Tutorial Configure Virtual Directory on Windows IIS Server 2019. As you know, all the files and content of a website are located in a specific folder and path. Sometimes, you need your website to include specific content that is in the folder and another location relative to the website. For example, in your company, you have a folder of different forms that several different websites must have access to and provide to their users. This folder is located in a physical path and all websites have access to files from this path.
In fact, virtual directories refer to physical content that is located locally or shared on a web server on another remote computer that does not exist on the website itself. Virtual directories can be created at the website or a specific web application. These, like web applications, have alias, which come at the end of the website’s URL and point to the physical path. In this tutorial, you will learn how to install Virtual Directory on IIS Server 2019.
You can Choose your perfect Windows VPS Server Packages from eldernode.
How to Add a Virtual Directory to IIS Server 2019
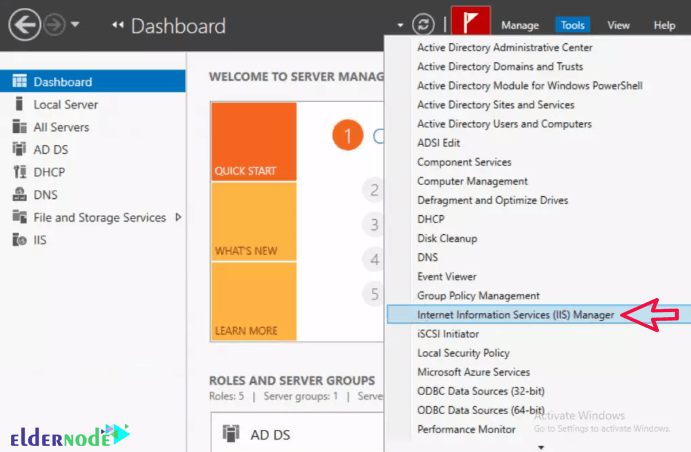
1) Open your Server Manager:
In the first step, you need to open the server manager. Then select the IIS manager option from the Tools tab.
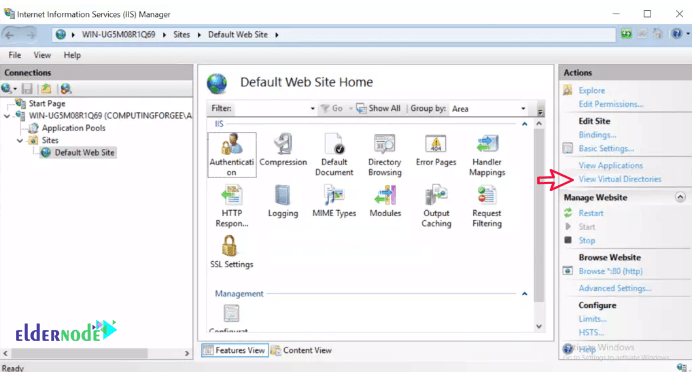
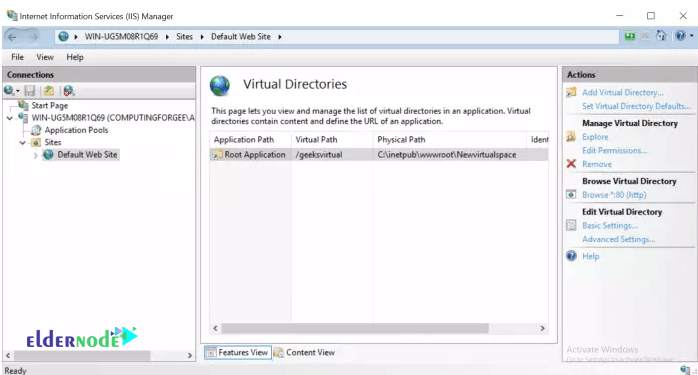
2. In the window that opens, select Default Web Site from the left column.
In the right column, click View Virtual Directories. Then, you shall be able to add a new Virtual Directory.
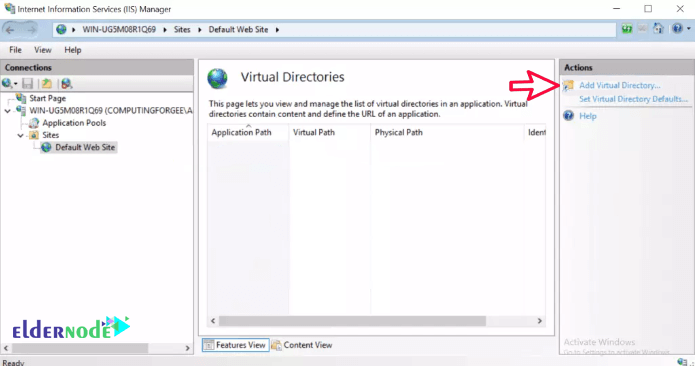
3. Click on Add Virtual Directory as shown below.
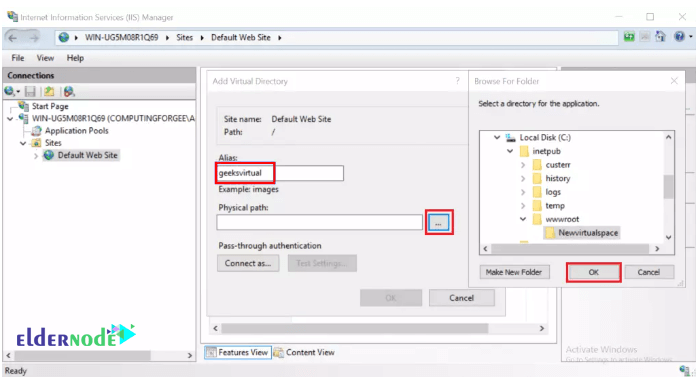
4. A smaller window called Add Virtual Directory will be displayed. Input your desired Alias In the Alias section.
Choose a physical path for uploading files.
Click OK to view the virtual directory you added.
*
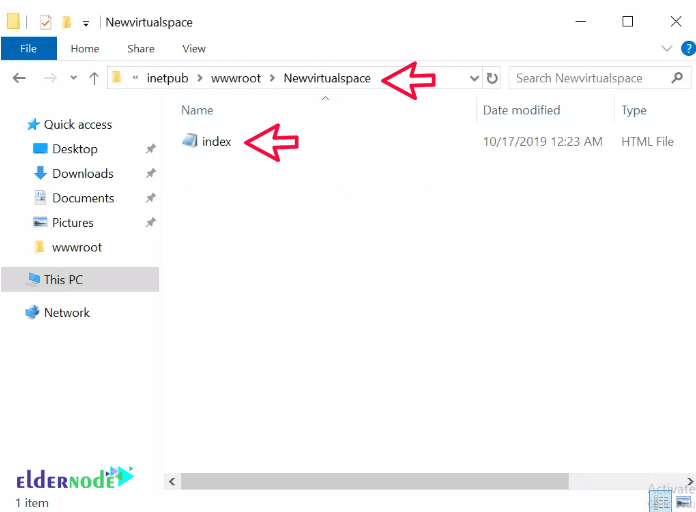
5. Copy your files to the physics path you specified in step 4. We are going to use a basic HTML file.
Note: Remember that IIS must have permission to read from this Physical Path/directory.
6. Open your browser and point it to the alias name you specified earlier. If you are not loading if from local, input the IP address of IIS Server.
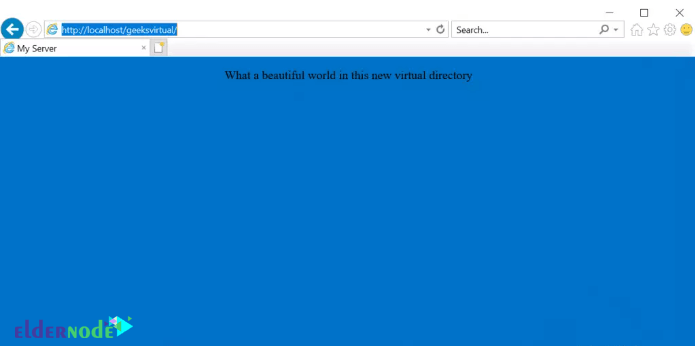
The installation of Virtual Directory on the ISS web server has been successfully completed.
Dear user, we hope you would enjoy this tutorial, you can ask questions about this training in the comments section, or to solve other problems in the field of Eldernode training, refer to the Ask page section and raise your problem in it as soon as possible. Make time for other users and experts to answer your questions.
Goodluck.