In this tutorial, we want to talk about the Initial server set up on Ubuntu 20.04 LTS. So I think, It’s important for all user when using Ubuntu as a server, especially on the internet
After you buy an Ubuntu VPS, you need to know, the provider didn’t set anything except an IP and password for you. Unless you order security configuration.
So we will consider, you buy a fresh Linux VPS or install it.
After installation, you need to set static IP for Ubuntu 20.04 and the Initial server set up on Ubuntu 20.04 LTS.
Let’s check how to set a hostname, update and upgrade, add a sudo user, secure SSH, and install a firewall for Ubuntu 20.04 LTS.
Table of Contents
Initial server set up on Ubuntu 20.04 LTS
Check and set the hostname on ubuntu 20.04
For check hostname you can you two command like this:
hostname hostnamectlboth commands shows your hostname, but hostnamectl show some more information.
For set new hostname on Ubuntu 20.04. you use the following command.
sudo hostnamectl set-hostname Ubuntu20In this command, we change our Ubuntu hostname to Ubuntu20. You set your favorite name.
After changing the hostname, you might change the hostname on /etc/hosts file for resolve.
sudo nano /etc/hostsyou just need to find an old hostname and replace the new hostname.
Like this
127.0.0.1 Ubuntu20Update and Upgrade Ubuntu
For an update and check all package and cache all repository on your ubuntu, run the following command\
sudo apt updateafter checking all package, Ubuntu show you how many package need to be updated. Now you can run the following command to upgrade packages and OS.
sudo apt upgrade
Add New sudo user to Ubuntu 20.04 LTS
At first, you need to run the following command to add a username and password.
sudo adduser eldernodeadminexcept for eldernodeadmin, you have to replace your favorite name
after the run command, Ubuntu asks about password and some information about the user, and you can input them.

Now we add the user, to sudo group with the following command.
sudo usermod -aG sudo eldernodeadminAgain, you need to replace your username instead eldernodeadmin
Secure SSH on Ubuntu 20.04
Securing SSH has a lot of instruction, but in this tutorial, we just talk about port and permission for the root login. This two configuration has enough for some security but you can search about other security and found our blog.
At first, you need to edit /etc/ssh/sshd_config file.
sudo nano /etc/ssh/sshd_configuncomment the port and change the 22 to your favorite port. After that uncomment PermitRootLogin section and change prohibits, like the picture below.
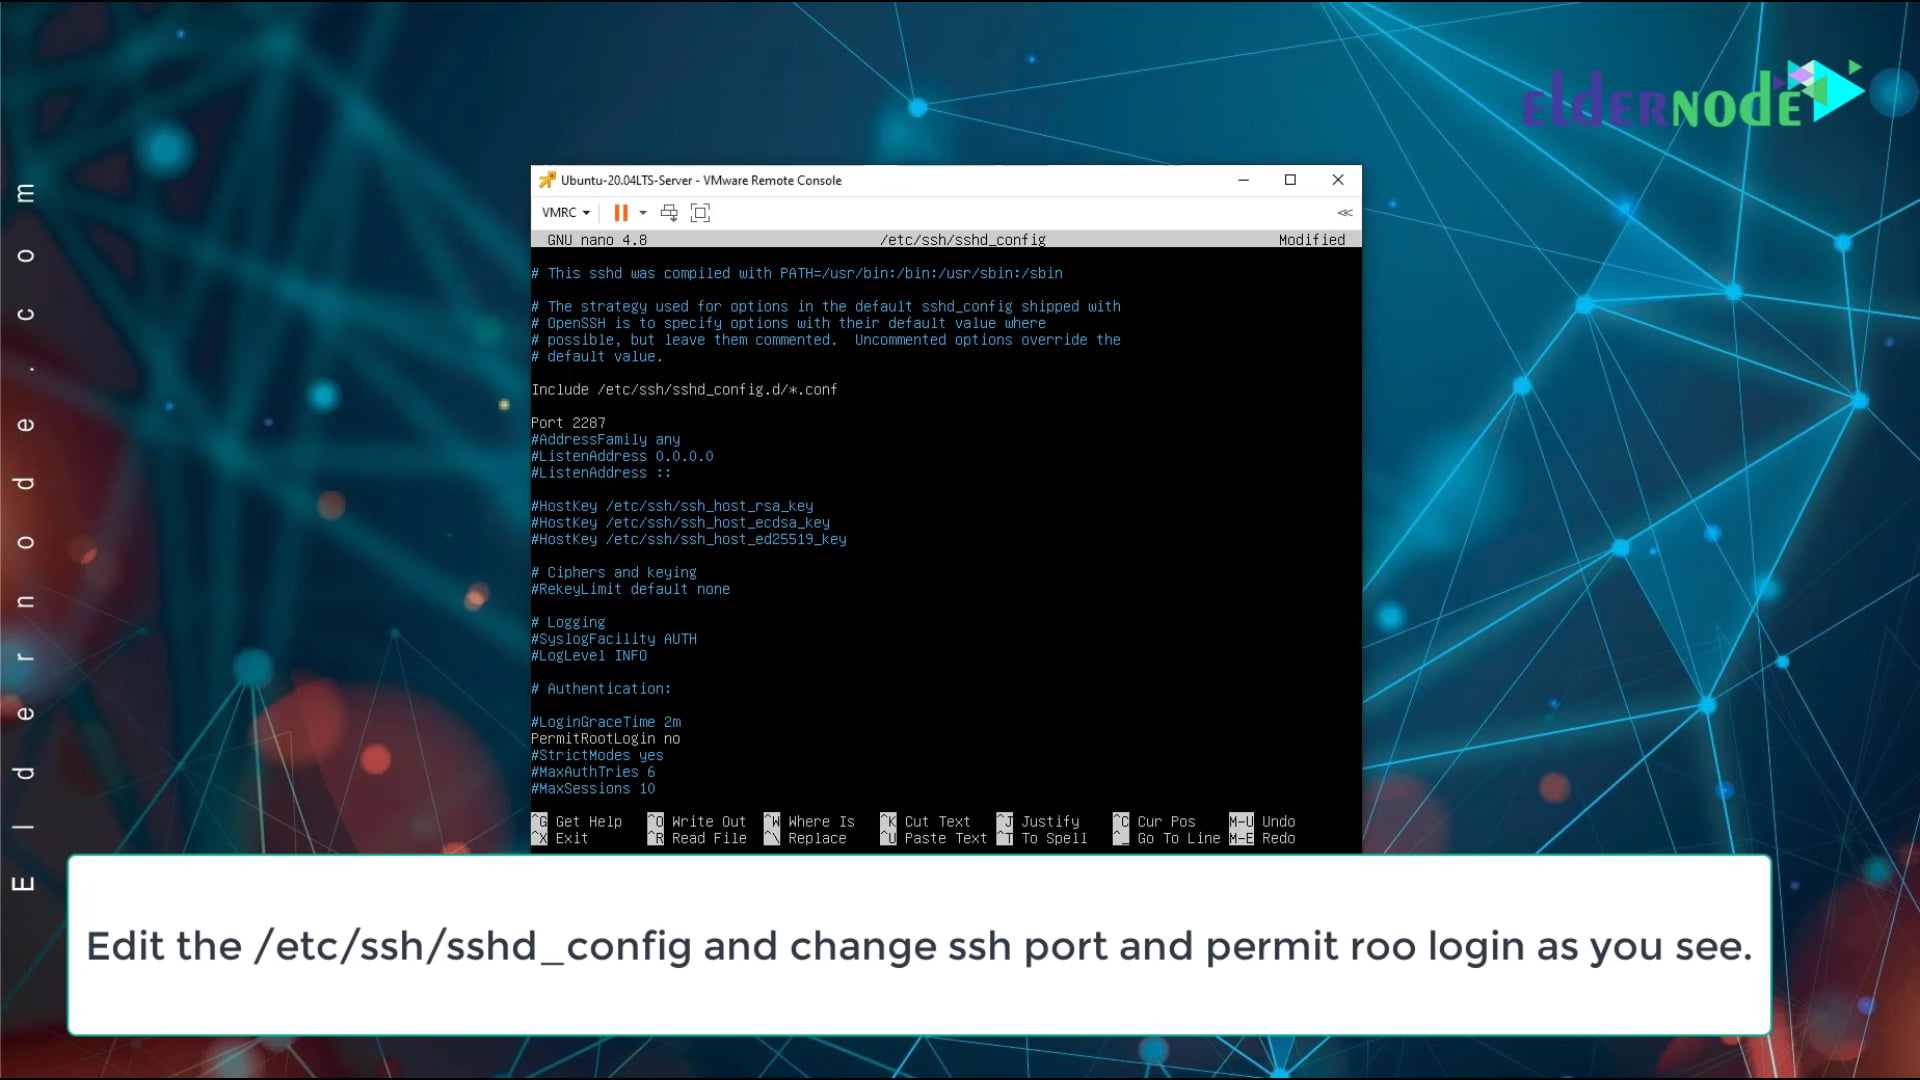
After editing done, saving and exit file with ctrl + x and press Enter key twice.
Install firewalld on Ubuntu 20.04 LTS
Ubuntu installed without any firewall for protecting your ports and services, you need to install a firewall service. In this tutorial, we decided to install firewalld.
For installing firewalld on ubuntu 20.04, following the command.
sudo apt install firewalldafter firewalld installed, you need to start and enable firewalld on startup.
sudo systemctl start firewalld sudo systemctl enable firewalldOk, now we add some rules on firewalld for example, but if you want to learn more about firewalld, you can go to what’s firewalld article on the Eldernode blog
firewall-cmd --permanent --add-service=http firewall-cmd --permanent --add-port=2287/tcpafter you add some rule, you need to reload firewall configuration with the following command.
firewall-cmd --reloadin the end, if you need to check all firewalld’s rules and configuration, just run the following command.
firewall-cmd --list-allConclusion
In this tutorial “ Initial server set up on Ubuntu 20.04 LTS”, learn about how to set some initial set up on ubuntu 20.04, of course, you can set more security configuration and other things, but this step has enough for working on the internet.
If you have any questions about this tutorial, you can comment on it or go ask page on the Eldernode.
At the end of the article, you can see the video, we just run all command on this video with all explanations.