[Updated on Date: 2021-02-01] Before you can create any file management strategy on a Windows server, you must install the File Server Resource Manager (FSRM) on the server. How to install FSRM on Windows Server 2012 is one of the application topics related to Windows Server, which will be discussed in this article. Once this role is installed, you can use its various tools to manage server files. You can visit the packages available in Eldernode to purchase a Windows VPS server. Stay tuned for the rest of this article.
Table of Contents
Tutorial install FSRM on Windows Server 2012
FSRM is one of the features available in Microsoft Windows Server. This feature enables you to better manage your data stored in the file server and categorize it. Using FSRM, you can classify the files on your file server and assign specific tasks to each created category. You can set a specific amount of space for each folder and volume created, report on the amount of storage space you have, and monitor it as well.
Available tools in FSRM
Quota Management: This allows the admin to divide disk space based on folder structure rather than drive structure.
File Screening: This allows the admin to create a blacklist of a variety of files that are allowed or unauthorized to be stored on the server.
Storage Reports: The admin can receive reports from the server instantly or as scheduled.
File Screen Report: File Screen Report
Quota Report: Quota status report
Large Files Report: Report large files
Most Accessed File Report: Report the most accessed files.
Least Accessed File Report: Report the least accessed files.
Files by Owner Report: Groups files by Owner.
File Classification Infrastructure: Allows admins to sort files by content.
File Management Tasks: Using this feature, you can run operations on files that have certain criteria based on File Classification.
Note: The FSRM role is a File and Storage service.
Step by step tutorial for installing FSRM role
1. In Server Manager, click Add Roles and Features.
2. On the page before you begin, click Next.
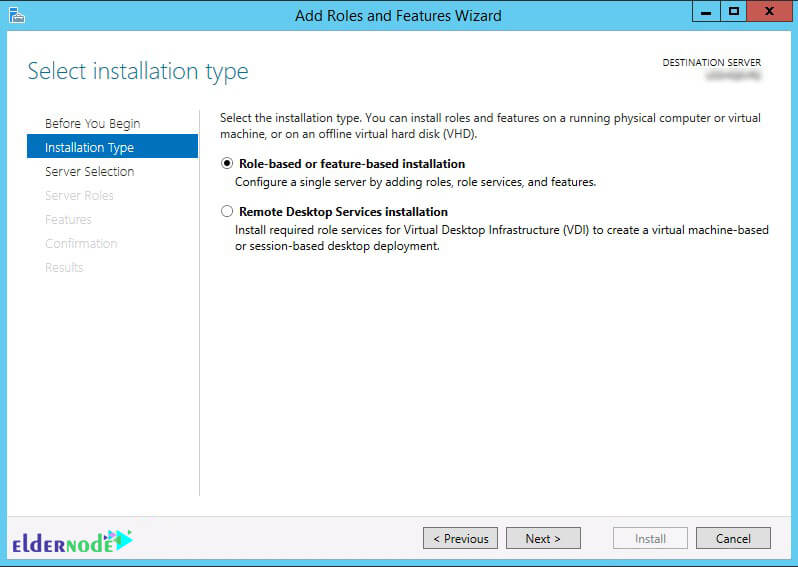
3. On the Installation Type page, click the first option, Role-base or feature-based installation, and then click Next.
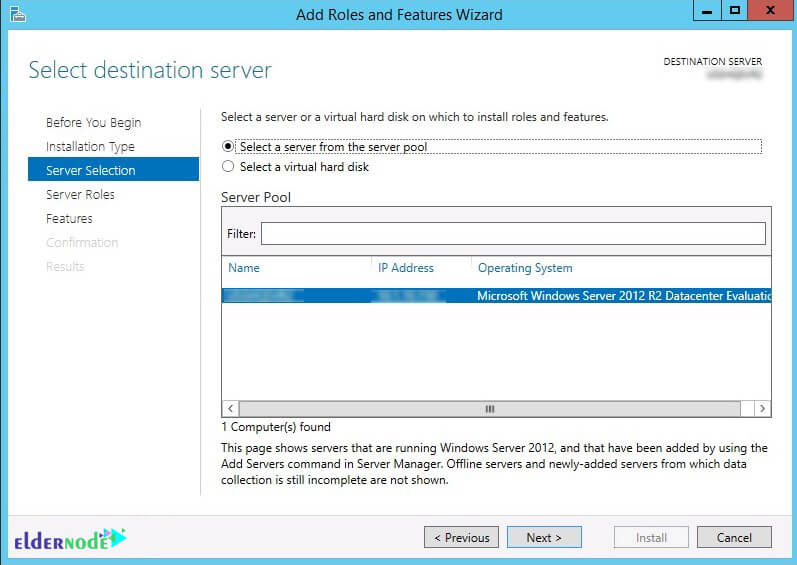
4. In the Select Destination Server page, select the desired server and click Next.
***
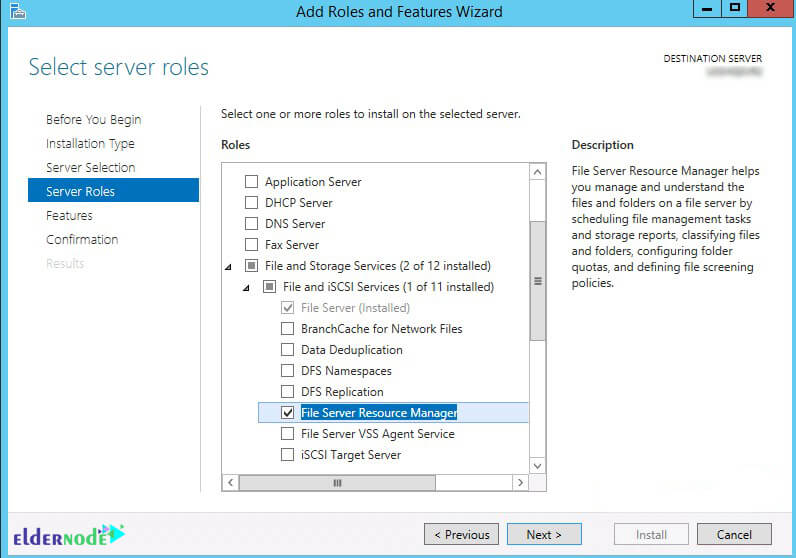
5. On the File and Storage Services page, Select server roles. Then open File and iSCSI Services. Select the File Server Resource Manager option.
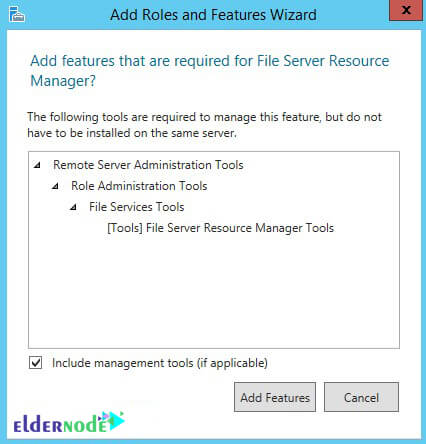
When the Add roles and feature wizard page opens, click Add features and then click Next.
6. Finish the installation and click Finish.
Conclusion
After explaining about FSRM and how to install it in Windows Server 2012, the tools available in FSRM were mentioned. Then the step-by-step installation of the FSRM role was explained with the relevant pictures.


How does a file server resource manager or FSRM work?
This service can provide network administrators with excellent management of users’ use to store data inside the server or the use of data already stored inside the server.
How to create a quota?
To implement Quota, you must first install the FSRM service inside the server that you intended as the file server. For this purpose, you must select FSRM to install inside the Windows Server Server Manager.
What is the use of the file server?
File Server allows users to share, upload or download files, although users can use the relevant files at any time. In general, file servers can not be left alone, because it causes chaos.
Please explain about the Classification Roule section.
In this section you define which folder your Classification Properties will be applied to and you can specify its value.
What is the File Management Task?
In this section you can tell what to do if your bet is correct, for example transfer the Folder.
What are the capabilities of FSRM?
a) Quota management
b) File classification infrastructure
c) File management tasks
d) File Screening Management
e) Reporting from storage space