[Updated] LAMP is an acronym for Linux, Apache, MySQL, and PHP. This set of open-source software is used by website administrators and developers alike to test and host dynamic websites. LAMP is the most common and popular software stack that powers dynamic websites and web applications such as WordPress, Laravel, and Drupal. In this article, you will learn How To Install the LAMP stack On CentOS 8. Visit the available packages on Eldernode to purchase your own CentOS VPS.
Table of Contents
Tutorial Install LAMP stack On CentOS 8
The LAMP server consists of 4 core components: the Apache web server, MySQL or MariaDB database, and PHP which is a popular scripting language that is used for creating dynamic web pages.
Prerequisites To Install LAMP stack On CentOS 8
To let this tutorial work better, please consider the below Prerequisites:
_ A non-root user with Sudo privileges.
_ To set up, follow our Initial server setup on CentOS 8.
_ In this tutorial, we use the DNF command for installing packages. DNF Command is pre-installed in CentOS 8. If not installed, you can follow the DNF command on CentOS 8 tutorial.
Install LAMP stack On CentOS 8 | Centos 7
Let’s go through the steps of this guide to learn how to install the popular hosting stack, LAMP on CentOS 8.
Step 1:
As always, we recommend you update software packages before installation. So, open a terminal window and run the following command:
sudo dnf updateStep 2:
Now, you should install the Apache webserver. So, type:
sudo dnf install httpd httpd-toolsAfter the installation is finished, run the following command to enable and start the server:
sudo systemctl enable httpdNext, to start the Apache service, use the command below:
sudo systemctl start httpdAlso, you can confirm that if the Apache web server is running or not. To do this, type:
sudo systemctl status httpdIf firewalld is active, you will need to run the following command to allow external access on port 80:
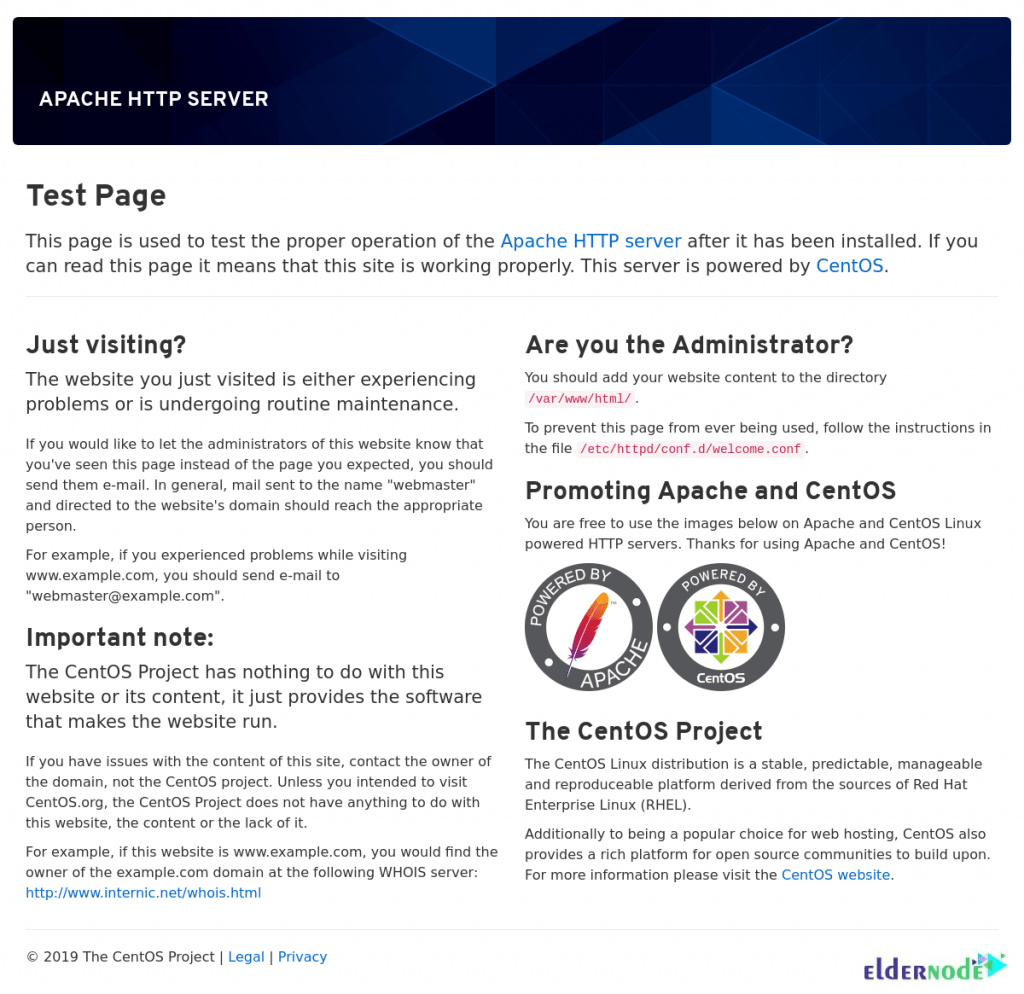
sudo firewall-cmd --permanent --zone=public --add-service=httpsudo firewall-cmd --permanent --zone=public --add-service=httpssudo firewall-cmd --reloadyou can test if the server is up and running by accessing your server’s public IP address or domain name from your web browser. You’ll see a page like this:
http://server-IP
Step 3:
In this step, it is time to install MariaDB on CentOS 8. A community-developed fork of the original MySQL server by Oracle. To install this, run:
dnf install mariadb-server mariadb -yAfter installation, enable and start the MariaDB server with this command:
systemctl start mariadb systemctl enable mariadbTo verify the status of MariaDB, run:
systemctl status mariadbFor more security of your database you have to run the following command and follow the instruction:
mysql_secure_installationThe first prompt will ask you to enter the current database root password and because you don’t have any password yet, just press Enter key to continue the steps.
Now you have to type a new password for root and confirmation. after that you can skip all steps with press Y and Enter.
Step 4:
Now, the last component in the LAMP stack. You need to install PHP. PHP is a scripting web programming language used for developing dynamic web pages. To install the latest version of PHP and the EPEL repository, run:
sudo dnf install https://dl.fedoraproject.org/pub/epel/epel-release-latest-8.noarch.rpmThen, you can install yum-utils and enable Remi-repository using the command below:
sudo dnf install dnf-utils http://rpms.remirepo.net/enterprise/remi-release-8.rpmNext, use the following command to search for the PHP modules which are available for download:
sudo dnf module list phpIn this way, you can view the currently installed version of PHP is PHP 7.2. Run the following command to install the newer release, PHP 7.4, reset the PHP modules:
sudo dnf module reset PHPHaving reset the PHP modules, enable the PHP 7.4 module by running:
sudo dnf module enable php:remi-7.4Finally, use the command below to install PHP, PHP-FPM (FastCGI Process Manager), and associated PHP modules:
sudo dnf install php php-opcache php-gd php-curl php-mysqlndAlso, you can verify the version installed to run. So, type:
php -vPHP 7.4 should have been installed now. Use the following command to start and enable PHP-FPM on boot-up:
sudo systemctl start php-fpmsudo systemctl enable php-fpmThen, you can check its status execute the command:
sudo systemctl status php-fpmTo instruct SELinux to allow Apache to execute the PHP code via PHP-FPM run:
setsebool -P httpd_execmem 1Finally, use the following command to restart the Apache webserver for PHP to work with the Apache webserver:
sudo systemctl restart httpdHow To Test PHP information on CentOS 8
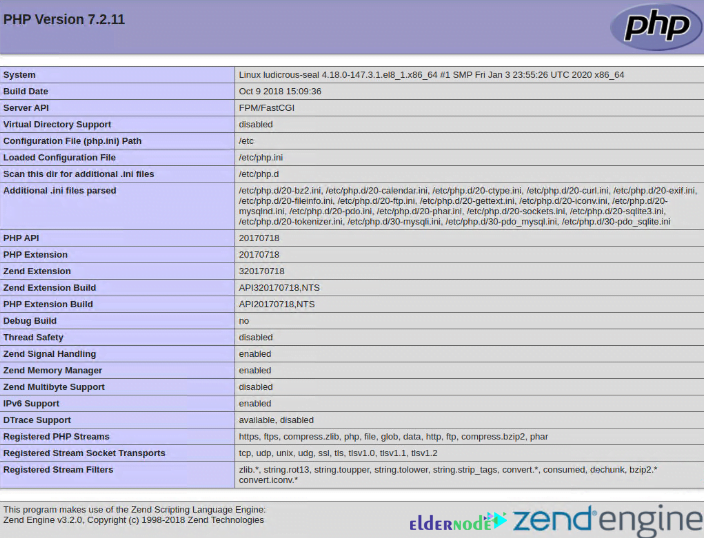
In this section, you can test PHP with the webserver. First, create an info.php file to the document root directory:
vi /var/www/html/info.phpAnd then, insert the PHP code below and save the file:
<?php phpinfo (); ?>Finally, open your favorite browser and type the URL below:
http://server-ip-address/info.phpNote: Remember to replace the server IP address with your server’s actual IP address.
Conclusion
In this article, you learned How To Install LAMP on CentOS 8. If you are interested to learn more, refer to the LAMP installation on Debian 10 and Ubuntu 20.04.