in this article, we are going to learn how to install LEMP on CentOS 8. step by step we would go through the process of setting up a LEMP stack with MariaDB as the database management system.
Prerequisites
To make this guide more useful, you’ll need access to a CentOS 8 server as a sudo user.
Table of Contents
How to install LEMP on CentOS 8
1- Install Nginx
To install the Nginx package run the below.
sudo dnf install nginxTo enable and start the server, run the following command after the installation finished.
sudo systemctl start nginx In case, firewalld is active, run the below command to allow external access on port 80 (HTTP):
sudo firewall-cmd --permanent --add-service=http To receive the effect of the changes, reload the firewall configuration
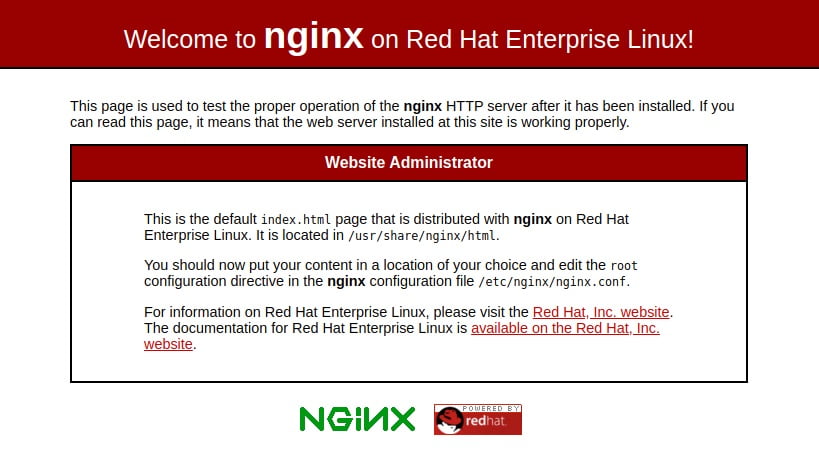
sudo firewall-cmd --reloadIf you add the new firewall rule, you can test if the server is up and running by accessing your server’s public IP address or domain name from your web browser. In this way, the below page would appear.
To read more:
2- Install MariaDB
To install MariaDB type:
sudo dnf install mariadb-serverEnable and start the MariaDB server when the installation is finished with:
sudo systemctl start mariadbYou are recommended to run a security script that comes pre-installed with MariaDB to improve the security of your database server. By the following command, Start the interactive script.
sudo mysql_secure_installationYou will be asked to enter the current database root password. Press ENTER at the prompt as the password is blank. And the next prompt wants you to set up a database root password. You do not need to set the password because MariaDB uses a special authentication method for the root user that is typically safer than using a password. Type N and press ENTER
3- Install PHP-FPM
Type the below command to install.
sudo dnf install php-fpm php-mysqlndAfter finishing the installation, you should edit the /etc/php-fpm.d/www.conf file to adjust a couple of settings. To facilitate editing these files, you need to install nano.
sudo dnf install nano Then, open the /etc/php-fpm.d/www.conf configuration file using nano or your editor of choice:
sudo nano /etc/php-fpm.d/www.conf Make sure to change both values from apache to Nginx:
… ; RPM: apache user chosen to provide access to the same directories as httpd user = nginx ; RPM: Keep a group allowed to write in log dir. group = nginx …After you edited, save and close the file. And run the below command to enable and start php-fpm
sudo systemctl start php-fpmIt is time to restart the Nginx web server that it loads the configuration files created by the php-fpm installation:
sudo systemctl restart nginx
Buy Linux Virtual Private Server
4- Test PHP with Nginx
You would need to modify the default owner and group on Nginx’s document root, to be able to create and modify files in that location using your regular non-root system user:
sudo chown -R noodi.noodi /usr/share/nginx/html/To create a new PHP file called info.php at the /usr/share/nginx/html directory:
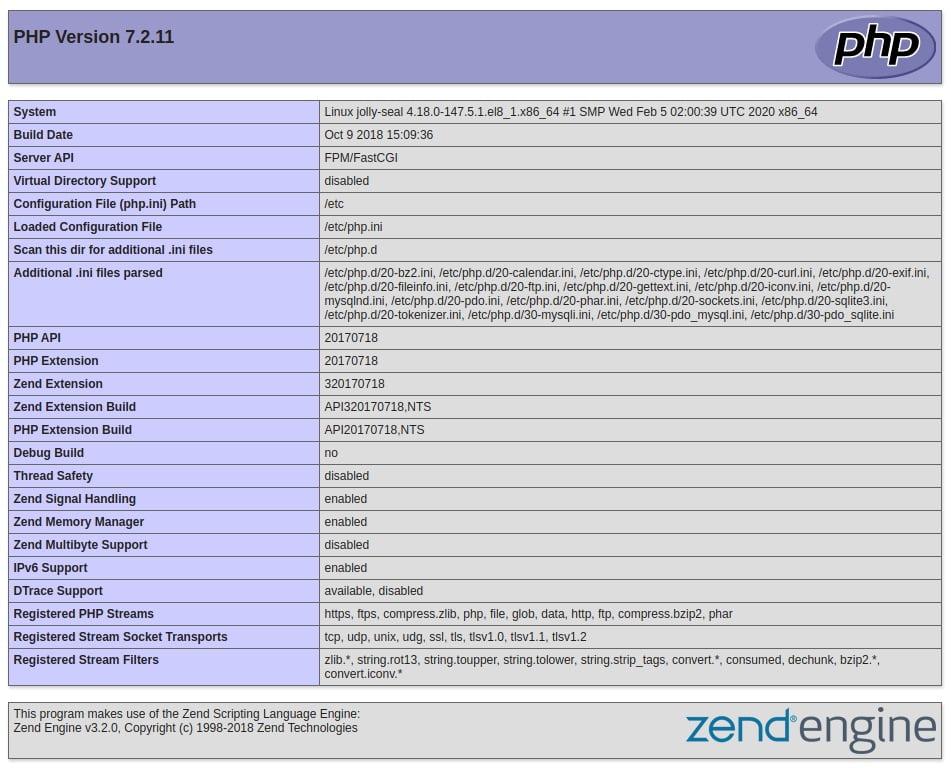
nano /usr/share/nginx/html/info.php To view information about the current PHP environment running on the server, use the following PHP code.
<?php phpinfo(); Copy this content to your info.php file, and be sure to save it.
To test if your web server gives a correct display content generated by a PHP script, use your browser and access your server hostname or IP address, followed by /info.php:
http://server_host_or_IP/info.phpYou may see a page as below.
Dear user, we wish this tutorial would be helpful for you, to ask any question or review the conversation of our users about this article, please visit Ask page. Also to improve your knowledge, there are so many useful tutorials ready for Eldernode training.
Also, see