How to install Nano Server. Microsoft has provided a software package by which you can graphically prepare and install a Nano Server. Nano Server is a headless operating system that has no terminal or graphical user interface. For this reason, the conditions and method of installation are different.
To install a Nano Server on a physical system or virtual server, you must type various commands in PowerShell to create a VHD, VHDx or Wim file.
Note: In this tutorial, you do not need to enter PowerShell commands and you will build your own nano server without it.
This tutorial contains 3 general steps, which are as follows:
1. Nano Server installation prerequisites
2. Build Nano Server installation file
3. Install Nano Server on the desired system
Table of Contents
How to install a nano server
Prerequisites for installing nano server
1. You must first download and install the following files:
Download Nano Server builder file
Download Windows Assessment and Deployment Kit
The process of preparing a Nano Server to create a file is the responsibility of a powerful and professional software called ADK. Most Microsoft experts are familiar with this software and know that the capabilities of ADK to build a dedicated Windows are very high.
2. After downloading the above files, install them and wait for ADK to download and install the desired files.
Build nano server installation file
1. First, open the Nano Server Image Builder software.
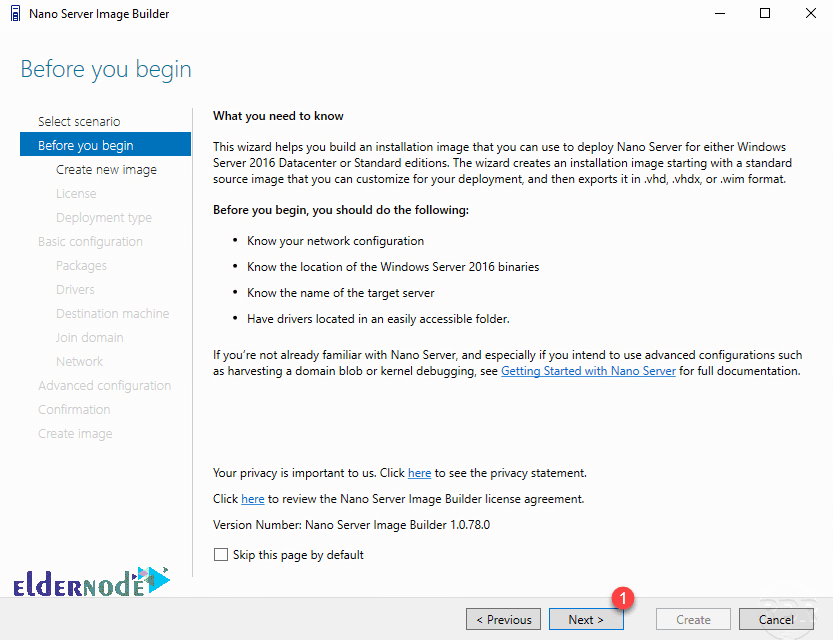
2. In the first step, click on Create a new Nano Server image.
3. In the next step, click Next.
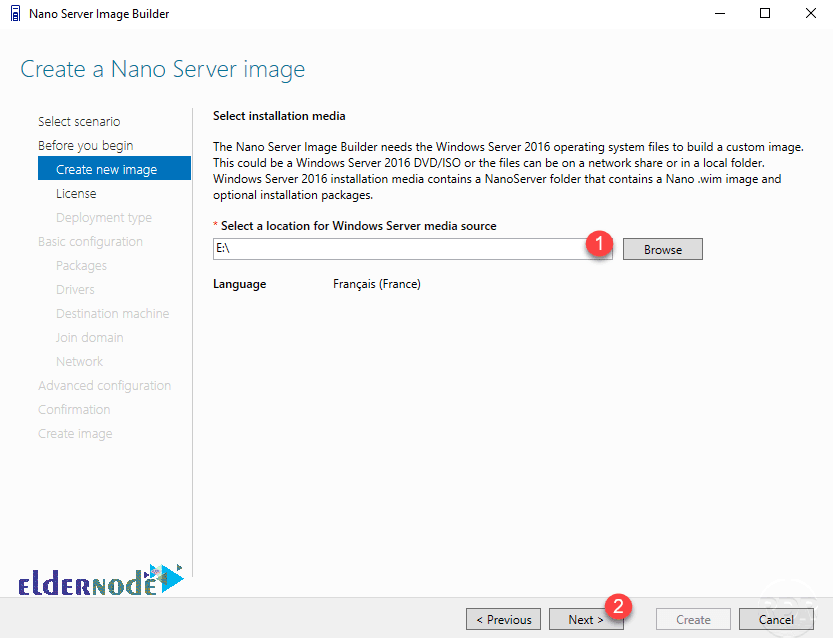
4. In this section, enter the ISO address of Windows Server 2016 and click Next.
Note that you must Mount the ISO and enter the address of the drive that was created.
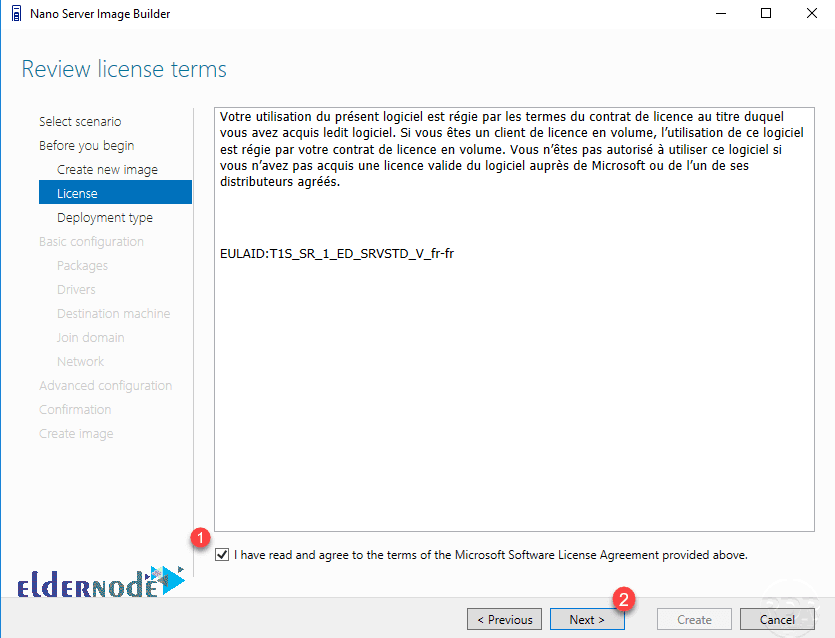
5. Check the license agreement and go to the next step.
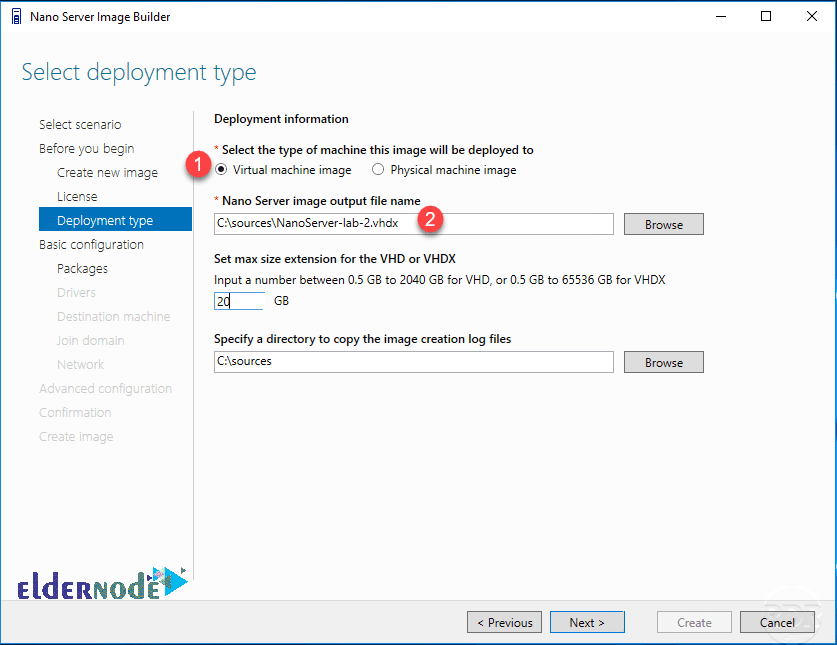
6. In this section, first specify whether the nano server is to be set up on a virtual machine or on a physical machine.
Then enter a path to save the created image.
Note: If you select Virtual machine image, you can output VHD or VHDx file. If you have selected Physical machine image, you will also be able to get Wim output.
In the last part, enter the path of the report file (Log) and go to the next step.
7. In Detect destination … section, you must select a Flash Disk to copy Nano Server files and make a flash boot to install the Nano Server on a physical machine.
Select Flash and click Create to prepare the flash.
Fix PowerShell script execution error
When hitting the Create option, if there is no problem until the end of making the flash, go to the next step, but in case of an error, you must follow the following step carefully.
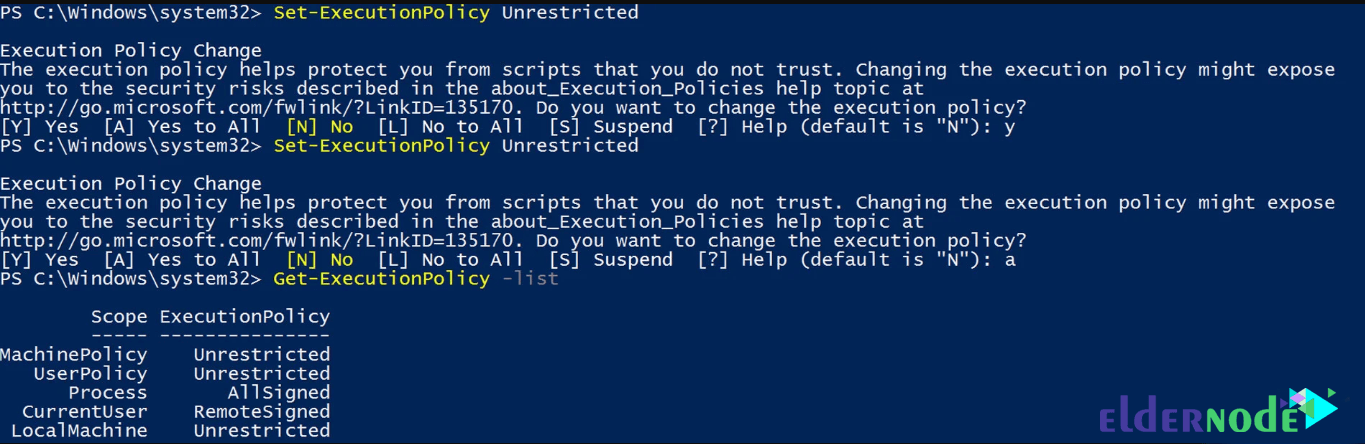
In case of an error, open your Windows PowerShell with Administrator access and enter the following command:
Set-ExecutionPolicy UnrestrictedAfter entering the above command, the script execution policy is changed and with the following command, you can see the list of scopes and its settings.
Get-Executionpolicy -list
Click Create again and go to the next step after making the flash boot.
8. In Continuing step 7, click Next to start the settings related to your personal Nano Server.
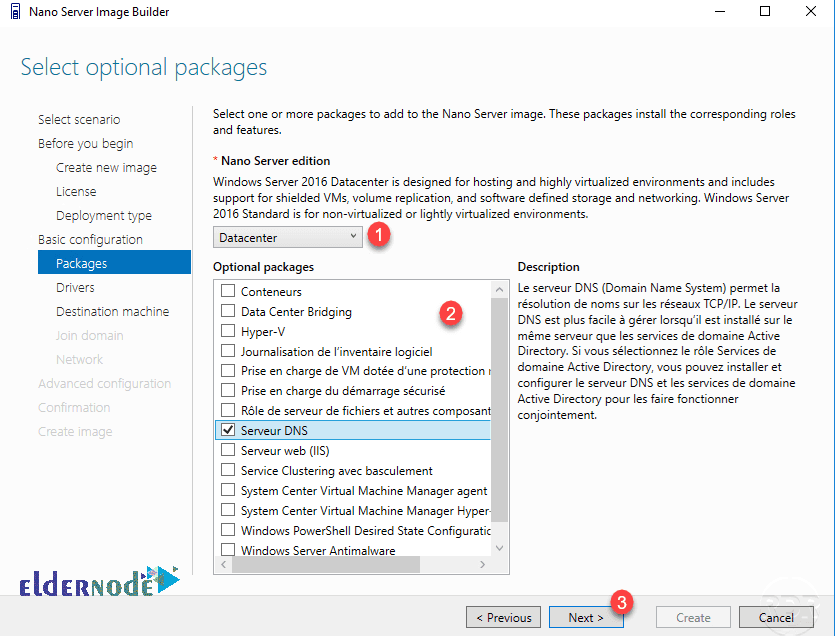
9. Select the desired edition and then select the role that you need to be installed on the Nano Server by default.
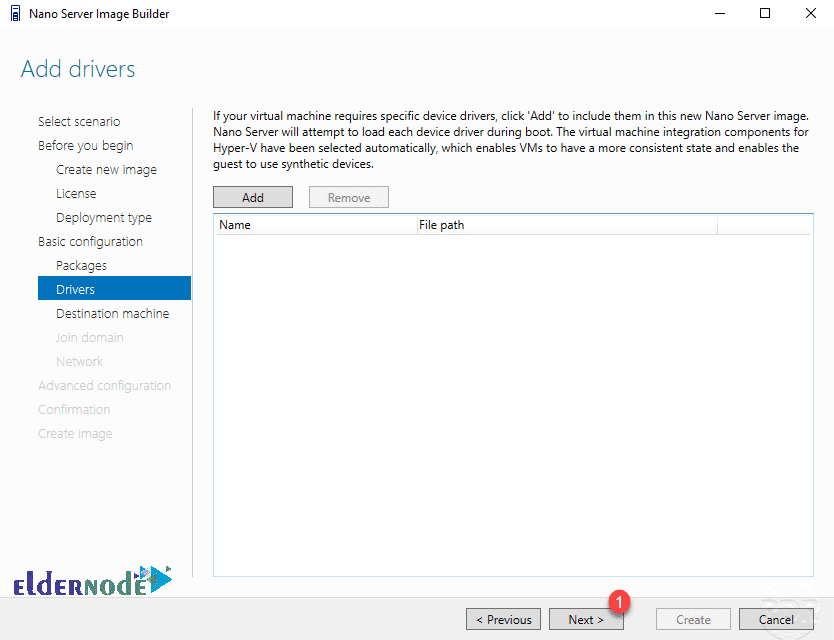
10. In this step, you can add hardware drivers related to your system.
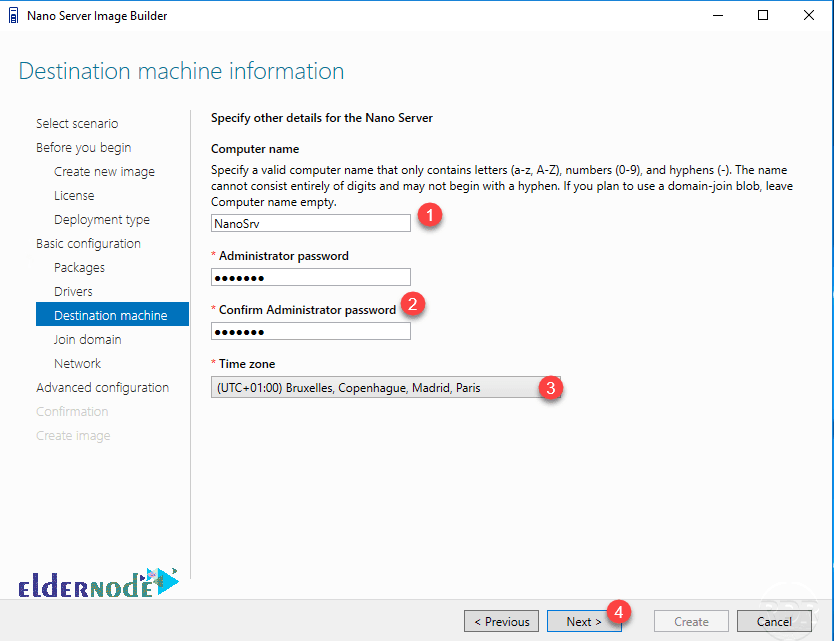
11. Set the specifications of your machine, including the system name, Administrator password and time zone.
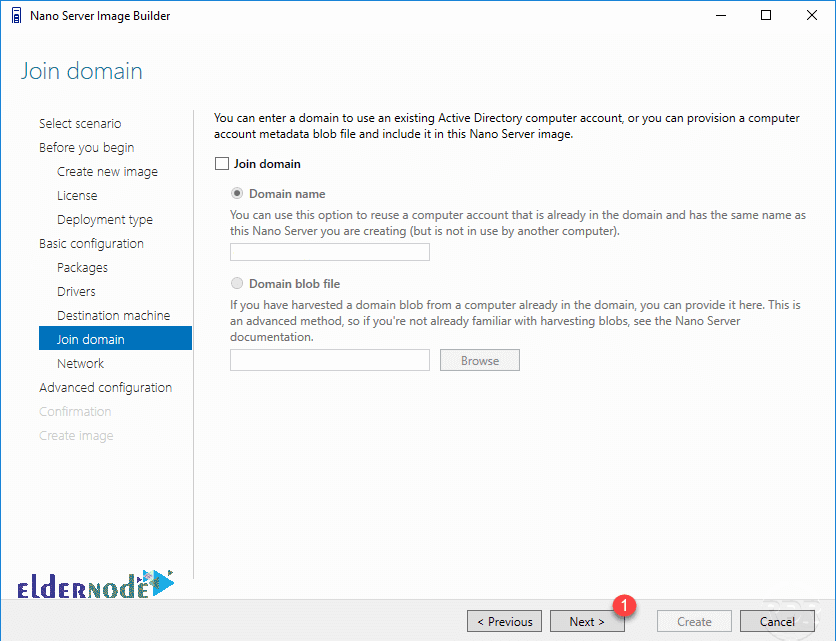
12. If the nano server is to be connected to the domain, enter its name.
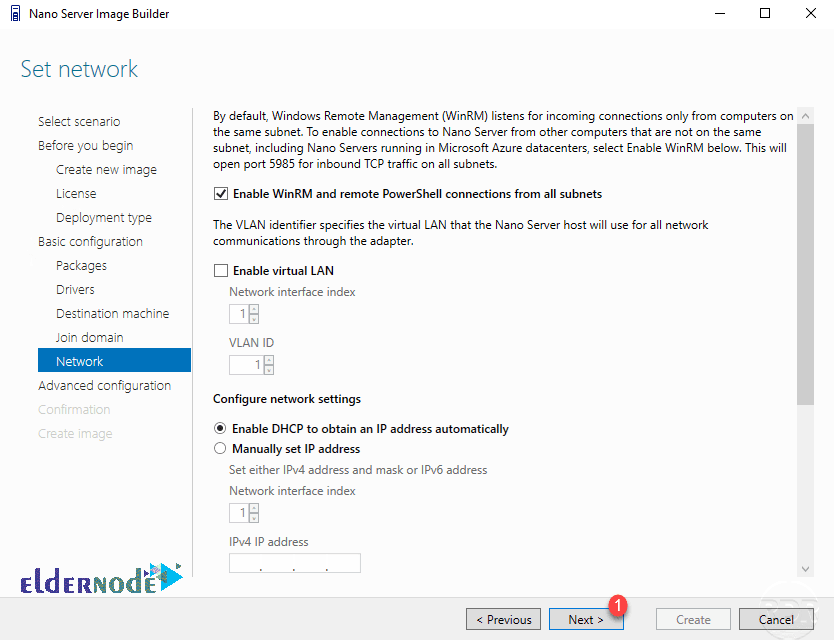
13. Make network related settings such as static IP, vLAN and WinRM settings and go to the next step.
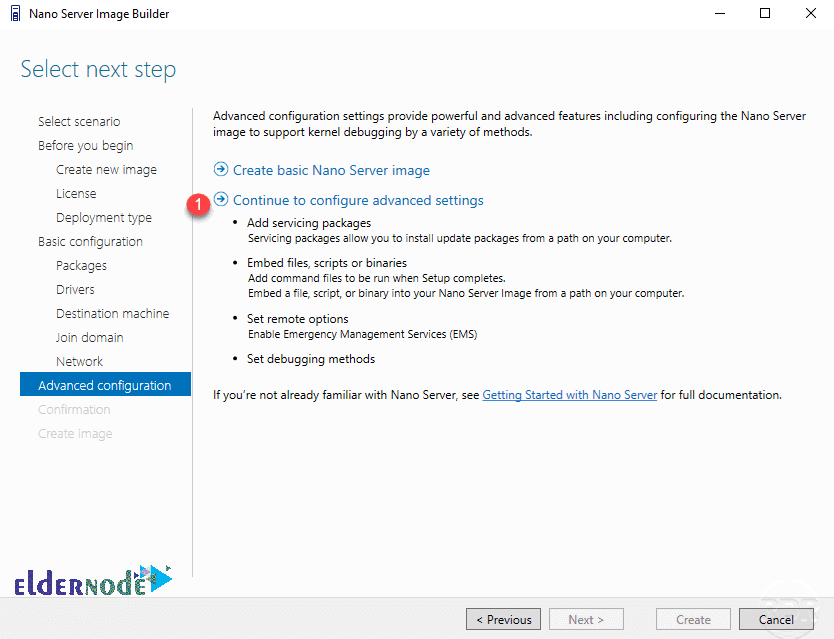
14. In this section, you will have the right to choose two different options:
– Create basic Nano Server image: Starts creating the Nano Server image.
– Continue to configure advanced settings: Go to advanced settings before installing Nano Server.
Advanced Nano Server configuration settings
In these steps, you have the ability to add PowerShell scripts to run, add a service package, remote control settings, etc. to get to the verification stage.
15. In this step, you will see a report of the settings you have made so far, if you confirm, click on Create.
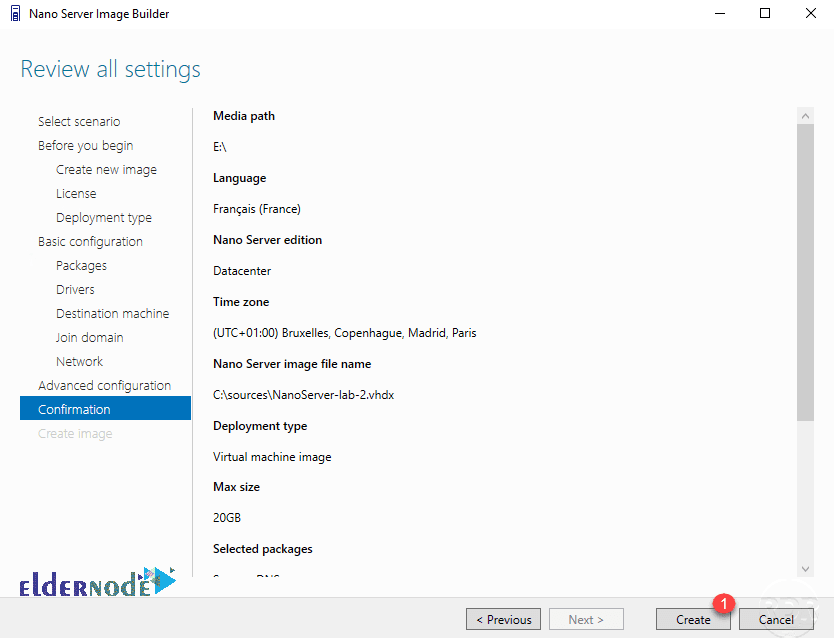
Wait for your custom nano server image to be created.
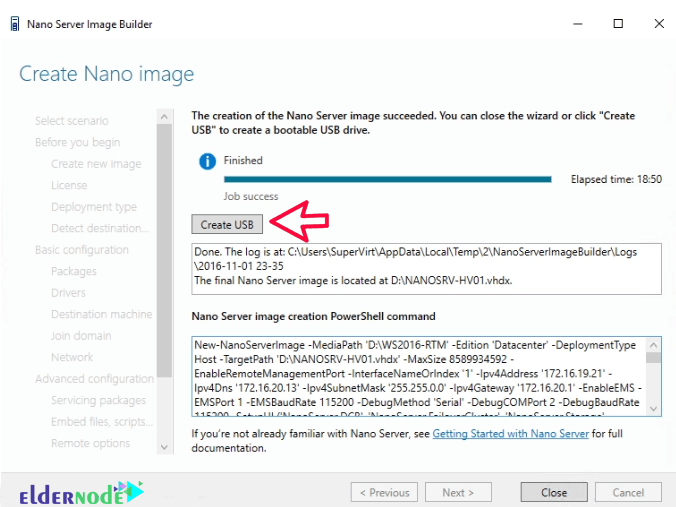
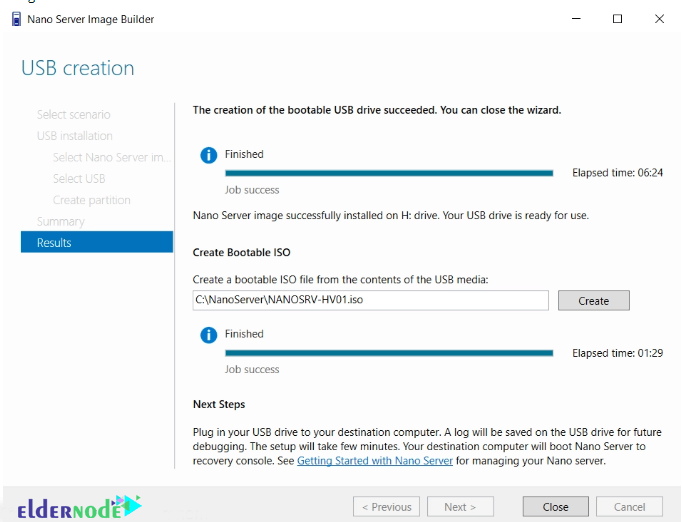
16. After finishing the construction of the Nano Server image, you can complete the steps in this section.
You can also click on Create USB to create a flash boot to install the Nano Server.
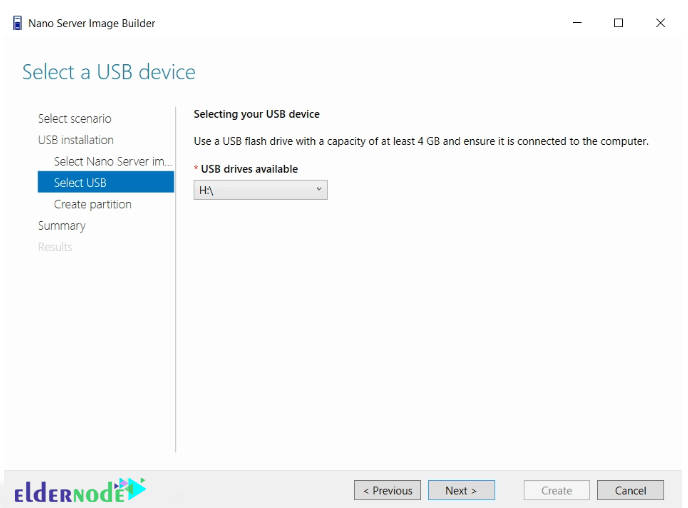
Build Nano Server flash boot
– First select the desired flash.
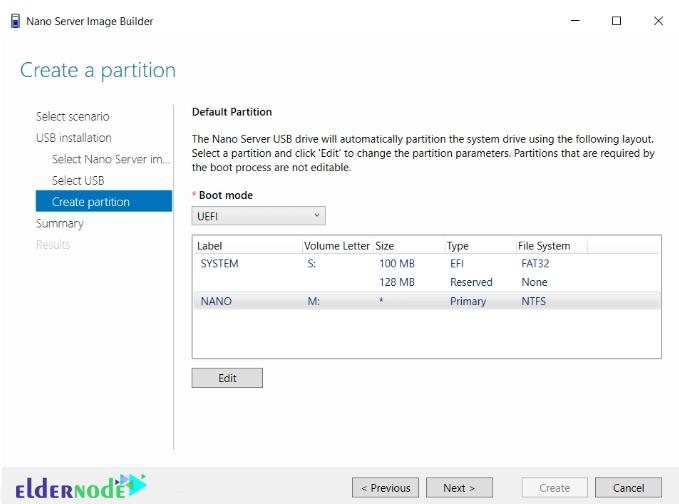
– Then select the UEFI or BIOS type and click Next.
Flash partitioning will be done in this section, you can edit it if needed.
– You will receive a complete report of the settings made, which if confirmed, click on Create.
Wait for your flash boot to be made.
– When done, you can connect the flash to the system and install the Nano Server on it.
Also, See:
How to Connect to the Nano Server
Dear user, we hope you would enjoy this tutorial, you can ask questions about this training in the comments section, or to solve other problems in the field of Eldernode training, refer to the Ask page section and raise your problem in it as soon as possible. Make time for other users and experts to answer your questions.
Goodluck.