[Updated] Node.js is a server-side platform based on the Google Chrome JavaScript engine (V8 Engine). Node.js provides everything we need to run a program written in JavaScript. With Node.js, the JavaScript programming language runs in the server environment instead of running in the browser. It should be noted that Node.js allows you to easily and simply write scalable and large network applications. In this article, we want to teach you How to Install node.js on Windows. You can see the packages available in Eldernode if you want to buy a Windows VPS server.
Table of Contents
Tutorial Install Node.js on Windows
Introduction to Node.js
To start programming with Node.js, you must first install it on your system. Node.js can be installed on various operating systems such as Windows, Ubuntu, OSX, etc. Once the Node.js installation is complete, you can start your projects using it.
When you install node.js, npm (node package manager) is also installed in the background, which you can use to manage packages and modules related to your project or the whole system.
Node.js contains a large number of modules, such as fs or path or HTTP modules. Other companies and developers also created modules and shared them with others, which you can install and use using npm. For example, using the MongoDB module, you can connect to the MongoDB database and manage the information you want.
Install Node.js on Windows
The first step in getting started with Node is to install it on your system. To do this, you need to enter the download link of Node.js from its official site and select the version related to your operating system and download it.
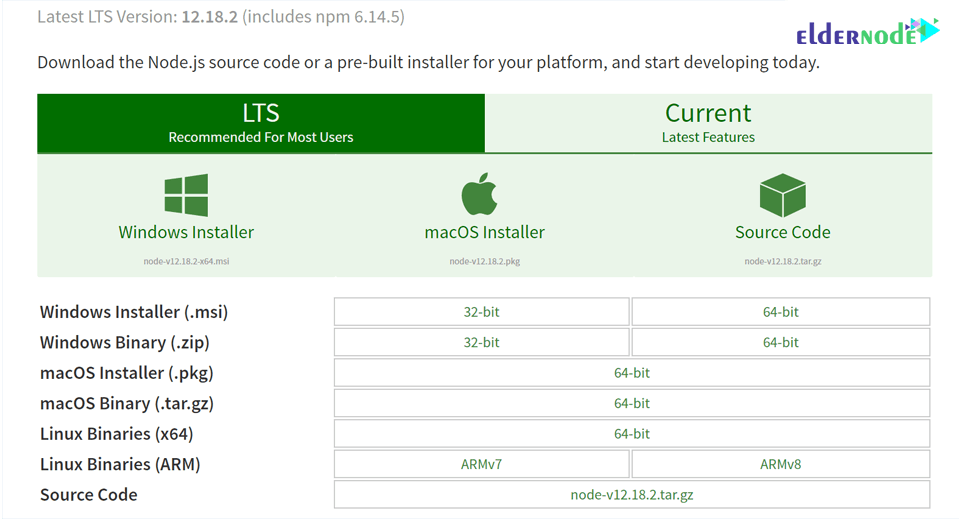
The npm version that will be installed is the same in both of the above cases. As shown in the previous image, we plan to download and install the 64-bit version of Node.js for Windows. To do this, click on the specified link to complete the download.
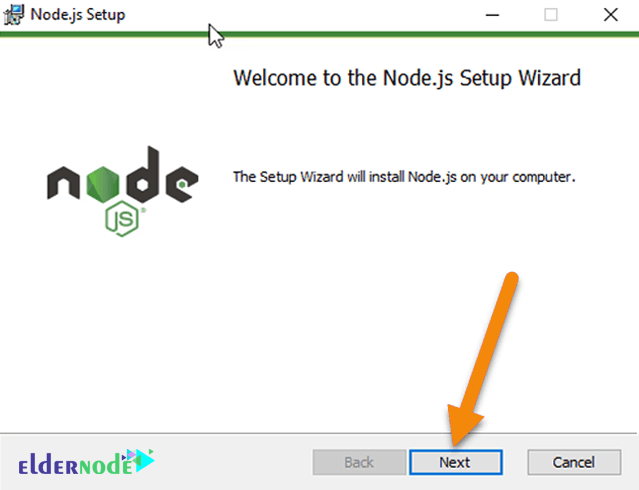
After the .msi file is downloaded, double-click on it to start the installation. In the following step, click the Next button:
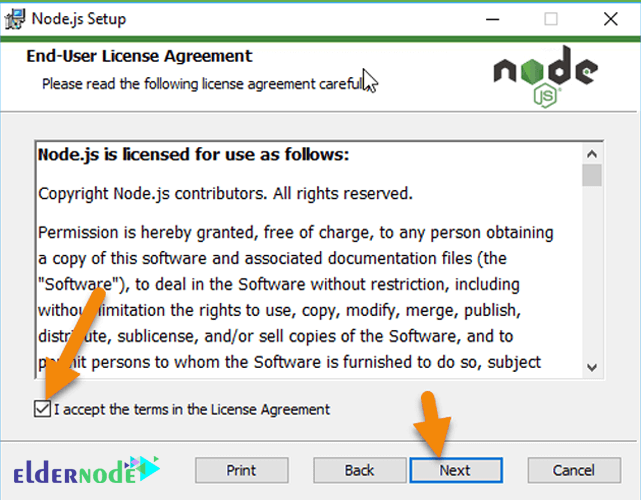
In the next step, read and accept the License agreement and Node.js license issues and click the Next button.
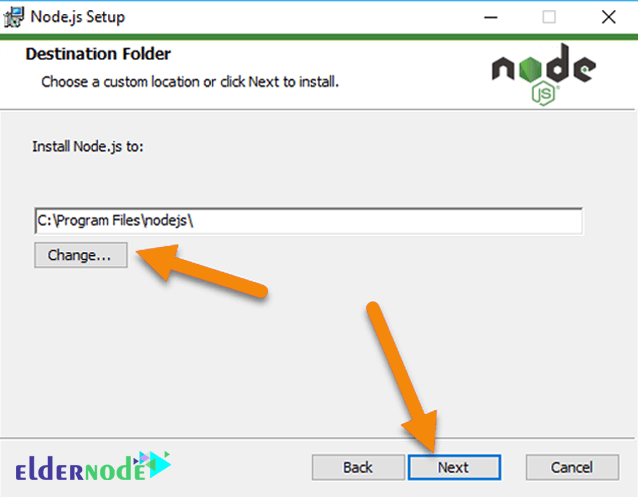
You can change the installation location in the following step, but we do not change this location. It is recommended that you do not change it and click Next.
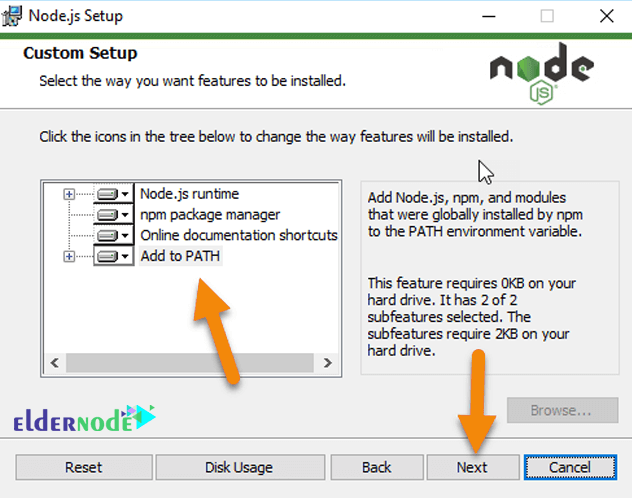
In the next section, you can also manage the things that are installed on your system.
Some npm modules must be compiled using the C or C ++ language when installed. If you want to install and use these modules on your system, you need to install Python, Visual Studio build tools, and many more on your system.
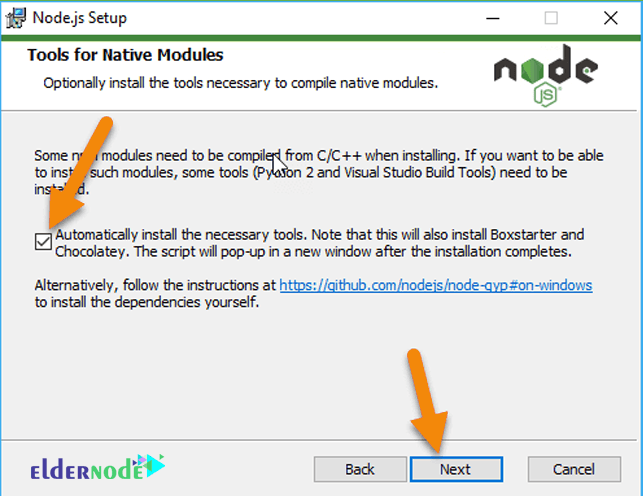
If you check the image above, Node.js will do everything for you by default. You can also uncheck and click Next.
In this case, you have to manually and with other methods install node-gyp on your system, which is easier to automate.
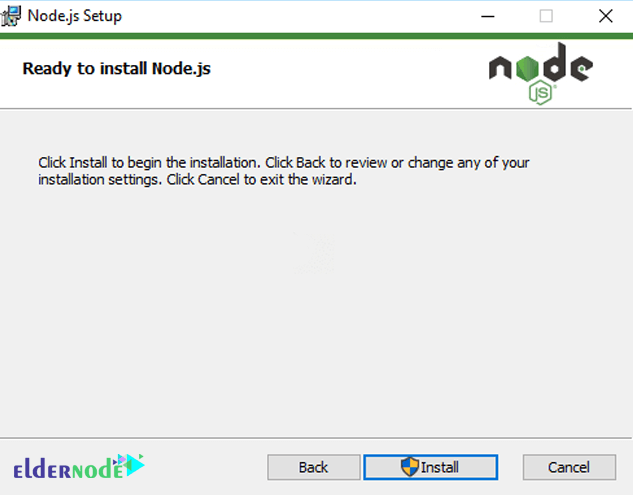
In the next section, click Install and wait for Node.js to be installed. After a short time, Node.js will be installed on your system:
Clicking Finish completes the installation of Node.js and you can use it.

How to Check the version of Node.js
To do this, you need to check that the node and npm are installed correctly on your system. Open a command line and type the following commands and then press Enter to execute it. If the desired versions are displayed, it will indicate that Node.js has been successfully installed on your system:
node -vnpm -vOnce you are sure that Node.js has been successfully installed on your system, you can start working with it.
How to Update the Node.js version
The best and easiest way to update your Node.js version is to download the latest version from the official Node.js site and install it. The site has officially logged all the changes and updates of the new version and you can see them.
Another way to update Node.js for other operating systems, especially Linux, is to use nvm or the node version manager. nvm lets you install and manage different versions of Node.js. In other words, you can use nvm to install the desired version of Node.js on your computer according to the needs of the project, switch between versions, and run the version.
Note: This method is not suitable for Windows; Because nvm is inherently written for Linux.
Conclusion
Node.js can be used for many applications with different purposes. The only scenario that should not be used are places where there is a long processing time, which is required by the program. In this article, we tried to teach you How to Install node.js on Windows. You can visit How to install Node.js on Ubuntu, Debian, CentOS, and Fedora if you wish.