MikroTik Firewall; A MikroTik firewall is one of the most widely used parts of this router. Although this firewall is not perfect, you can use it extensively to protect your router.
Like most routers, MikroTik is equipped with a firewall. Since the MikroTik company, like the major network equipment vendors, does not have a standalone network firewall, it makes the firewall inside its router a little more equipped.
Although this firewall can by no means replace a UTM or hardware firewall, it can be used in projects where cost is essential.
If you have a large number of firewall rolls or you are extensively using a layer 7 firewall, be very careful in choosing the right board router so that your router’s service quality is not compromised.
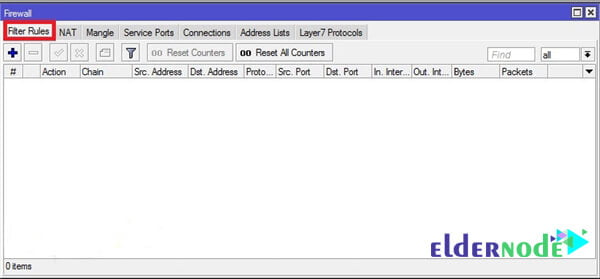
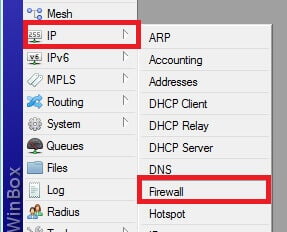
To access the MikroTik firewall from the left menu, first, select IP and then Firewall. In the pop-up window, go to the filter role tab.
Chain Definition in MikroTik Firewall:
By default, the MikroTik firewall has three chains.
- Input chain: This packet is in the Input chain when the destination of a packet is the router itself. Like when you use MikroTik as a DNS server, DNS packets are in the input chain.
- Output chain: packets whose source address is the router itself. Like the NTP packet that the router sends to the Internet to set its clock.
- Forward chain: Packets that are intended to pass through the router. Such as when the router only routes packets and the source, and destination addresses of the packets are not any of the router board addresses.
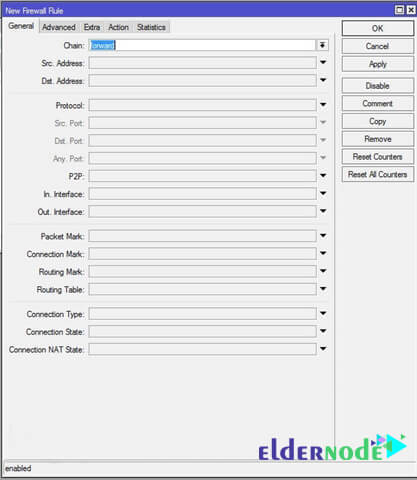
It’s easy to add a new roll to the MikroTik.
Click on the add sign and go to the General tab. Then select the chain you want. Fill in the fields depending on the scenario. Note that leaving any field blank means that the field is unimportant.
Then go to the Action tab and select the type of firewall function with the package that fits this role.
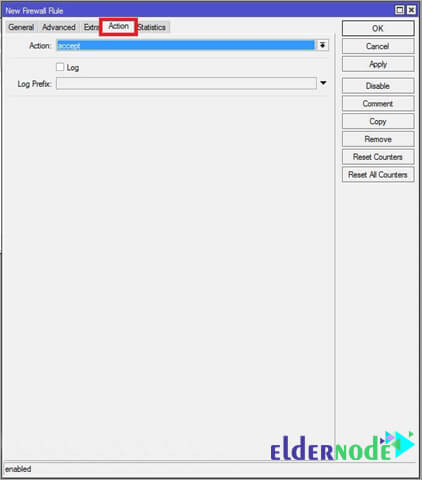
Three important MikroTik actions are as follows:
- Accept: This function allows packet passage.
- Drop: This operation discards the packet and does not send the result to the sender.
- Reject: This operation discards the packet and reports the result to the sender.
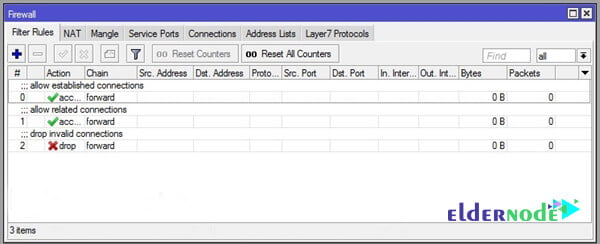
For better firewall performance, be sure to put these three rolls in a high priority firewall. Otherwise, some rolls may not work properly.
To apply these rolls, just copy the following commands into the MikroTik terminal:
| /ip firewall filter a) add chain=forward connection-state=established comment=”allow established connections” b) add chain=forward connection-state=related comment=”allow related connections” c) add chain=forward connection-state=invalid action=drop comment=”drop invalid connections” |
Goodluck.