Special Offer
 How to Install MikroTik on VMware (Step-by-Step Tutorial)


Honestly, most of us who work with networks don’t always have spare hardware lying around. That’s why a lot of admins just install MikroTik on VMware. It’s quick, it works, and you can test stuff or build a mini lab without buying an extra router.
In this guide I simply walking you through the steps for installing MikroTik on VMware. Nothing fancy, just the basics so you get it running fast to effectively install MikroTik RouterOS on VMware.
And hey, if you’d rather not bother with the setup at all, Eldernode has MikroTik VPS plans ready to go. They fire up instantly, and you can even pay with Bitcoin, PayPal.
I tested this in my own lab, and VMware made the whole MikroTik setup way easier than messing with extra hardware. Setting it up on VMware really saved me time.
How to Download and Install MikroTik ISO on VMware
First thing you’ll need is the MikroTik RouterOS ISO. Just go to the official MikroTik download page and scroll until you see the X86 section that’s where the ISO lives. Grab the CD image from there. When the file finishes downloading, keep it somewhere easy to find. In the next step, you’ll point VMware to this ISO when setting up the new virtual machine. This is essential to successfully install MikroTik on VMware.

Wait for the download to complete.
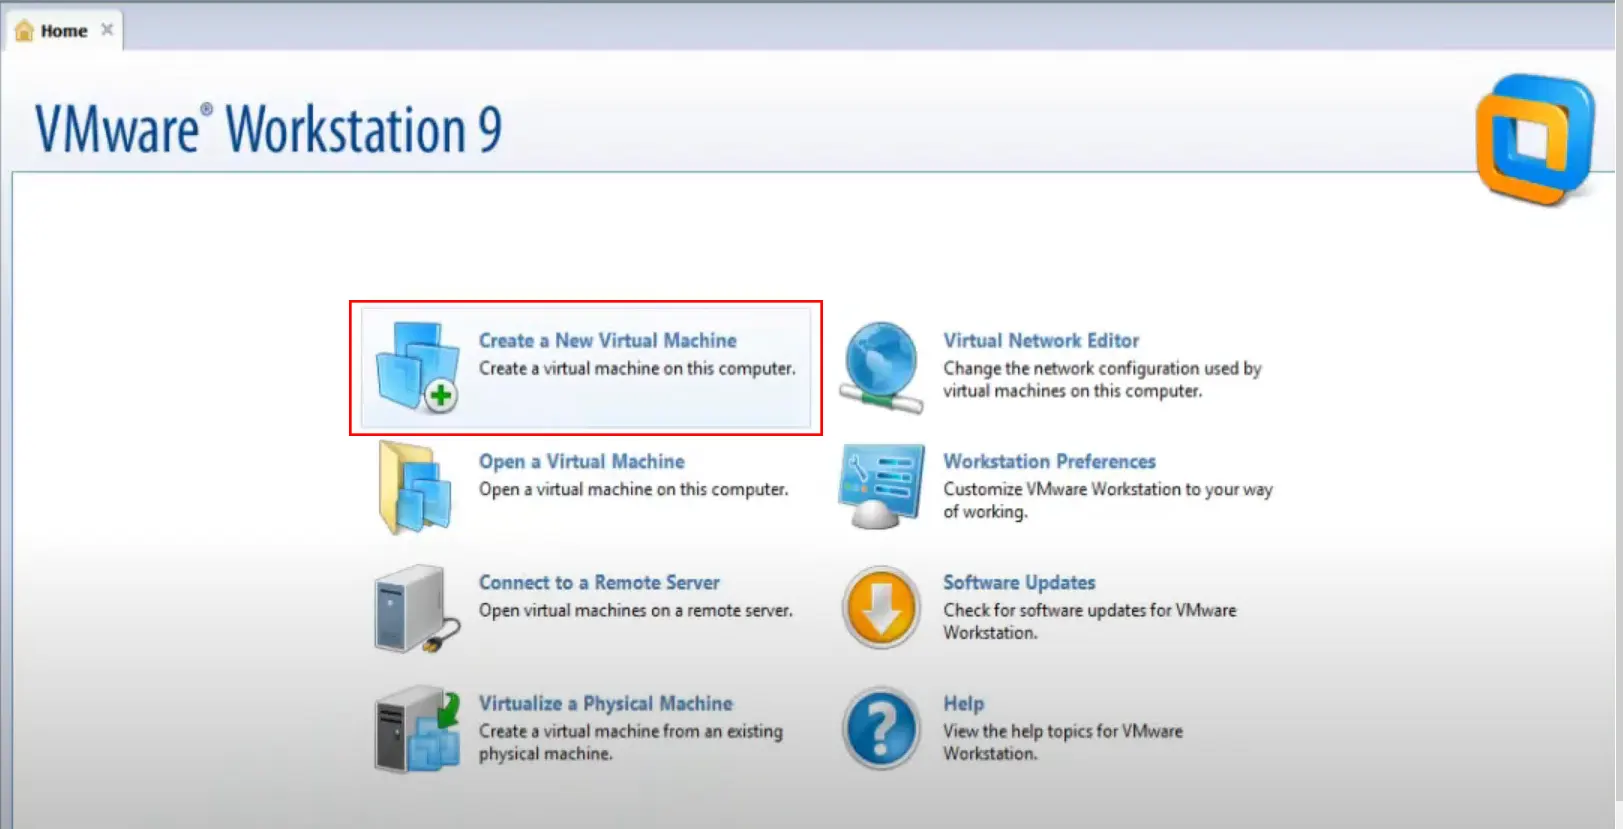
Launch VMware Workstation and select “Create a New Virtual Machine” this opens the setup wizard where you’ll configure your MikroTik installation. Then click on Next to proceed:
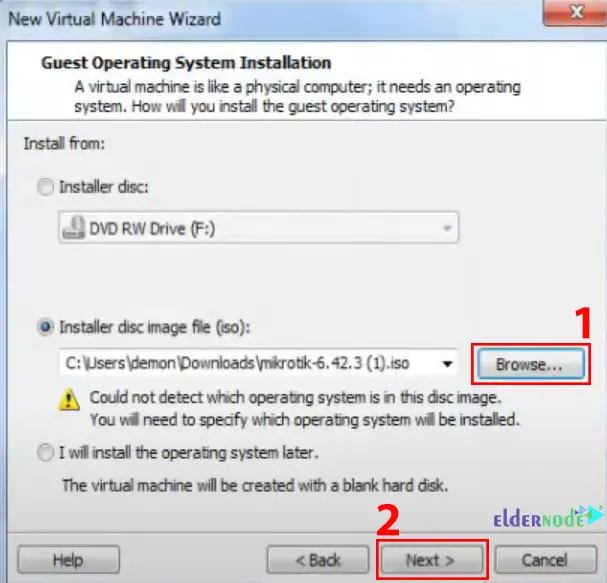
In the Guest Operating System Installation section, click on Browse and choose the downloaded Mikrotik CD image:
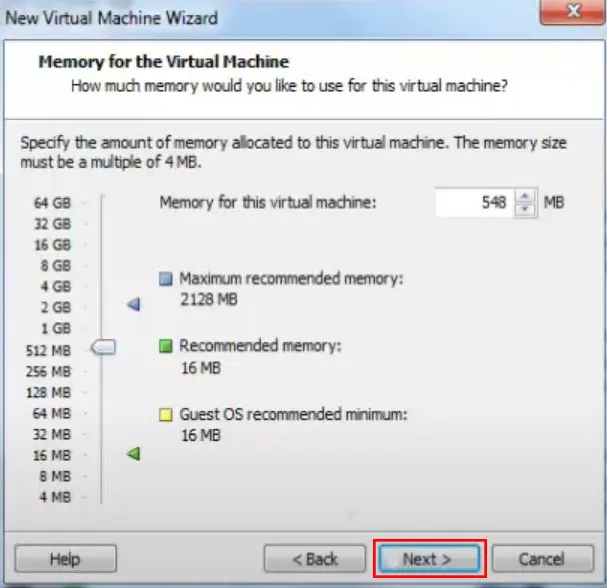
Specify the amount of memory allocated to this virtual machine in the Memory for the Virtual Machine section:
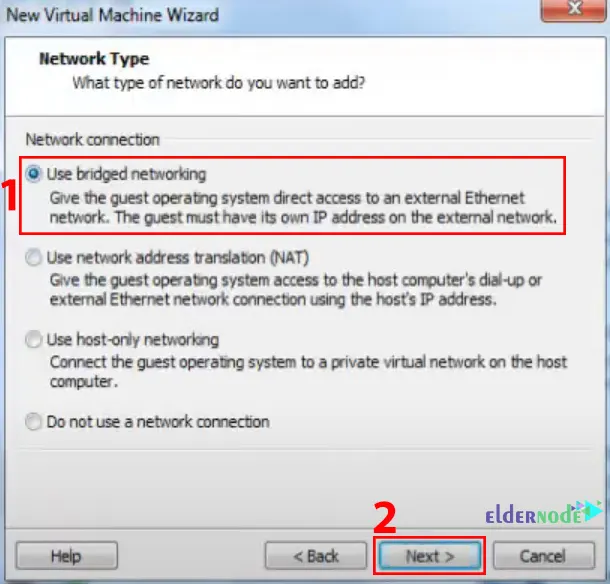
Now you will see the Network Type section, choose the Use bridged networking for the type of the Network and click on Next to proceed:
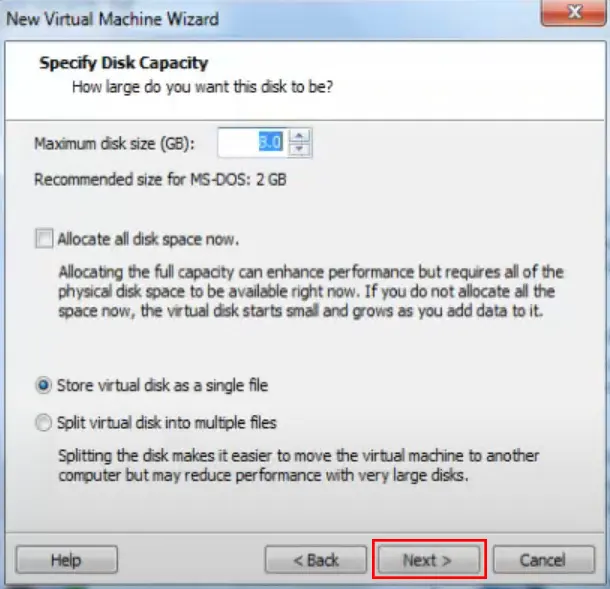
In the Specify Disk Capacity section, choose the Store virtual disk as a single file and specify the maximum disk size:
Click Finish to create the virtual machine.
Setup MikroTik on VMware
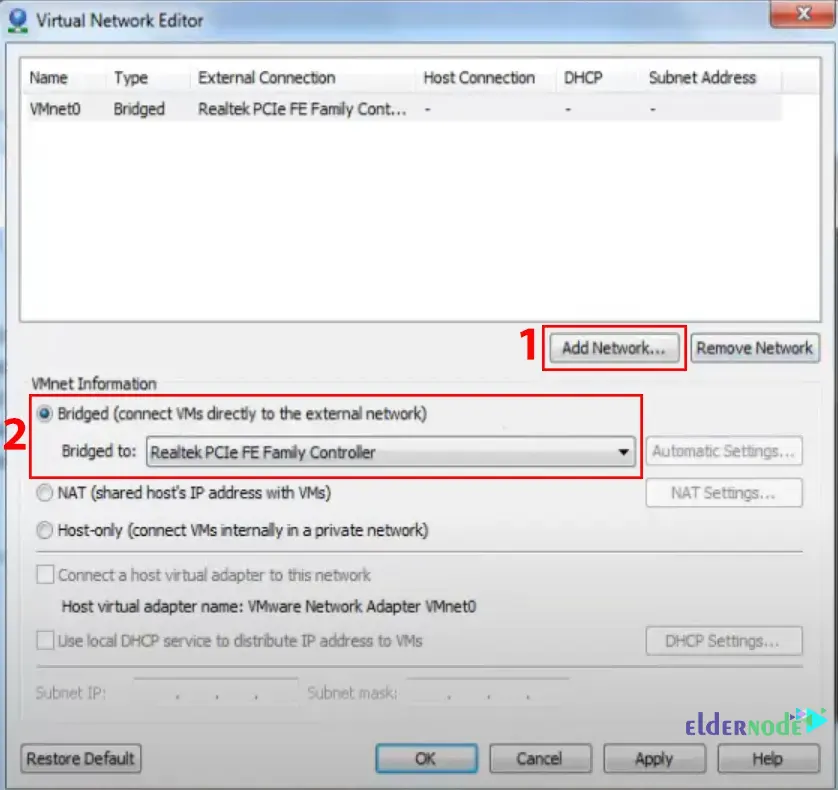
After adding MikroTik RouterOS to your VMware machine, you’ll need to tweak the network part so it actually talks to the outside world. From the top menu, click Edit → Virtual Network Editor.
In there, create a VMnet0 network and switch it to Bridged mode. Pick your LAN or Wi-Fi adapter so the virtual MikroTik can grab an external IP, basically the same way a real router on your network would. It’s a useful step for configuring MikroTik after installation on VMware, especially when trying to install MikroTik on VMware directly.
When I bridged VMnet0 to Wi-Fi in my test, the MikroTik VM instantly pulled an IP, which made it feel like I was working with a real router.
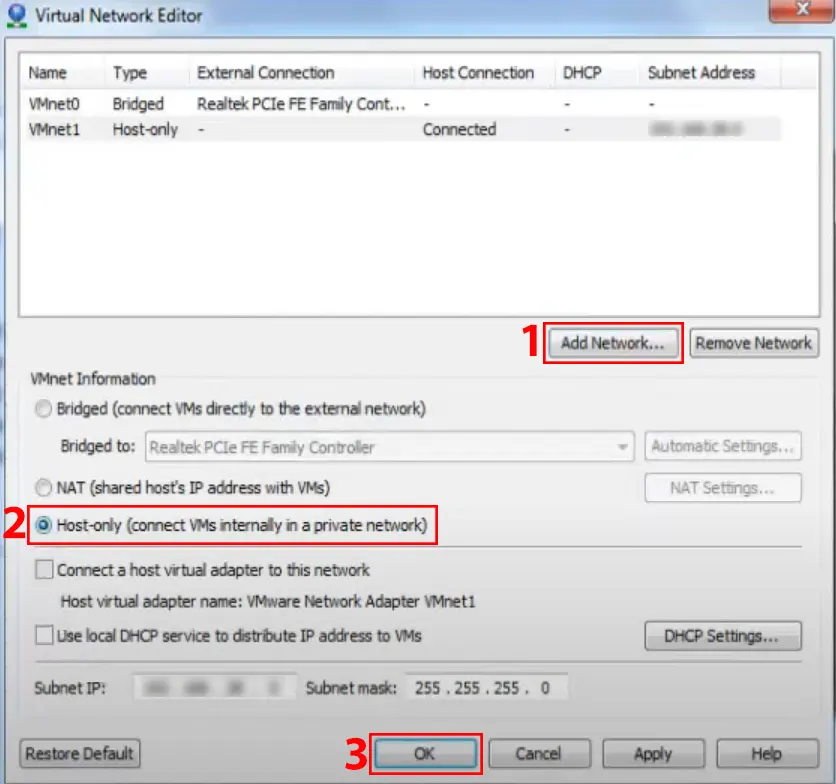
Also, add the VMnet1 network and choose the host-only as a private network. Remember to uncheck the “Use local DHCP service to distribute IP addresses to VM” and “Connect a host virtual adapter (vmnet1) to this network” checkboxes:
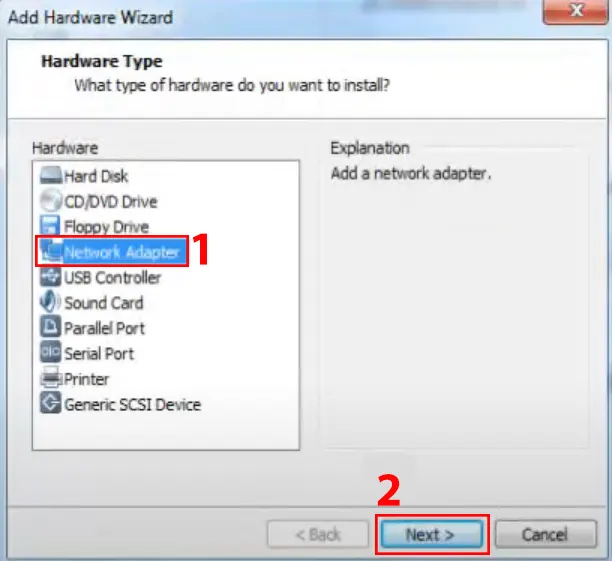
Next, right-click on MIKROTIK and choose Settings. From the Hardware section, choose Network Adapter and click on Custom: Specific virtual network and then Add:

Choose Network Adapter again and press Next:
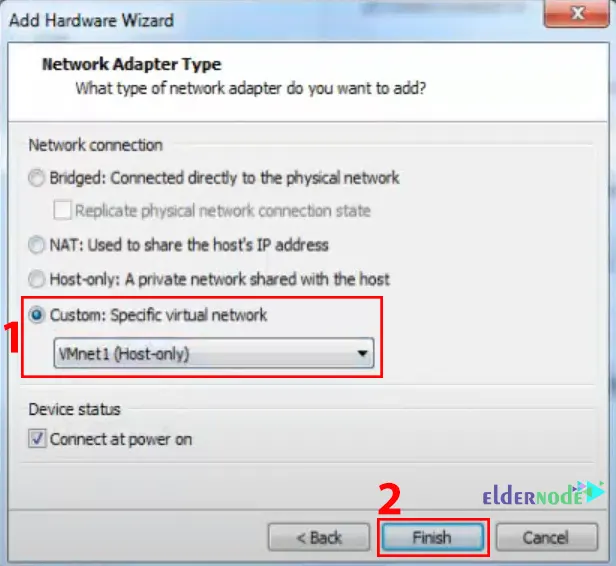
Now you should choose Custom: Specific network adapter and VMnet1 from the drop-down menu as the type of Network Adapter:
In this step, click on Power on this virtual machine. You will see the following screen:

After the installation wraps up, press Enter to reboot and load MikroTik RouterOS.

After the reboot is complete, enter your username and default password from the login page:

That’s it! You can now log in to your MikroTik server through Winbox and start configuring your router.
Conclusion
So yeah, it really doesn’t take much to install MikroTik on VMware. Grab the ISO, tweak the network settings, reboot once, and you’ve got RouterOS running inside your VM. Perfect for testing configs or spinning up a small lab without dragging in extra hardware.
💡 Not in the mood to set it up yourself? Eldernode has ready-to-go MikroTik VPS plans that fire up instantly, with payment options like Bitcoin, PayPal, and…
I’ve personally used this setup in my own lab many times before pushing changes to production routers and honestly, it’s saved me from breaking a live network more than once. If you get stuck, just drop a comment below and I’ll try to help you out.