Special Offer
 How to Configure NTP Server in Windows Server 2019


Configure NTP Server in Windows Server 2019 sounds simple, but it’s one of those things that quietly keeps your entire network sane.
When the time drifts even a few seconds, you start seeing weird stuff: logins that fail, certificates that don’t match, or systems that just stop trusting each other. Windows has had NTP support built in for years since the XP and Server 2003 era yet a lot of admins never bother to set it up properly.
Under the hood, it works the same way Linux and Unix do: one machine keeps everyone else on time. In this guide, we’ll walk through setting up your own NTP Server on Windows Server 2019 so everything in your network stays perfectly in sync.
Steps to Configure NTP Server in Windows Server 2019
A) Open the Registry Editor
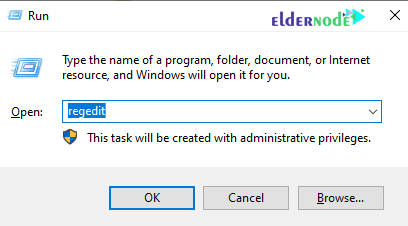
1. Click on the start menu and search for the Run.
2. Type Regedit and hit Enter. A window will open as shown below.
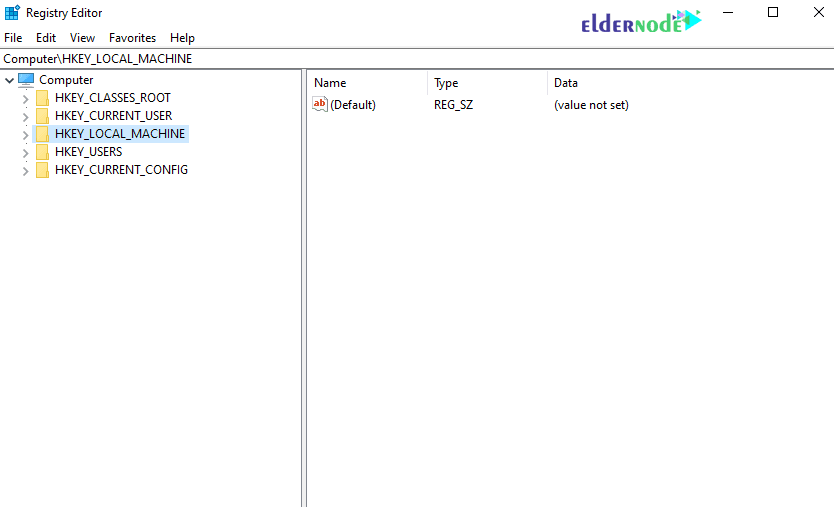
3. In the window that opens, select HKEY_LOCAL_MACHINE.
4. Follow the path below to reach the NtpServer option.
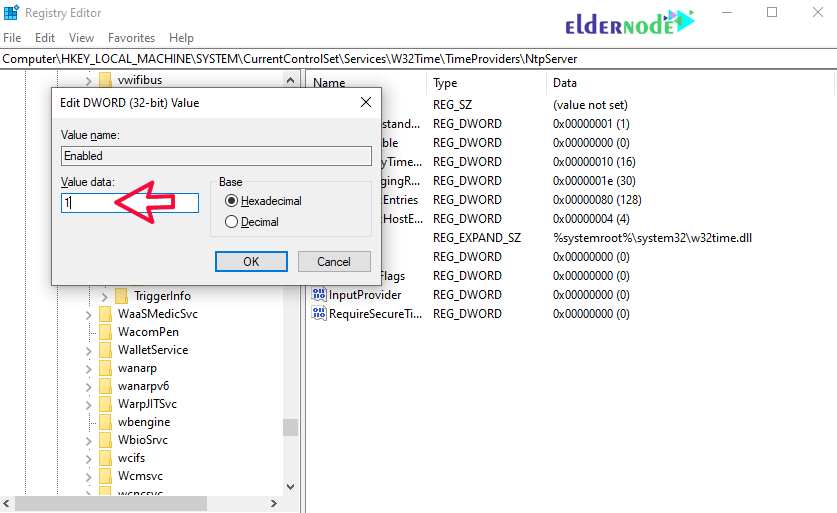
SYSTEM>CurrentControlSet>Services>W32Time>TimeProviders>NtpServer
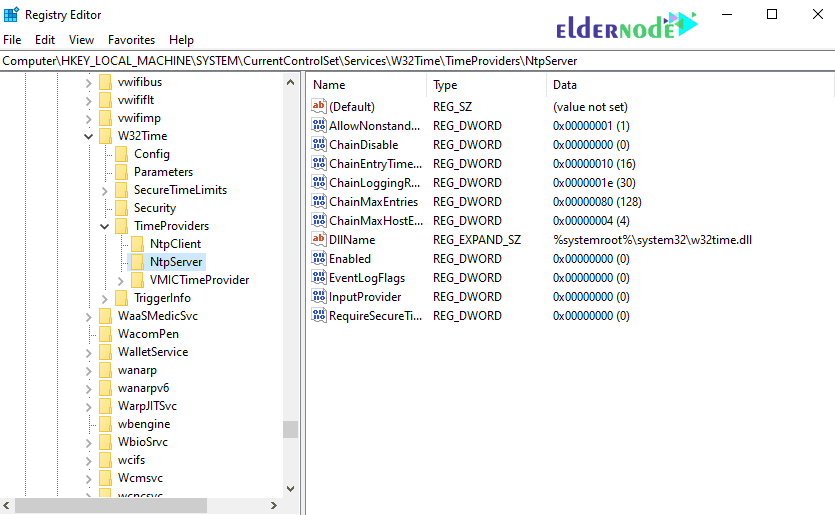
5. On the right page, double-click Enabled.
In the Value data section, change the value from 0 to 1 and click ok.
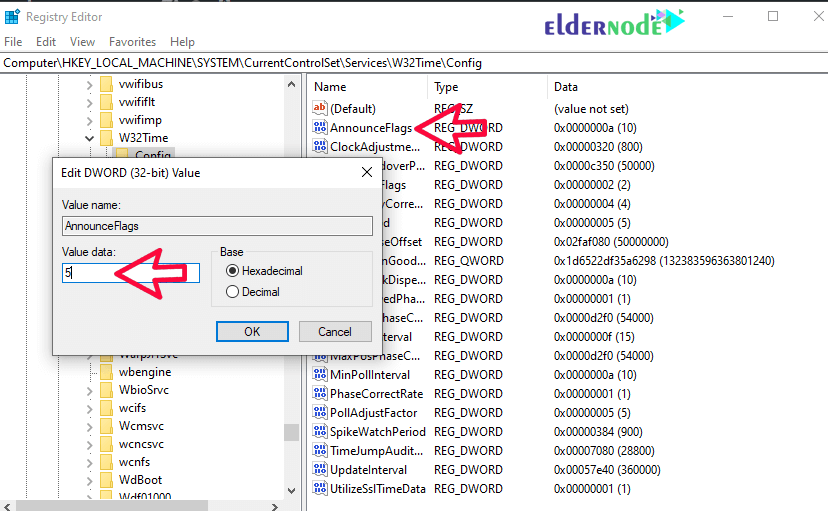
6. Continue the path below until you reach the config option.
Computer>HKEY_LOCAL_MACHINE>SYSTEM>CurrentControlSet>Services>W32Time>Config.
From the page on the right, double-click AnnounceFlags and change its value to 5 and click ok.
The following options explain the information about AnnounceFlags:
0x00 Not a time server
0x01 Always time server
0x02 Automatic time server
0x04 Always reliable time server
0x08 Automatic reliable time server
default value for domain members and stand-alone clients and servers is 10.
B) Restart NTPServer
1. Open the Services by searching in start menu or hitting on the windows key.
2. In the window that opens, select the windows time option. Then right-click on it and select Restart.

C) Open UDP port 123 in Firewall
You can follow the Learn how to open a port on a Windows firewall.
Note that this port is UDP and not TCP.
Conclusion
That’s it your NTP Server on Windows Server 2019 should now be keeping your systems perfectly in sync.
It’s one of those tiny configurations you rarely think about again, but you’ll definitely notice when it’s missing failed logins, certificate mismatches, or random sync issues suddenly start showing up.
If something doesn’t go as expected, just drop a comment below. Someone from the Eldernode team or another admin who’s already been through it will probably jump in to help. You can also check out the Ask section to troubleshoot further or share your own fix.
Good luck with your setup, and may your network clocks always agree.