How to Configure OpenVPN on MikroTik VPS (Complete Guide)


If you’ve ever tried to set up a VPN on your MikroTik, you probably know it can look a bit tricky at first. The good news is that with OpenVPN on a MikroTik VPS, you can create a safe and encrypted tunnel for your connections without too much hassle. OpenVPN has been around for years and people like it because it’s flexible, reliable, and works almost anywhere. I’ll show you, step by step, how to set up OpenVPN on your MikroTik VPS so you can get it running without the usual confusion. And if you don’t already have a server, Eldernode offers affordable MikroTik VPS plans that you can grab and start experimenting with right away.
Configuring OpenVPN on MikroTik
Let’s roll up our sleeves and actually set this up. Open Winbox, sign in to your MikroTik VPS, and start with the first step. If you’ve never done this before, it might look a bit confusing, but stick with me we’ll go through it piece by piece so the setup feels smooth. In short, you’ll have a working OpenVPN tunnel on MikroTik.
Create New Interface
In Winbox, open Interfaces, click the plus sign, and add a new Bridge. Think of it as the foundation before you move on with OpenVPN.
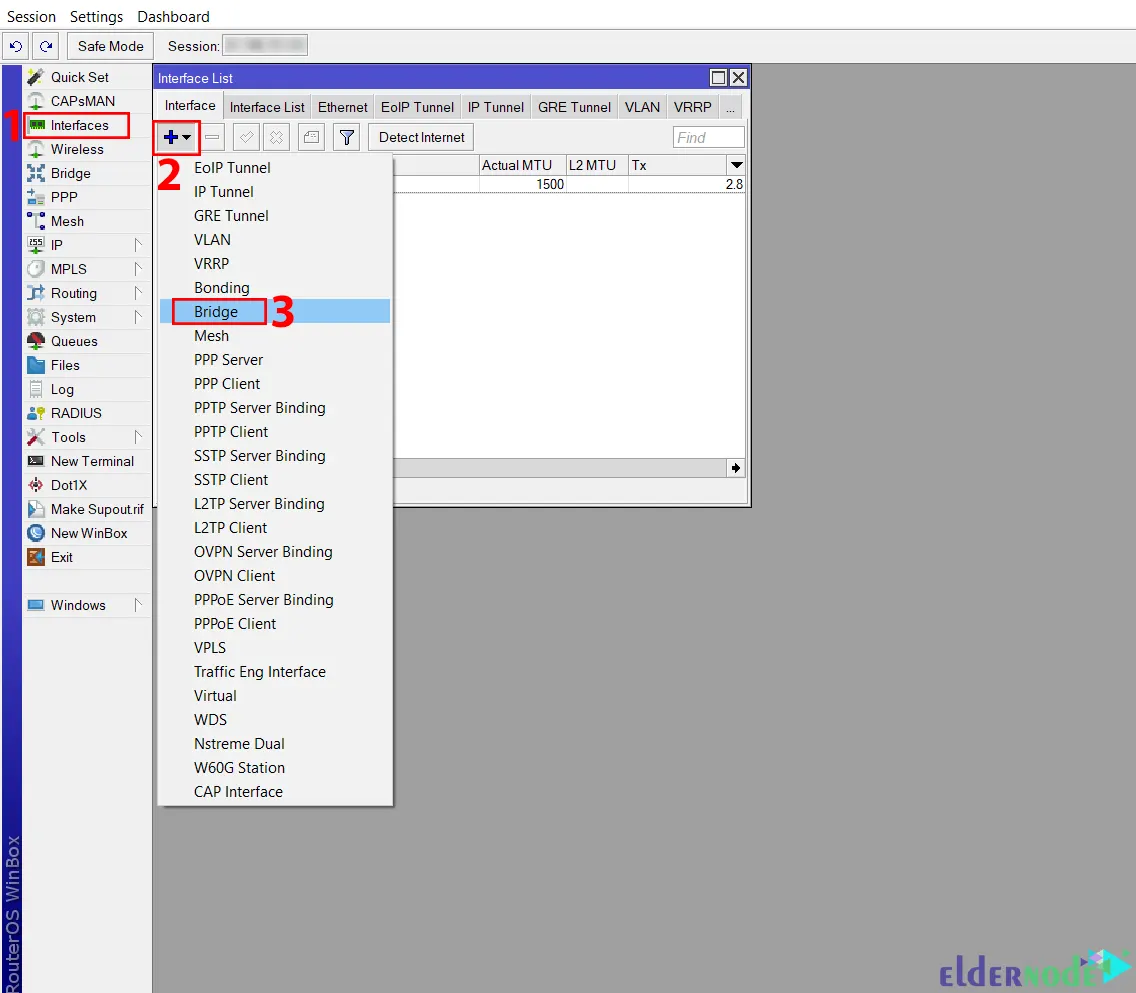
Fill in the required information and click on OK to save the interface.

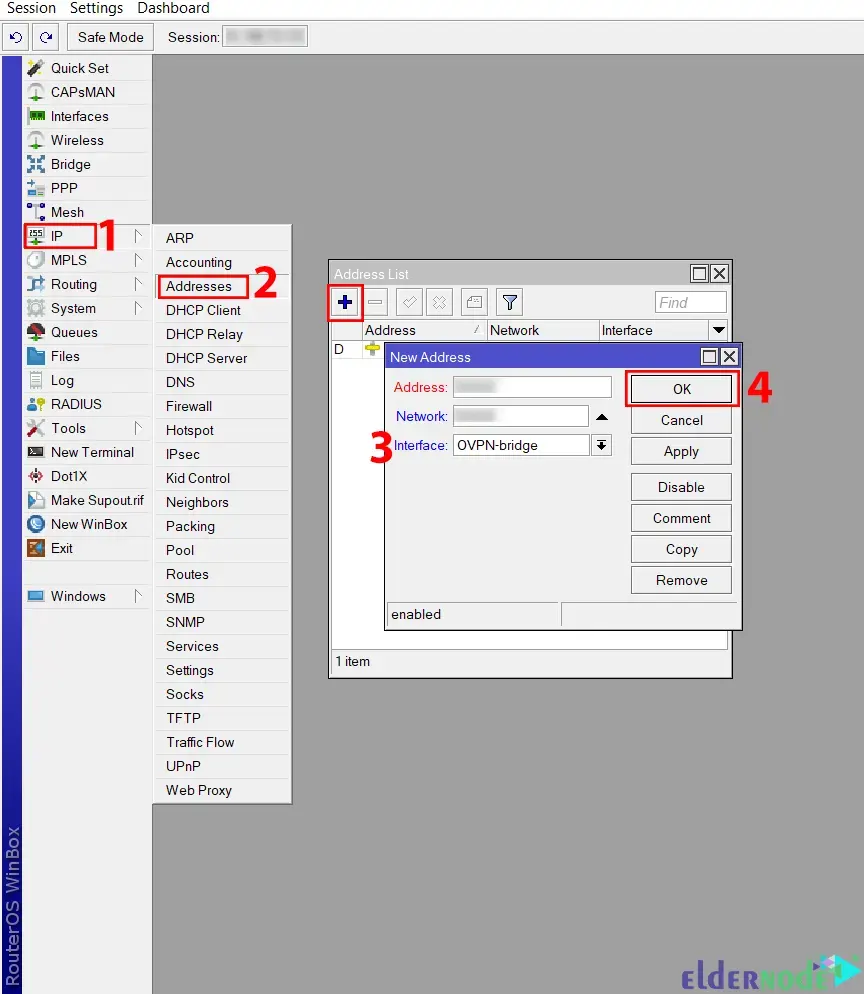
Now go to the IP >> Addresses path and click +. Set your IP as Address, choose the bridge you made earlier as Interface, and click OK to apply the new address.
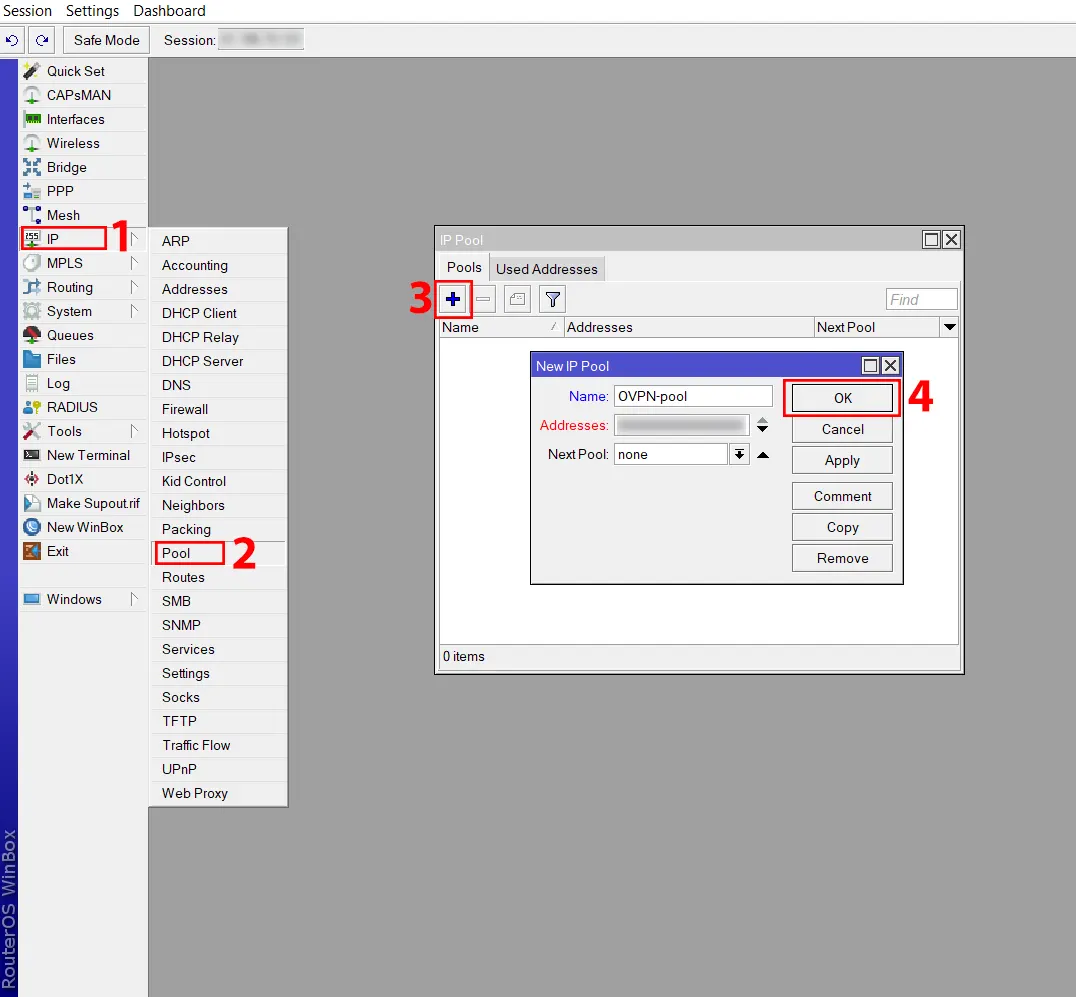
Once done, go to the IP >> Pool path and click on +. Next, choose the name for your IP Pool and enter the IP range, then click OK again: to continue configuring OpenVPN.
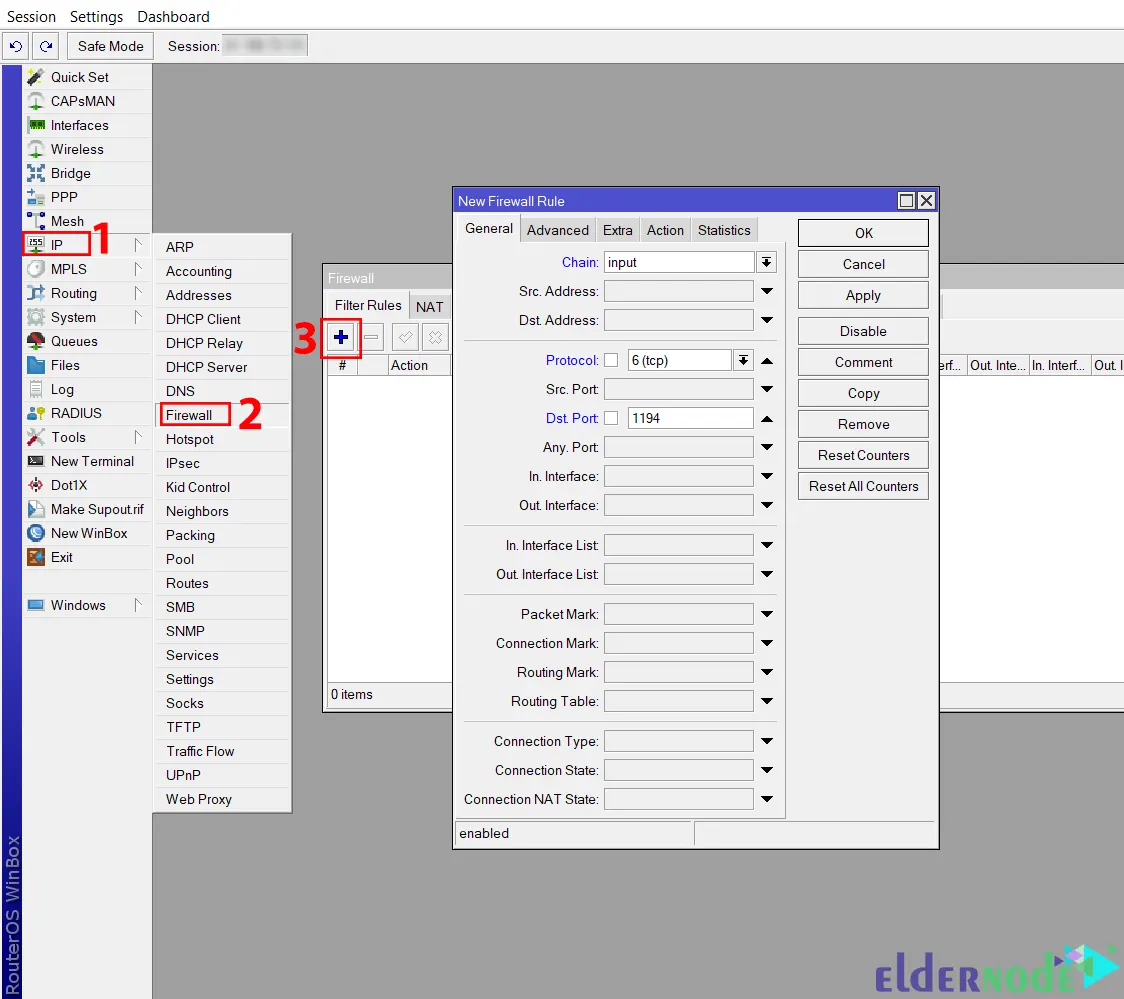
In this section, you should create rules in the Firewall and NAT. So, go to the IP >> Firewall path and click +. In the Windows that opens, go to the General tab for configuration purposes:
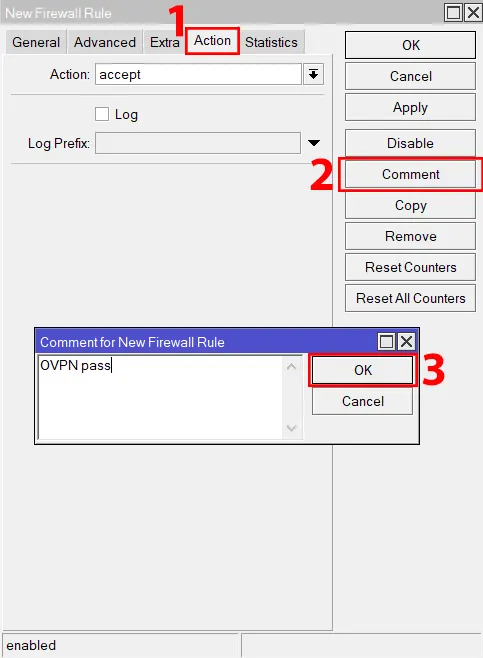
Then go to the Action tab and click Comment to comment it with an OVPN pass to find the rule faster: when you’re trying to configure OpenVPN on MikroTik settings.
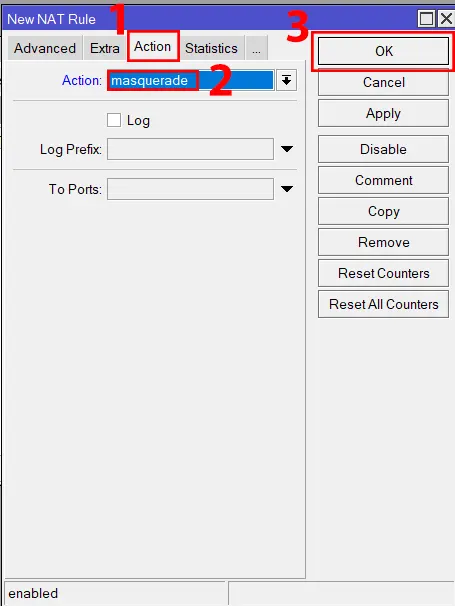
From the Firewall window, navigate to the NAT tab and click on +. In the window that opens, go to the General tab and fill in the required information to help configure OpenVPN:
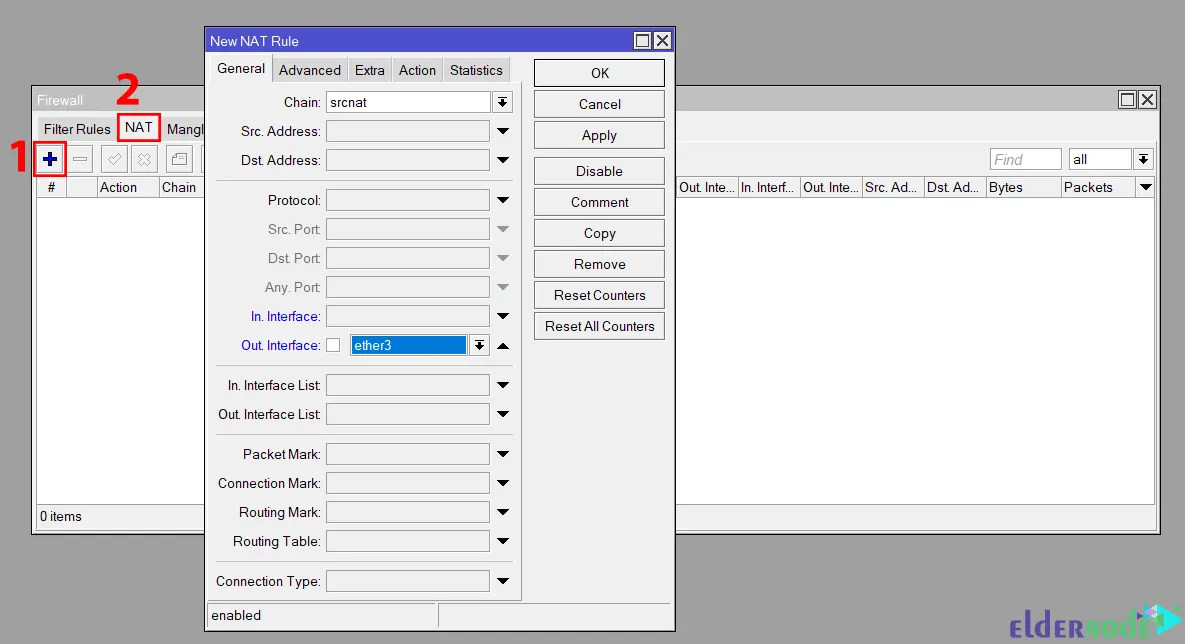
Under the Action tab, select masquerade and confirm with OK this makes sure your VPN traffic can reach the internet.
Create Certificates for User, Server, and Client
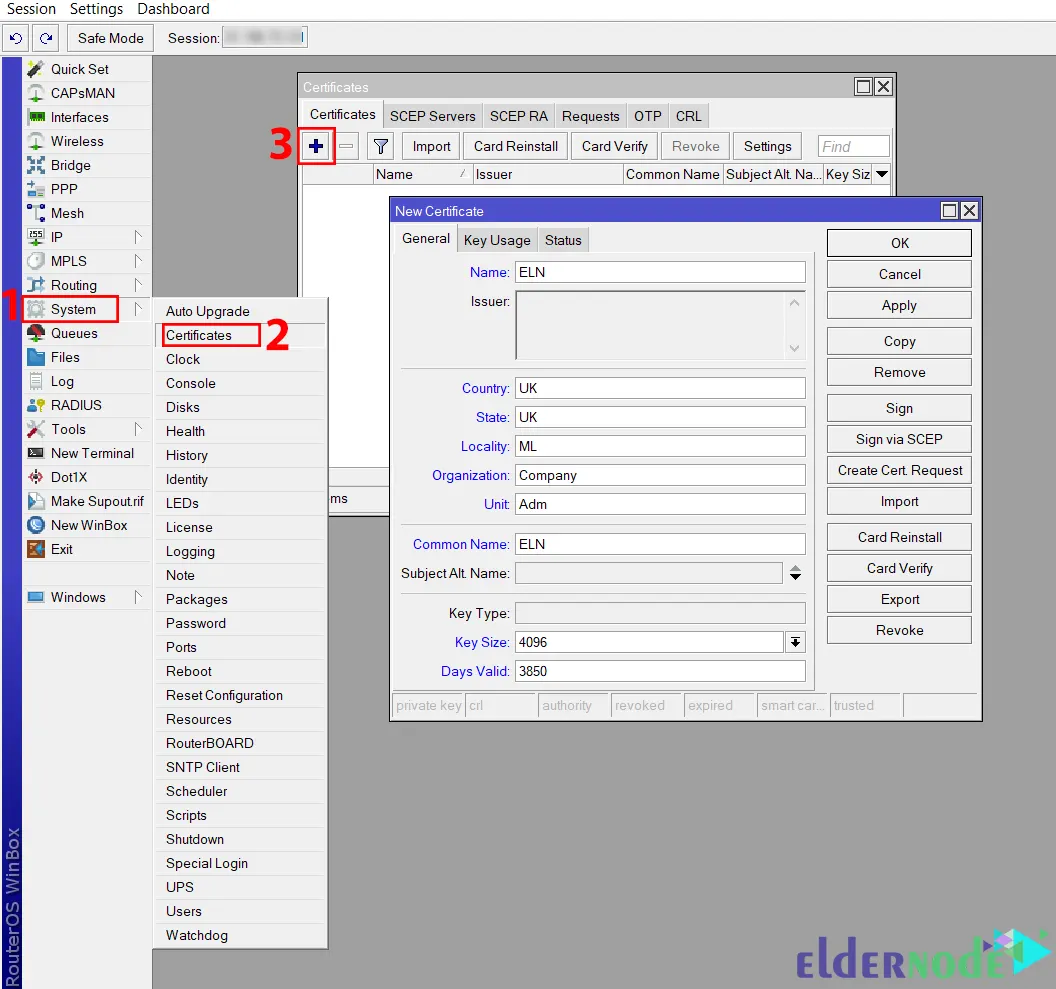
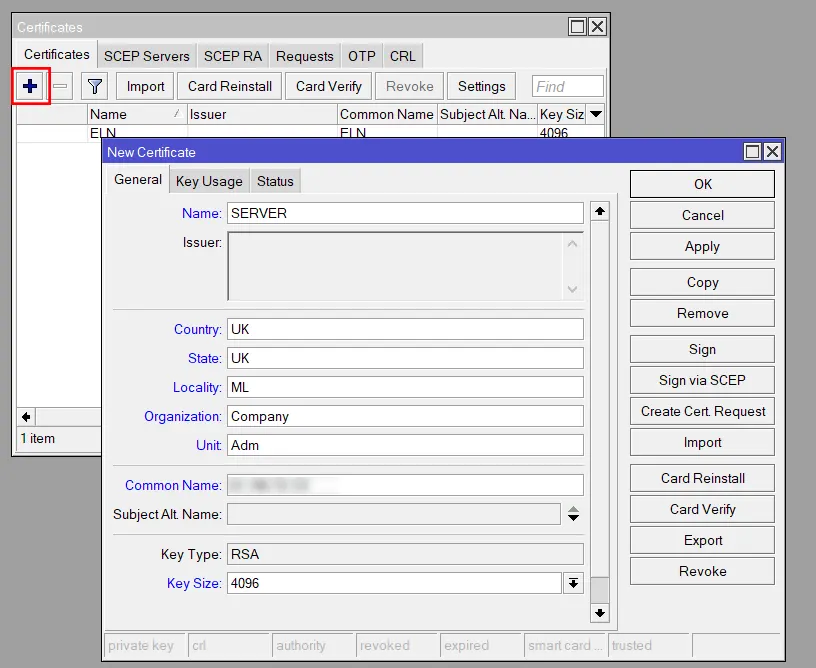
Here’s the part most people trip over: certificates. OpenVPN won’t even start without them. On your MikroTik VPS, head to System → Certificates and hit +. The very first one you need is the CA (Certificate Authority). Think of it like the main key that signs off on everything else. When you’re filling it out, set the key size to 4096 (stronger security) and pick how long you want it to last it’s up to you. When you set up OpenVPN on MikroTik router, these steps are essential.
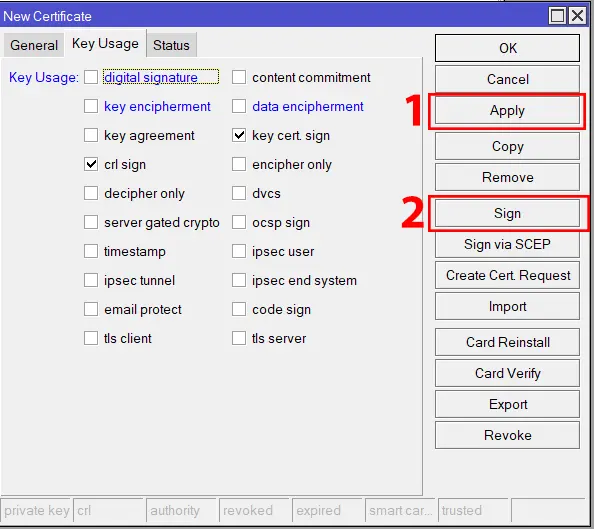
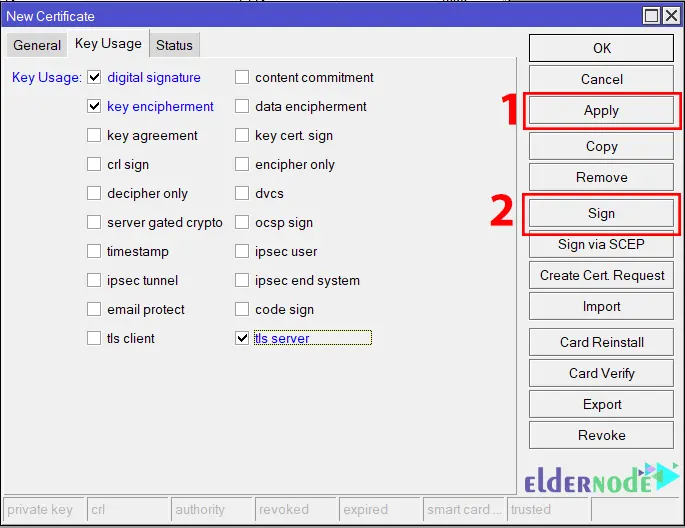
Now navigate to the Key Usage tab and check the ”crl sign” and ”key cert. sign” checkboxes only. Then click Apply >> Sign to include in the configure OpenVPN on MikroTik process.
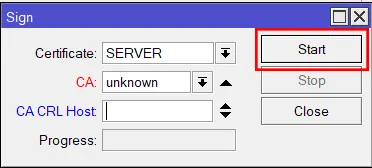
Now it’s time to sign the CA. To do this, enter the Public IP address of your MikroTik in the CA CRL Host section and click on Start:
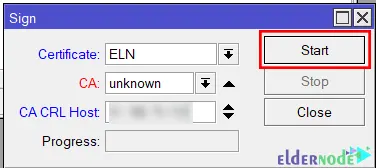
It will show done in the Progress section when it is done.
In this section, you should create a certificate again for the Open VPN server. So, click on + and fill in the information. Remember to set the Public IP address of the router as a Common Name: for OpenVPN on MikroTik configuration.
Navigate to the Key Usage tab and check the ”digital signature”, ”key encipherment”, ”tls server” checkboxes, then click Apply >> Sign to sign it with the CA:
Now you should choose your newly created CA as CA and click Start to finish the OpenVPN server setup.
Finally, you should generate certificates for the Clients. So, press + again and fill in the information in the General tab:
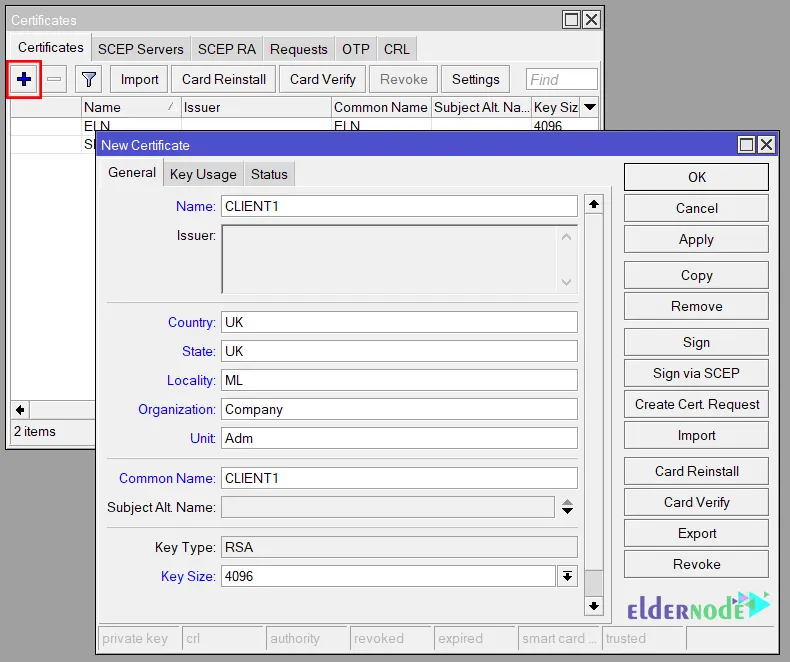
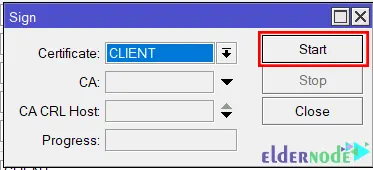
Then change the certificate and client names to CLIENT1 and click Apply >> Sign. From the Sign window, choose your newly created CA as CA and click on Start for the VPN setup.
Now double-click on the server certificate, check the Trusted check box and click OK.
Note: The server certificate should have K, I, and T flags and the client certificate should have K and I flags.
Next, right-click on them and choose Export to export the CA certificate without a passphrase and the client certificate with a passphrase. You can find the exported certificates in Files. In this section, drag and drop them into a folder on your Desktop.
Enable OpenVPN Server
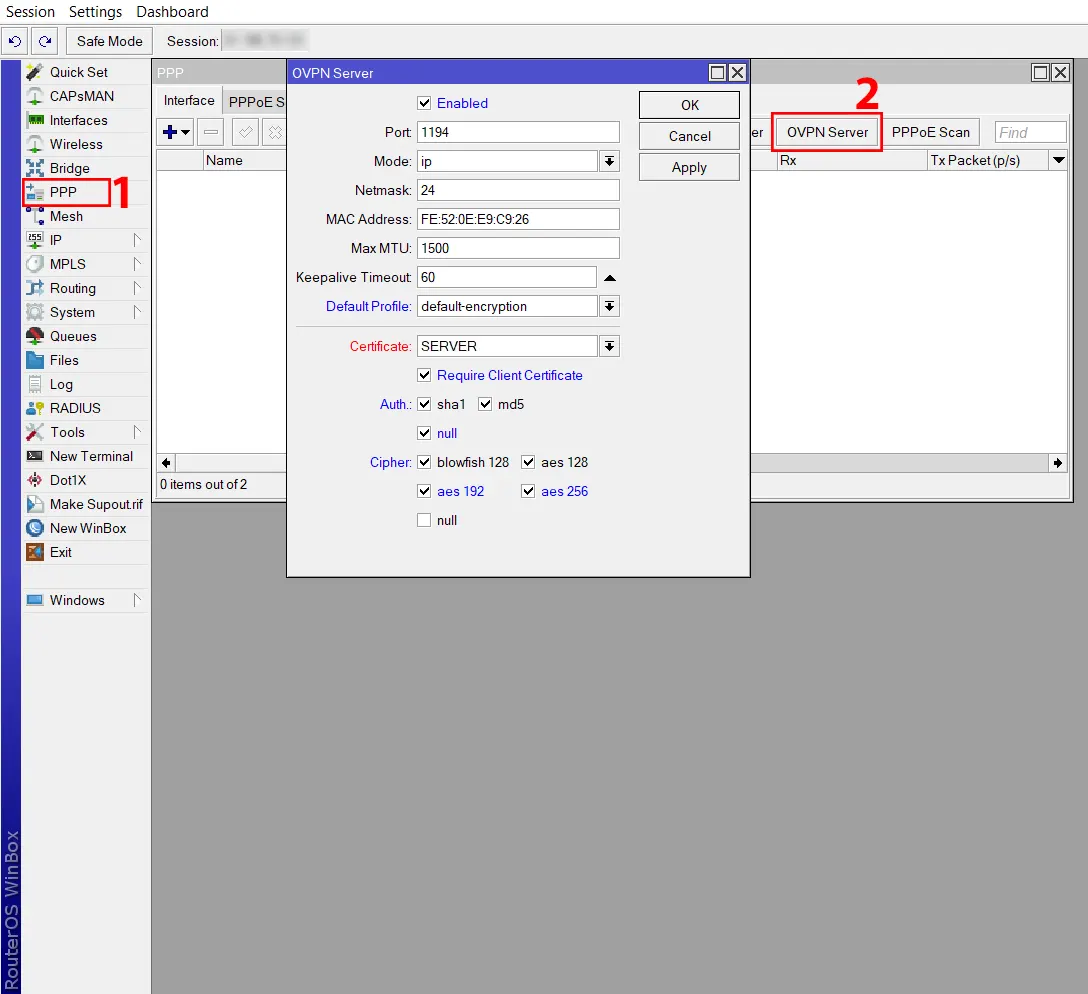
Now go to the PPP >> OVPN Server path to enable the OpenVPN server. Choose the Server certificate and check the ”Require Client Certificate”, all the ”Auth”, and all the ”Cipher” options except null. Then change the Default Profile to default-encryption and check Enabled: This is how you effectively set up OpenVPN on MikroTik router.
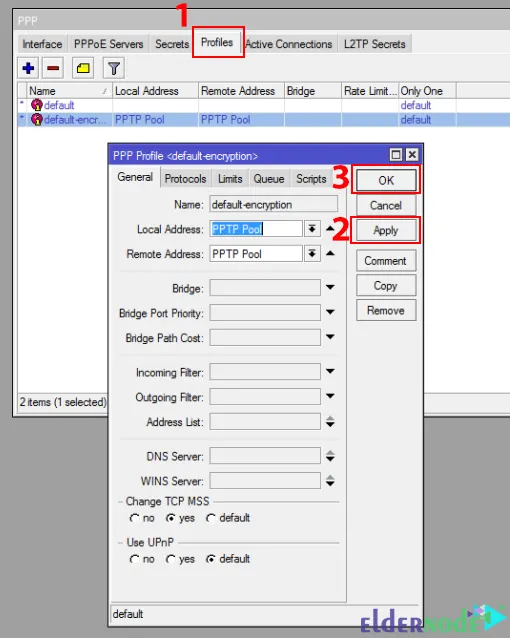
In this section, go to the Profiles tab and double-click on the default encryption profile. Then set the VPN Gateway address as Local Address, the IP Pool as the Remote Address, and the bridge you made as the Bridge. Remember to enter the DNS server’s addresses that you will use. Finally press Apply >> OK: These settings only work once OpenVPN is enabled.
Create a User for VPN
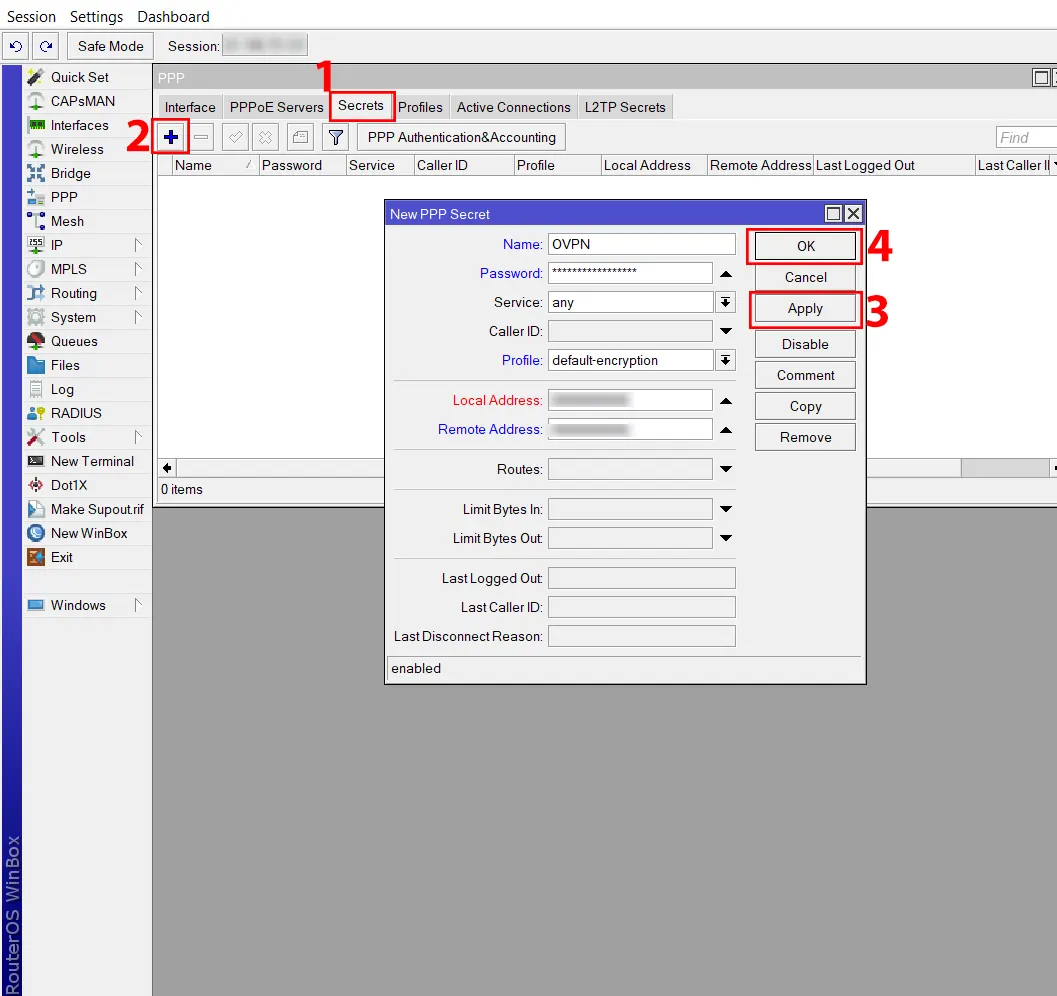
Firstly, go to the PPP >> Secrets tab and click on +. Now enter your desired credentials and choose the default encryption as the profile. Lastly click Apply >> OK:
That’s it!
Conclusion
So yeah, that’s pretty much how you get OpenVPN running on a MikroTik VPS. It might feel a bit messy the first time MikroTik always does but once it clicks, it just works. The cool part is knowing your traffic’s locked down and you can reach your network from anywhere without stress. If you try the steps and something doesn’t line up during the process to set up OpenVPN on MikroTik, don’t panic. It happens. Leave a note in the comments and let’s sort it out.