How to Enable RDP on Windows Server 2019 [Step-by-Step]
![How to Enable RDP on Windows Server 2019 [Step-by-Step]](https://eldernode.com/wp-content/uploads/2021/02/enable-RDP-on-Windows-Server-2019.webp)


Enable RDP on Windows Server 2019 is usually one of the first steps admins take after setting up a new server. With Remote Desktop enabled, you can log in from anywhere whether it’s over the internet or just inside your local network and manage the system as if you were sitting right in front of it.
RDP (Remote Desktop Protocol) is Microsoft’s own technology, and it has been built into Windows since the XP days. The reason it’s still so widely used is simple: it’s fast, reliable, and you don’t need to install anything extra.
On Your Windows Server 2019, there are two common ways to enable Remote Desktop:
Using PowerShell (faster and more direct)
Or through the Server Manager GUI (point-and-click method)
In this guide, I’ll walk you through both step by step.
A) Step-by-Step: Enable Remote Desktop on Windows Server 2019 via PowerShell
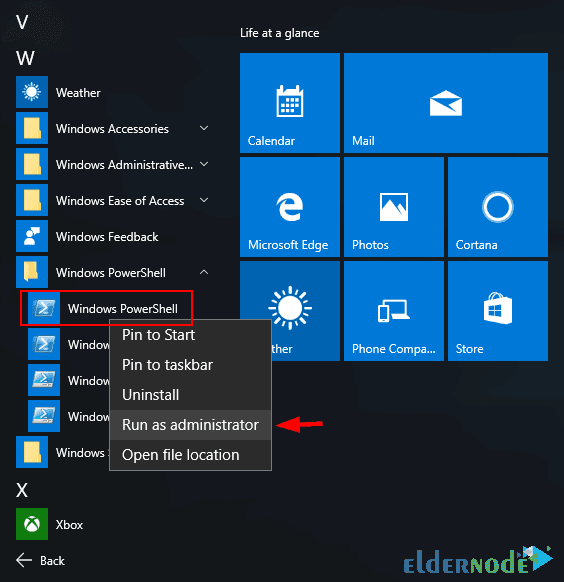
1. Open PowerShell with administrator privileges. (You can do this by right-clicking the PowerShell icon and selecting Run as Administrator.)
2. Once PowerShell is open, type the following command and press Enter to enable Remote Desktop:
Set-ItemProperty -Path 'HKLM:\System\CurrentControlSet\Control\Terminal Server' -name "fDenyTSConnections" -value 0
3. By default, the Windows Firewall blocks Remote Desktop connections. To allow RDP through the firewall, run this command:
Enable-NetFirewallRule -DisplayGroup "Remote Desktop"
4. If you ever want to disable RDP again, simply run:
Set-ItemProperty -Path 'HKLM:\System\CurrentControlSet\Control\Terminal Server' -name "fDenyTSConnections" -value 1
B) Enable RDP on Windows Server 2019 Using Server Manager (GUI)
1. Begin by opening Server Manager. You’ll find it in the Start menu. (Click the Start button and search for Server Manager if you don’t see it right away.)

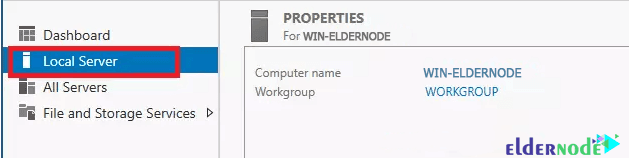
2. After opening Server Manager, click Local Server in the left column.
3. Click Disabled in front of the Remote Desktop option.

4. In the window that opens, click Allow remote connections to this Computer and click OK.
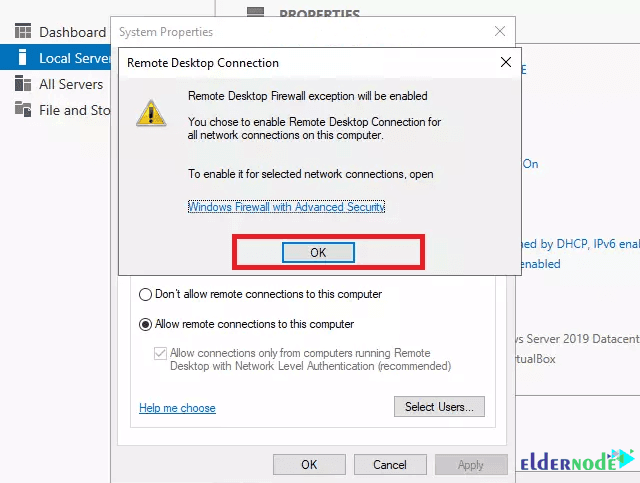
5. Now select the Select Users option to agree to Remote Desktop firewall exception warning and add users to allow.
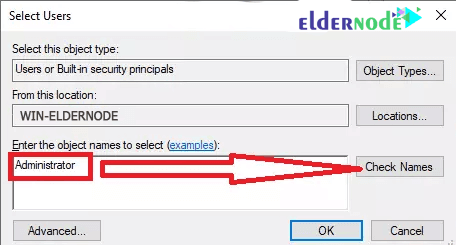
6. Enter Username and click Check names. When the username has been checked, press OK to store your settings.
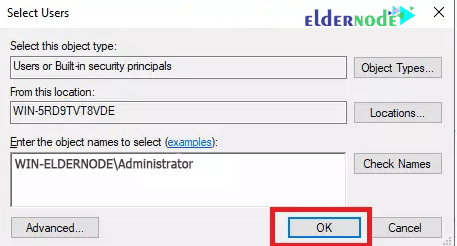
7. Click OK at the end.
So that’s it now you know two different ways to enable RDP on Windows Server 2019. If you’re someone who likes commands and speed, PowerShell gets the job done in seconds. If you’re more comfortable with menus and clicking around, the Server Manager GUI works just as well.
Either way, once RDP is up and running, you can connect to your server from anywhere and manage it just like you’re sitting right in front of the screen. It’s one of those features Windows Server admins almost always turn on right away.
Got questions or ran into issues? Drop a comment below, or head over to the Eldernode Ask page
and share it there other users and experts usually jump in pretty quick.
👉 And if you don’t feel like setting up everything yourself, you can grab a ready-to-use Admin RDP Server from Eldernode.
Happy remote managing! 🚀