How to Install OpenSSL on Windows Server 2019


When you’re securing your server, one of the first things you’ll need is OpenSSL on Windows Server 2019. It’s a well-known tool for encrypting and protecting data, used by system admins for years. OpenSSL works on multiple platforms like Linux, Windows, macOS, and BSD, which is why it’s such a popular choice. With OpenSSL, you can do things like create private keys, generate Certificate Signing Requests (CSRs), and install SSL certificates to keep your communication secure. While most Linux systems come with OpenSSL pre-installed, Windows users will have to go through a few extra steps.
In this guide, we’ll walk you through exactly how to install OpenSSL on Windows Server 2019. And if you’re also in need of a solid Windows VPS Server, Eldernode has some great options to help you easily manage and deploy your applications.
Step-by-Step Guide: Install OpenSSL on Windows Server 2019
Let’s get OpenSSL up and running on your Windows Server 2019. First, log in to your server with your username and password, then open any browser.
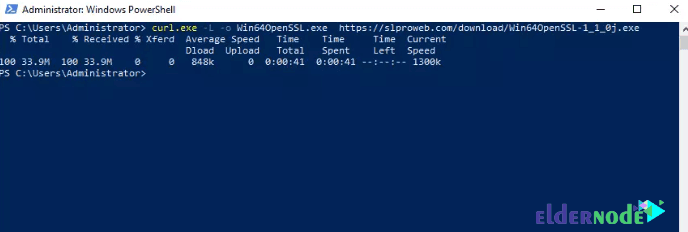
Next, download the latest version of OpenSSL. Depending on your server’s architecture, pick the 64-bit, light, or full version.
Once that’s done, use the following command in your command line:
curl.exe -L -o Win64OpenSSL.exe https://slproweb.com/download/Win64OpenSSL-1_1_0j.exe
After the file is downloaded, double-click and run it.
You can run OpenSSL by entering the following command in PowerShell:
.\Win64OpenSSL.exe
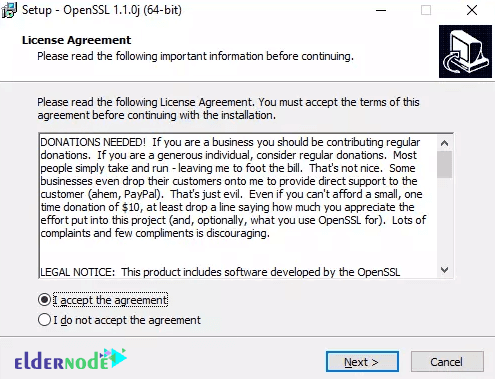
After viewing the image below, click I accept the agreement. Then click Next:
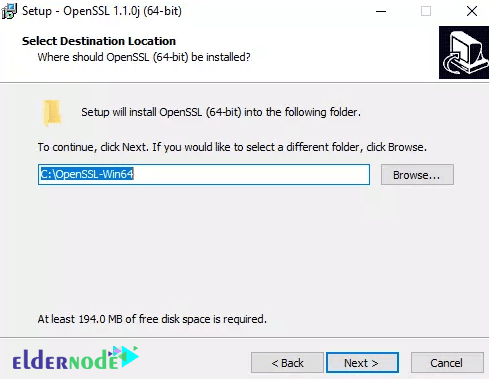
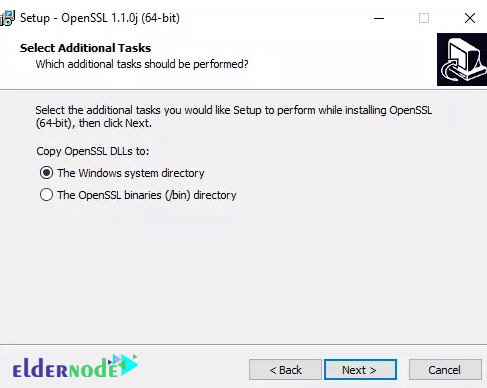
In the next step, specify the OpenSSL installation path. Then click Next:
*
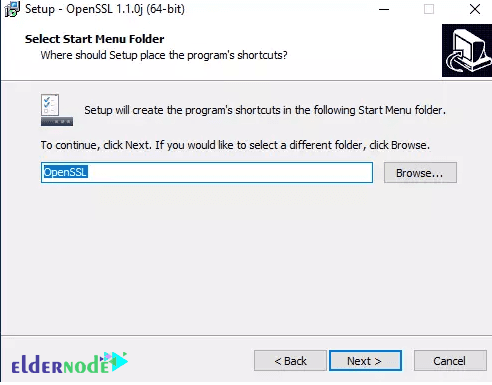
Select directory for Application shortcut:
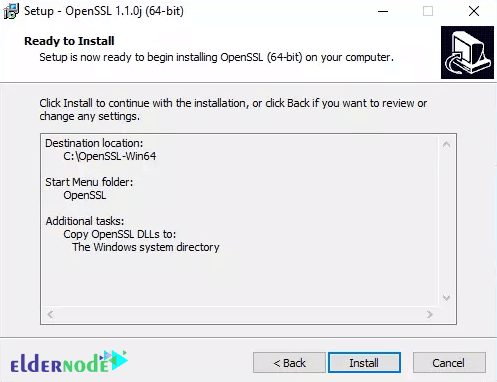
Next, click Install to begin the OpenSSL installation:
Wait for the installation to complete and finally click Finish.
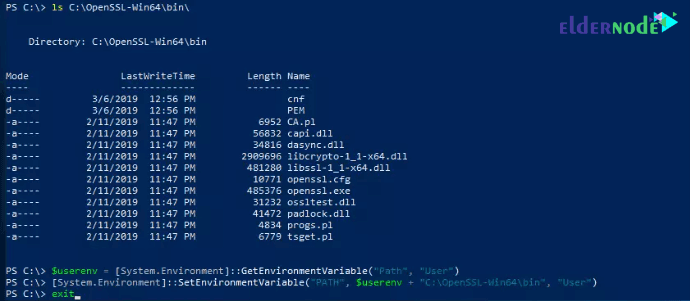
Finally, add C:\OpenSSL-Win64 to the Windows environment PATH.
$userenv = [System.Environment]::GetEnvironmentVariable("Path", "User")
[System.Environment]::SetEnvironmentVariable("PATH", $userenv + "C:\OpenSSL-Win64\bin", "User")
Note: If your system is 32-bit, in the above code you should type win32 instead of win64.
Start executing OpenSSL by entering the following command:
set OPENSSL_CONF=C:\OpenSSL-Win64\bin\openssl.cfg
You can check the accuracy of installing OpenSSL by entering the command line below:
openssl.exe req -new -nodes -keyout server.key -out server.csr -newkey rsa:2048
Practical OpenSSL Examples
Here are a couple of things you can do:
Create a Certificate Signing Request (CSR):
If you need to generate a CSR, use this command:
openssl req -new -key private_key.pem -out my_csr.csr
This will generate the CSR that you need for getting an SSL certificate.
Convert SSL Certificate Formats:
If you have a PEM certificate and need to convert it to DER format, use:
openssl x509 -in certificate.pem -outform DER -out certificate.der
This is useful if you need the certificate in a different format for certain systems.
Conclusion
In this guide, we’ve walked you through the steps to install OpenSSL on Windows Server 2019. We hope you found the tutorial helpful! If you have any questions or run into any issues, feel free to drop them in the comments section. For any other problems, you can visit our community forum where we’ll be happy to assist you.