How to Install PowerDNS and PowerDNS Admin on Debian 11


When you run your own server, sooner or later DNS becomes part of the job. Instead of dealing with plain IP addresses, it’s much easier to use a tool that translates names into numbers for you. On Debian 11, one of the most popular choices is PowerDNS, and if you add PowerDNS Admin on top, you’ll get a clean web interface where managing records takes just a few clicks.
In this walkthrough, we’ll install both PowerDNS and PowerDNS Admin, set up the database they need, and get everything running so you can start hosting your own domains.
Introduction to PowerDNS and PowerDNS Admin
Nobody wants to memorize strings of numbers just to reach a site typing example.com is a lot friendlier than punching in an IP.
That’s where PowerDNS comes in. It’s an open-source DNS server that’s been around for years, lightweight but powerful, and it plays nicely with backends like MySQL or PostgreSQL.
You’ll usually hear about two sides of PowerDNS:
the Authoritative Server, which responds to queries for domains it’s responsible for, and the Recursor, which reaches out to other DNS servers whenever it doesn’t have the answer itself.
And instead of wrestling with raw zone files, you can throw PowerDNS Admin into the mix. It gives you a clean browser-based dashboard where adding or tweaking records feels straightforward, even if you’re not a DNS veteran.
How to Install PowerDNS Relational Database
Before doing anything, update your system and install the required tools by using the following commands:
sudo apt update
sudo apt upgrade
sudo apt install curl vim git -y
As I mentioned before, PowerDNS supports innumerable database backends such as MySQL, PostgreSQL, Oracle and etc. You can use any of them for backend storage PowerDNS zone files. I preferred to use MariaDB. You should first install the required tools to install MariaDB by entering the following command:
sudo apt install software-properties-common gnupg2 -y
Now download the MariaDB repository with the help of the following command:
curl -LsS -O https://downloads.mariadb.com/MariaDB/mariadb_repo_setup
sudo bash mariadb_repo_setup
Install MariaDB after updating your package:
sudo apt update
sudo apt install mariadb-server mariadb-client
You can use the following command to start MariaDB:
sudo systemctl start mariadb
To enable MariaDB:
sudo systemctl enable mariadb
Now you need to login into the shell with the root user:
sudo mysql -u root
You can create a PowerDNS database by running the following command:
CREATE DATABASE powerdns;
GRANT ALL ON powerdns.* TO 'powerdns_user'@'%' IDENTIFIED BY 'Strongpassword';
FLUSH PRIVILEGES;
EXIT
Note that the password you set does not have special characters as it will cause “Access denied for user ‘powerdns_user’@’localhost’ (using password: YES)” error.
How to Install PowerDNS on Debian 11
First, you should stop and disable systemd-resolved service:
sudo systemctl stop systemd-resolved
sudo systemctl disable systemd-resolved
Now remove the symbolic link for the file:
ls -lh /etc/resolv.conf
sudo unlink /etc/resolv.conf
Then update the resolv.conf file with the following command:
echo "nameserver 8.8.8.8" | sudo tee /etc/resolv.conf
In this step, add the repository to the system by entering the following command:
sudo vim /etc/apt/sources.list.d/pdns.list
deb [arch=amd64] http://repo.powerdns.com/debian bullseye-auth-46 main
Now you should import the GPG key signing for the repository:
curl -fsSL https://repo.powerdns.com/FD380FBB-pub.asc | sudo gpg --dearmor -o /etc/apt/trusted.gpg.d/pdns.gpg
Then enter the following command to set the APT preferences:
sudo vim /etc/apt/preferences.d/pdns
Package: pdns-*
Pin: origin repo.powerdns.com
Pin-Priority: 600
Update your APT package again:
sudo apt update
To install PowerDNS and the MySQL backend from the default APT repositories, run the following command:
sudo apt install pdns-server pdns-backend-mysql
How to Configure the PowerDNS Database on Debian 11
First, you should enter the database schemas to the PowerDNS database that was created on MariaDB, which are usually stored in /usr/share/pdns-backend-mysql/schema/ as a schema.mysql.sql file.
Import the above schema to the database that was created in the above step:
mysql -u powerdns_user -p powerdns < /usr/share/pdns-backend-mysql/schema/schema.mysql.sql
Then verify schema import with the following command:
sudo mysql -u root
use powerdns;
show tables;
In this step, create the file to configure the PowerDNS connection details to the database:
sudo vim /etc/powerdns/pdns.d/pdns.local.gmysql.conf
Edit the following lines in the opened file:
# MySQL Configuration
# Launch gmysql backend
launch+=gmysql
# gmysql parameters
gmysql-host=127.0.0.1
gmysql-port=3306
gmysql-dbname=powerdns
gmysql-user=powerdns_user
gmysql-password=Strongpassword
gmysql-dnssec=yes
# gmysql-socket=
Then you need to set the permissions for the file:
sudo chown pdns: /etc/powerdns/pdns.d/pdns.local.gmysql.conf
sudo chmod 640 /etc/powerdns/pdns.d/pdns.local.gmysql.conf
Next, run the following command to verify the database connection:
sudo systemctl stop pdns.service
sudo pdns_server --daemon=no --guardian=no --loglevel=9
In the last step, restart and enable the PowerDNS service by running the following command:
sudo systemctl restart pdns
sudo systemctl enable pdns
You can verify that port 53 is open for DNS using the following command:
sudo ss -alnp4 | grep pdns
You can check if PowerDNS responds to requests with the following command:
dig @127.0.0.1
How to Install PowerDNS Admin on Debian 11
In the first step, you need to install the Python development package by entering the following command:
sudo apt install python3-dev
Now run the following command to install the required build tools:
sudo apt install libsasl2-dev libldap2-dev libssl-dev libxml2-dev libxslt1-dev libxmlsec1-dev libffi-dev pkg-config apt-transport-https virtualenv python3-venv build-essential libmariadb-dev git python3-flask -y
Then you should install Node.js. To do this add the repository:
curl -sL https://deb.nodesource.com/setup_16.x | sudo -E bash -
Now it’s time to install Nodejs:
sudo apt install -y nodejs
Then you should install the yarn package but first add its repository and GPG key:
curl -sL https://dl.yarnpkg.com/debian/pubkey.gpg | gpg --dearmor | sudo tee /usr/share/keyrings/yarnkey.gpg >/dev/null
echo "deb [signed-by=/usr/share/keyrings/yarnkey.gpg] https://dl.yarnpkg.com/debian stable main" | sudo tee /etc/apt/sources.list.d/yarn.list
Run the following command to install it:
sudo apt update
sudo apt install yarn -y
Next, you should clone the PowerDNS admin source code with the following command:
sudo su -
git clone https://github.com/ngoduykhanh/PowerDNS-Admin.git /var/www/html/pdns
In this step, create a virtual environment as below:
cd /var/www/html/pdns/
virtualenv -p python3 flask
Then execute the following commands to activate the environment and install the libraries that were specified in the requirements.txt:
source ./flask/bin/activate
pip install --upgrade pip
pip install -r requirements.txt
To configure the PowerDNS Admin connectivity to your database, you should deactivate the virtual environment:
deactivate
Now edit the following file:
vim /var/www/html/pdns/powerdnsadmin/default_config.py
Then edit the below line in it:
### DATABASE CONFIG
SQLA_DB_USER = 'powerdns_user'
SQLA_DB_PASSWORD = 'Strongpassword'
SQLA_DB_HOST = '127.0.0.1'
SQLA_DB_NAME = 'powerdns'
SQLALCHEMY_TRACK_MODIFICATIONS = True
….
Create a database schema by running the following command:
cd /var/www/html/pdns/
source ./flask/bin/activate
export FLASK_APP=powerdnsadmin/__init__.py
flask db upgrade
If you receive an “ImportError: cannot import name ‘json’ from ‘itsdangerous” error, enter the following command:
pip uninstall itsdangerous
pip install itsdangerous==2.0.1
flask db upgrade
After the above problem is solved, create the asset files by running the following command:
yarn install --pure-lockfile
flask assets build
Finally, deactivate the virtual environment by entering the following command:
deactivate
How to Enable PowerDNS API Access
In this step, you should enable PowerDNS API access.
Using the following command, you can open the file and enable parameters such as controlling multiple activities, reading statistics, changing the content of the area and etc.
sudo vim /etc/powerdns/pdns.conf
Edit the file as below:
# api Enable/disable the REST API (including HTTP listener)
# api=no
api=yes
###########################
# api-key Static pre-shared authentication key for access to the REST API
# api-key=
api-key=3ce1af6c-981d-4190-a559-1e691d89b90e
#You can generate one from https://codepen.io/corenominal/pen/rxOmMJ
In the end, save the file and restart PowerDNS using the following command:
sudo systemctl restart pdns
Now it’s time to create a PowerDNS Virtual Host file. To do this first, install the Nginx web server:
sudo apt install nginx
Then create a virtual host file as below:
vim /etc/nginx/conf.d/powerdns-admin.conf
and add the following content:
server {
  listen         *:80;
  server_name               pdnsadmin.yourdomain.com;

  index                     index.html index.htm index.php;
  root                      /var/www/html/pdns;
  access_log                /var/log/nginx/pdnsadmin_access.log combined;
  error_log                 /var/log/nginx/pdnsadmin_error.log;

  client_max_body_size              10m;
  client_body_buffer_size           128k;
  proxy_redirect                    off;
  proxy_connect_timeout             90;
  proxy_send_timeout                90;
  proxy_read_timeout                90;
  proxy_buffers 32                  4k;
  proxy_buffer_size                 8k;
  proxy_set_header                  Host $host;
  proxy_set_header                  X-Real-IP $remote_addr;
  proxy_set_header                  X-Forwarded-For $proxy_add_x_forwarded_for;
  proxy_headers_hash_bucket_size    64;

  location ~ ^/static/ {
   include   /etc/nginx/mime.types;
   root  /var/www/html/pdns/powerdnsadmin;

   location ~* \.(jpg|jpeg|png|gif)$ {
     expires 365d;
   }

    location ~* ^.+.(css|js)$ {
      expires 7d;
    }
  }

  location / {
    proxy_pass http://unix:/run/pdnsadmin/socket;
    proxy_read_timeout 120;
    proxy_connect_timeout 120;
    proxy_redirect off;
  }

}
Next, rename the Nginx file:
mv /etc/nginx/sites-enabled/default{,.old}You can check the above file syntax using the following command:
nginx -t
Now run the following command to set the right ownership of the file:
chown -R www-data: /var/www/html/pdns
Then remember to restart Nginx to apply the changes:
systemctl restart nginx
In the next step, you need to create a system service file for PowerDNS Admin. To do this first, create the file as follows:
vim /etc/systemd/system/pdnsadmin.service
And add the following content to the created file:
[Unit]
Description=PowerDNS-Admin
Requires=pdnsadmin.socket
After=network.target

[Service]
PIDFile=/run/pdnsadmin/pid
User=pdns
Group=pdns
WorkingDirectory=/var/www/html/pdns
ExecStart=/var/www/html/pdns/flask/bin/gunicorn --pid /run/pdnsadmin/pid --bind unix:/run/pdnsadmin/socket 'powerdnsadmin:create_app()'
ExecReload=/bin/kill -s HUP $MAINPID
ExecStop=/bin/kill -s TERM $MAINPID
PrivateTmp=true

[Install]
WantedBy=multi-user.target
Now, create a socket file too by using the following command:
sudo vim /etc/systemd/system/pdnsadmin.socket
And add the following content to it:
[Unit]
Description=PowerDNS-Admin socket
[Socket]
ListenStream=/run/pdnsadmin/socket
[Install]
WantedBy=sockets.target
Next, you should create an environment file as follows:
mkdir /run/pdnsadmin/
echo "d /run/pdnsadmin 0755 pdns pdns -" >> /etc/tmpfiles.d/pdnsadmin.conf
Next, set the required permissions like below:
chown -R pdns: /run/pdnsadmin/
chown -R pdns: /var/www/html/pdns/powerdnsadmin/
Remember to reload the system daemon with the following command:
systemctl reload-daemon
To start and enable the PowerDNS Admin service, enter the following command:
systemctl enable --now pdnsadmin.service pdnsadmin.socket
You can check the service status by running the following command:
systemctl status pdnsadmin.service pdnsadmin.socket
How to Access the PowerDNS Admin Web UI
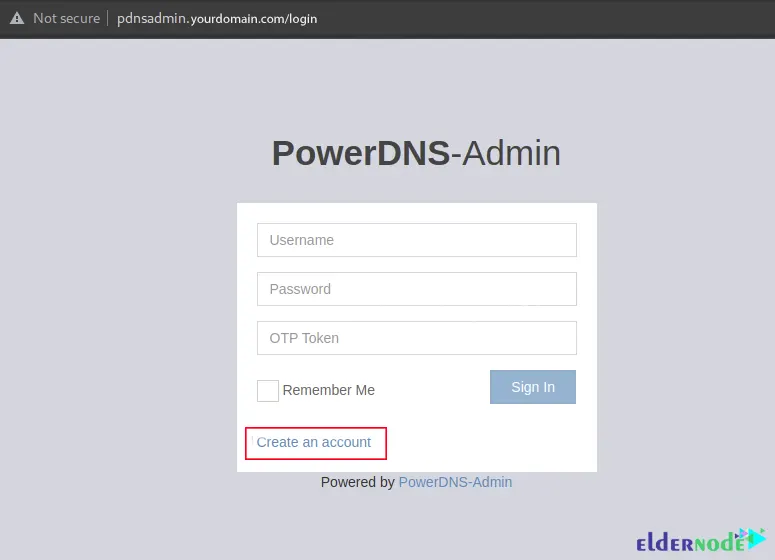
At first, navigate to the PowerDNS web UI with the help of the http://domain_name or http://IP_address URL and click on Create an account:
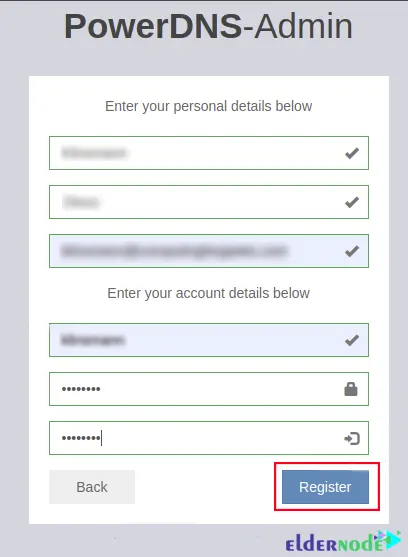
Fill in the information and click on Register to create a user admin:
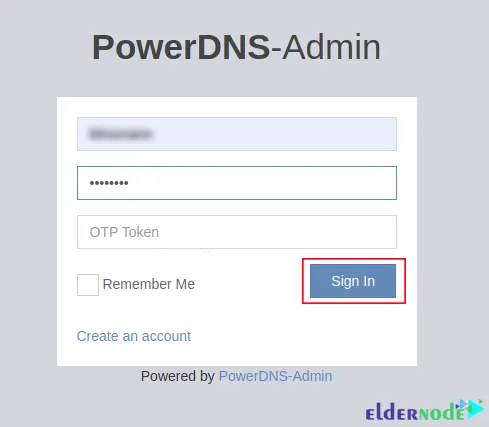
After creating an account, use it to log in to the PowerDNS Admin interface:
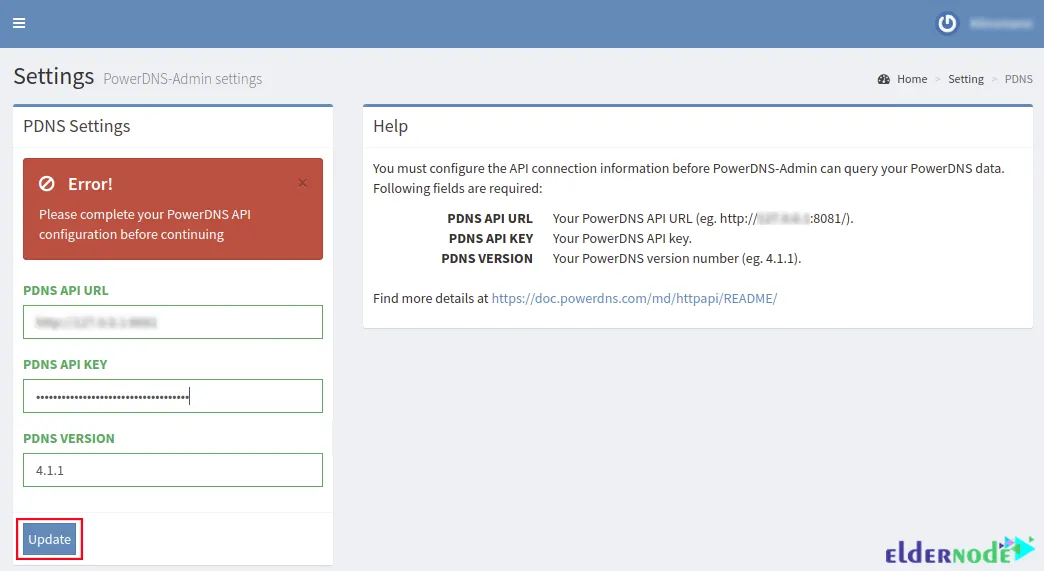
Now you should provide the API Key URL http://your-IPaddress:8081 and the API Key defined in the PowerDNS config file to manage the PowerDNS server. If you click on Update, the error will disappear:
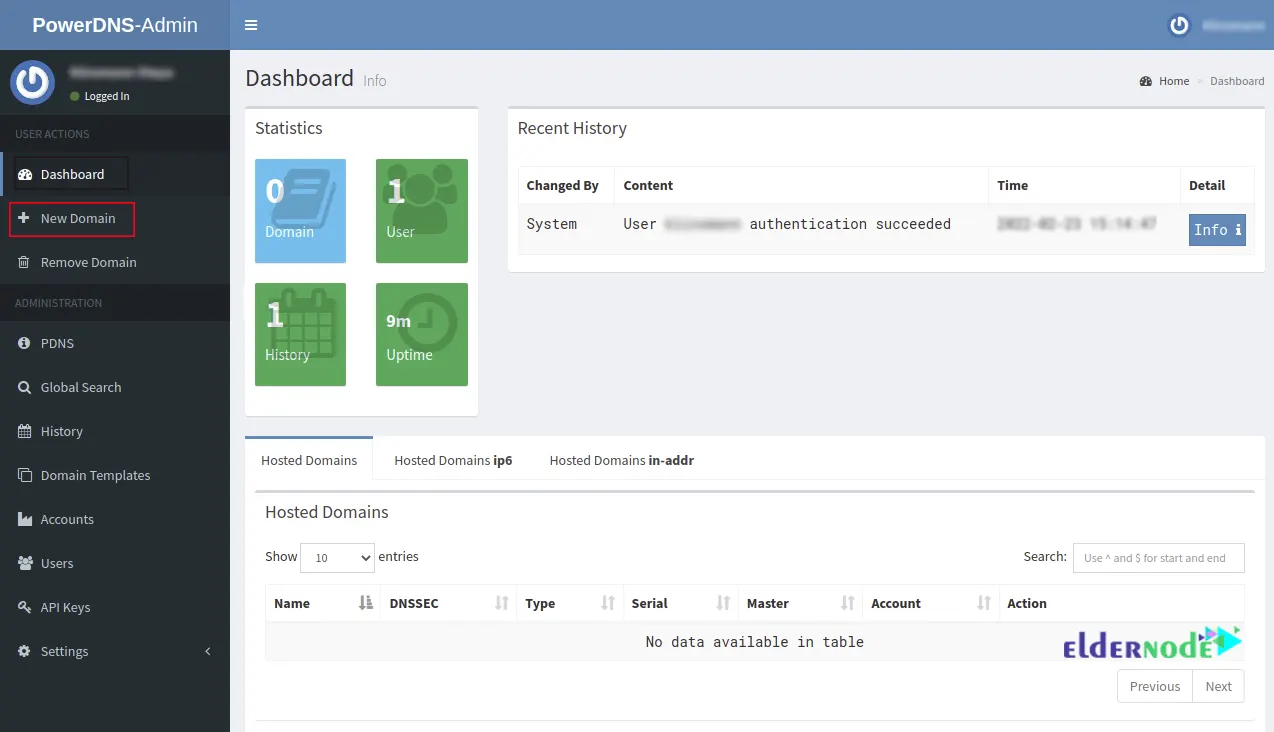
The PowerDNS Admin dashboard should be as follows. Click on + New Domain to create a new domain:
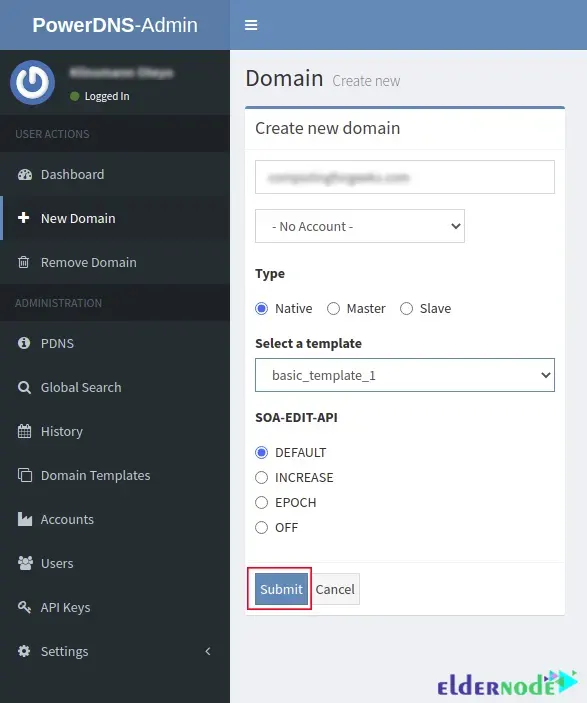
Now you should enter the domain name and select the template to use from the templates list and submit. After creating the domain, it will appear in your list like this:
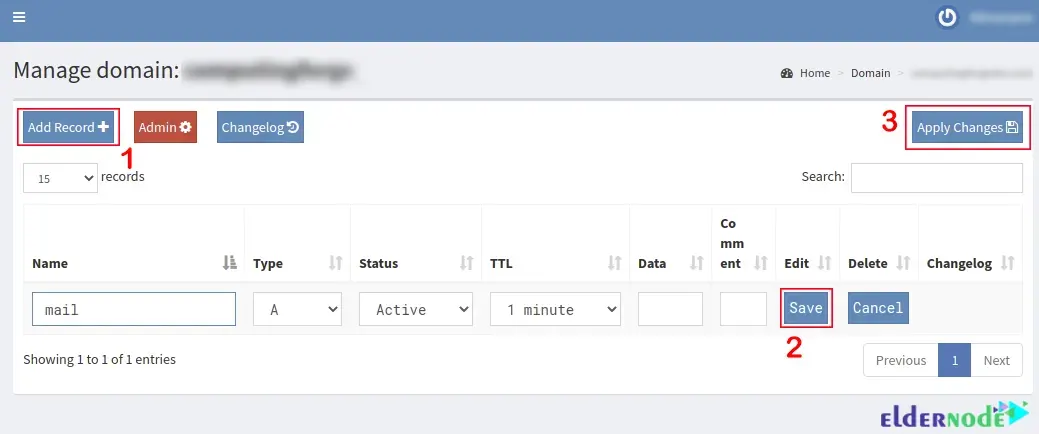
Click on the domain to open its records. To add a new one, select Add Record +, type in the record name, and then choose Save followed by Apply Changes.
That’s all you need, from here you can log in anytime and manage your DNS records through the web panel.
Conclusion
On Debian 11, combining PowerDNS with PowerDNS Admin gives you a practical way to run your own DNS service without the usual headaches. PowerDNS handles the heavy lifting as a reliable DNS server, while PowerDNS Admin gives you a clear web dashboard to create and manage records without touching zone files. Together, they let you control your domains in a straightforward way that saves time and reduces errors.