How to Set Up SSTP VPN on MikroTik Router


So need to set up SSTP VPN on your MikroTik router but not sure where to even begin? Yeah, I’ve been there. SSTP works over HTTPS (basically the same stuff your browser uses), which makes it perfect if your network blocks everything else.
I’ll walk you through how to configure SSTP on MikroTik, the real way from messing with TLS certs to adding users and getting the VPN tunnel actually working.
And hey, if you’re short on time or don’t wanna deal with all that, just grab a pre-configured MikroTik VPS from Eldernode. Saves the headache.
What is SSTP and Why Use It on MikroTik?
I first stumbled on SSTP when nothing else worked. OpenVPN kept failing, L2TP was getting blocked, and the network I was on had everything locked down except port 443. That’s where SSTP saved the day. Since it runs over HTTPS, it pretty much slips through most firewalls without making a fuss.
If you’re working with a MikroTik router and need a quick, encrypted way to get remote access without messing too much with NAT or port forwarding setting up SSTP on MikroTik is a solid choice that just works.
Create TLS Certificate for SSTP Server
SSTP VPN uses a TLS certificate for secure communication and you need a TLS certificate to configure the SSTP server. MikroTik RouterOS v6 allows you to create, store and manage certificates in the certificate store. So, create the required SSTP server certificate from MikroTik RouterOS. The SSTP server requires two types of certificates, which are the CA certificate (Certificate Authority) and the Server Certificate.
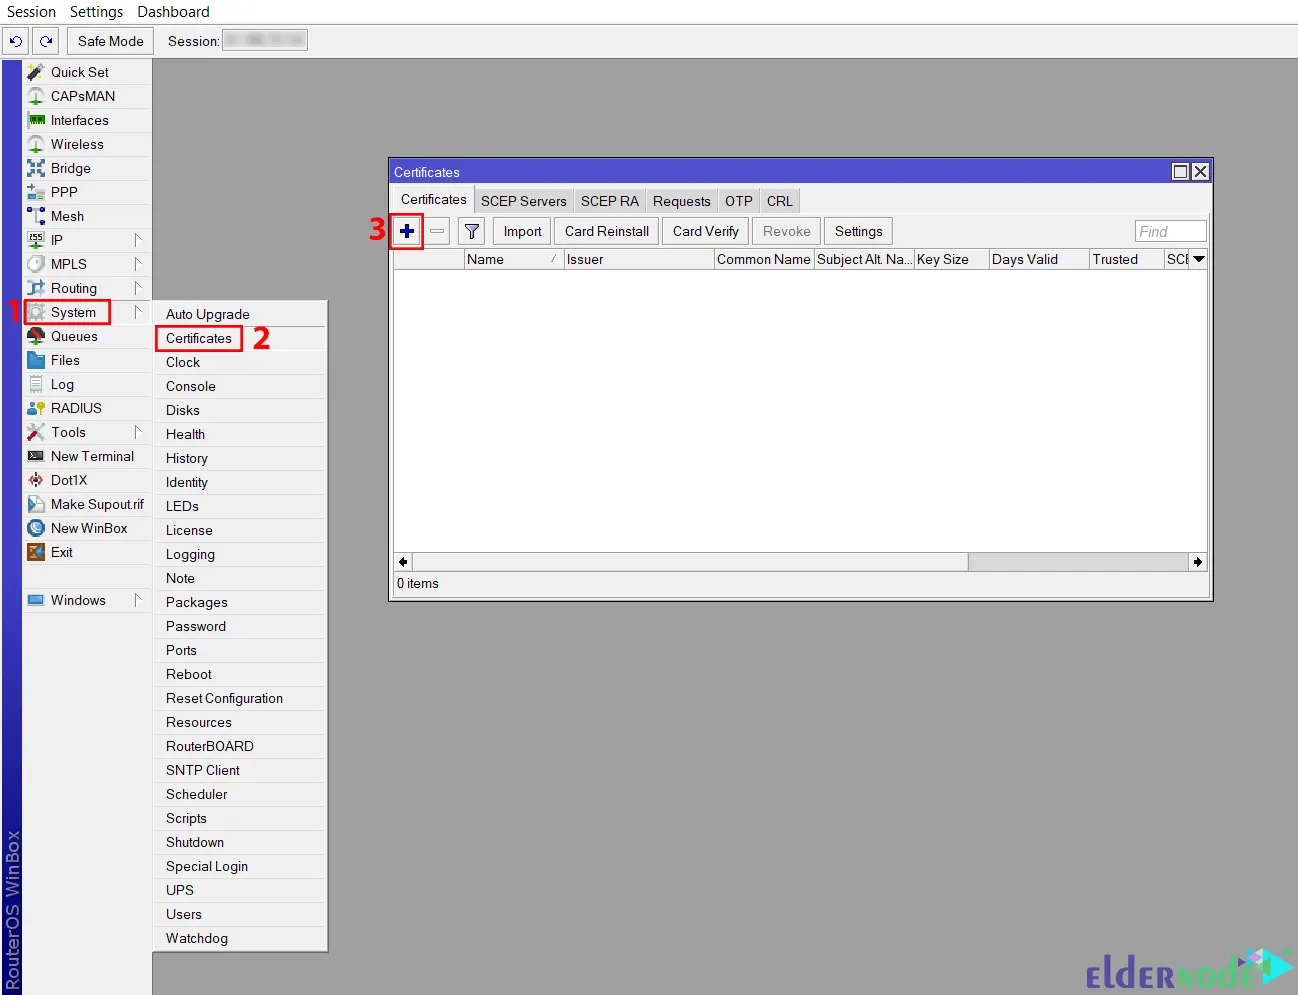
Firstly, open your Winbox and log in to your MikroTik server. Navigate to the System >> Certificates and open a new Certificate window by clicking +:
Now fill in the required information. Next, go to the Key Usage tab and uncheck all checkboxes except the digital signature, key encipherment and tls server checkboxes. Then press Apply >> Sign to open Sign Window:
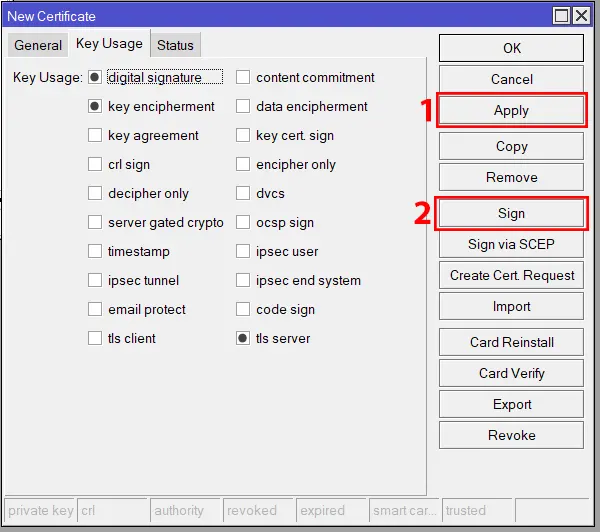
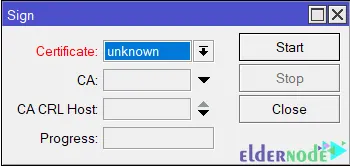
You can see the newly created Server certificate template in the certificate dropdown menu. Now choose the newly created certificate template if it is not selected and also choose CA certificate from the CA dropdown menu. Then press Sign >> OK.
Note: If the newly created server certificate does not show the T flag or the Trusted property indicates No, double-click your server certificate and click the Trusted box located at the bottom of the General tab, and then click the Apply and OK button:
Configure SSTP Server Configuration on Mikrotik
Navigate to the PPP >> Interface >> SSTP Server:
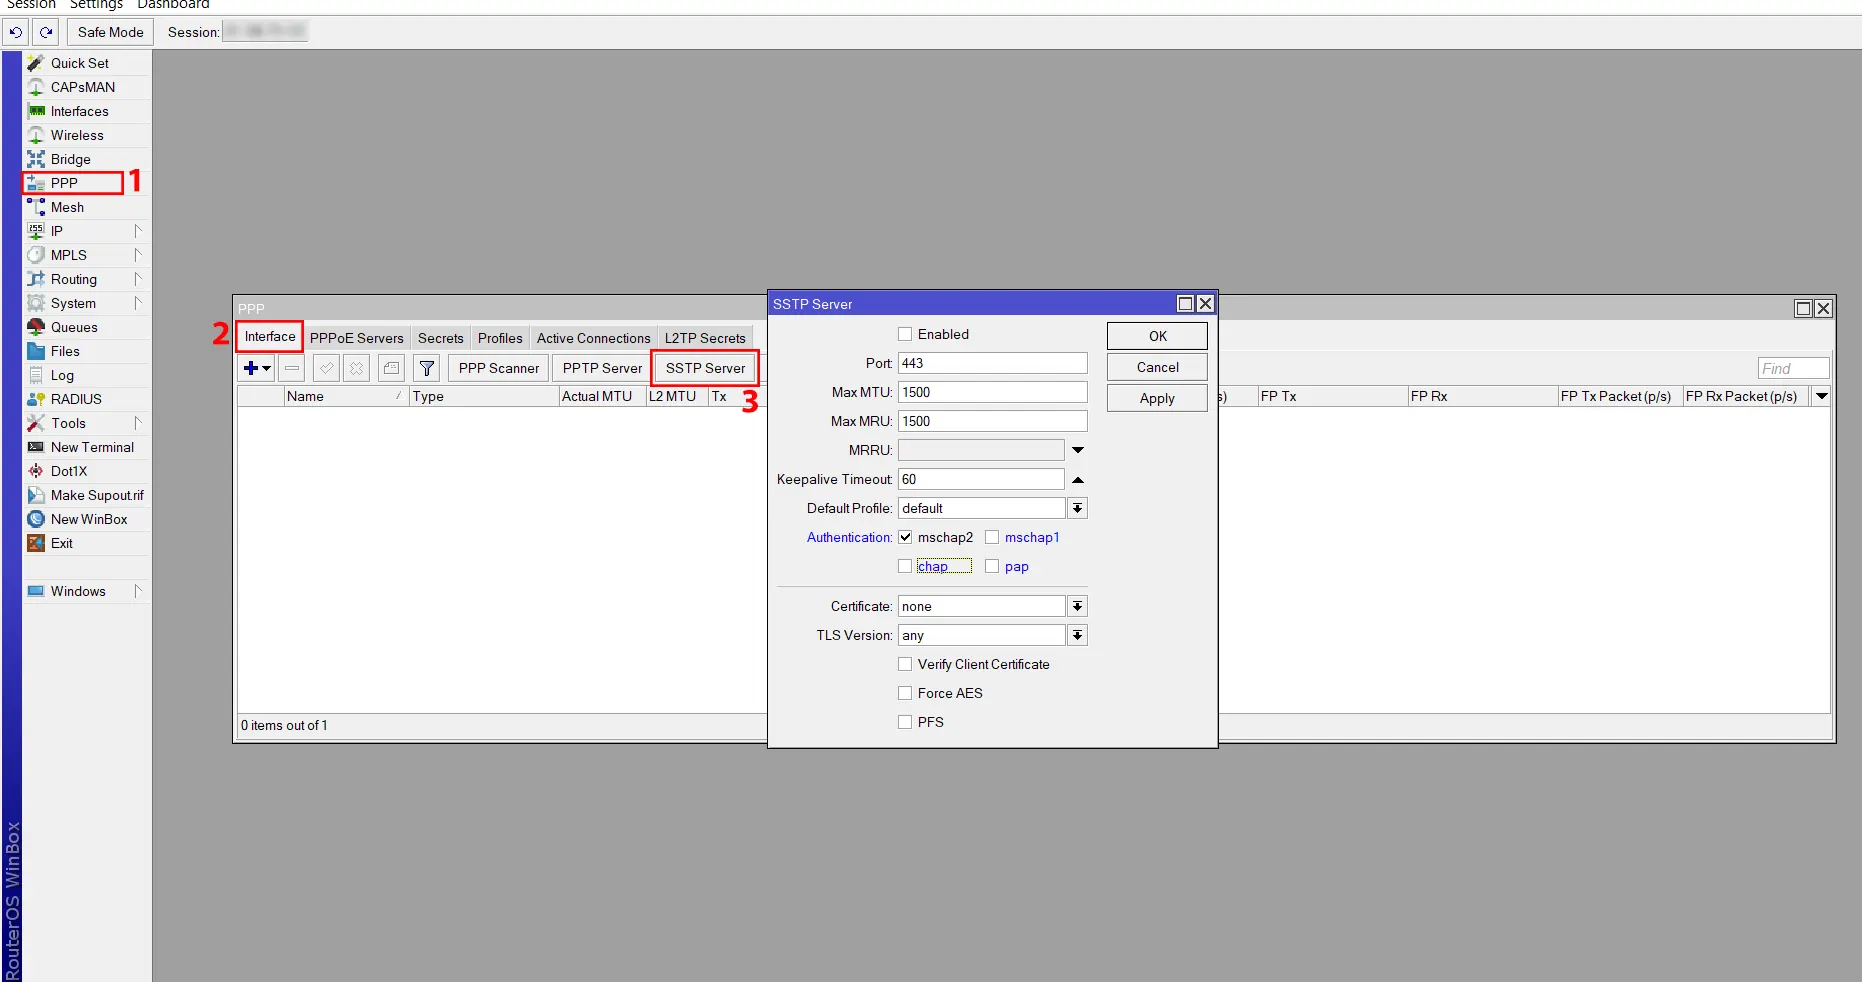
And in this field, do the following configuration:
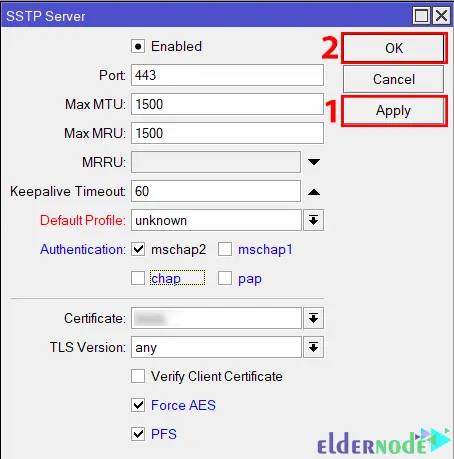
– Click on the Enabled checkbox to enable SSTP Server.
– Assign TCP Port 443 in the Port input field.
– Uncheck all checkboxes except the mschap2 checkbox from the Authentication.
– From the Certificate drop-down menu, select the server certificate created in the previous step.
– From the TLS version drop-down menu, select only-1.2. Any TLS version can also be selected.
– Click on the Force AES and PFS boxes.
Finally, click Apply and OK:
Now SSTP Server should be run in MikroTik Router.
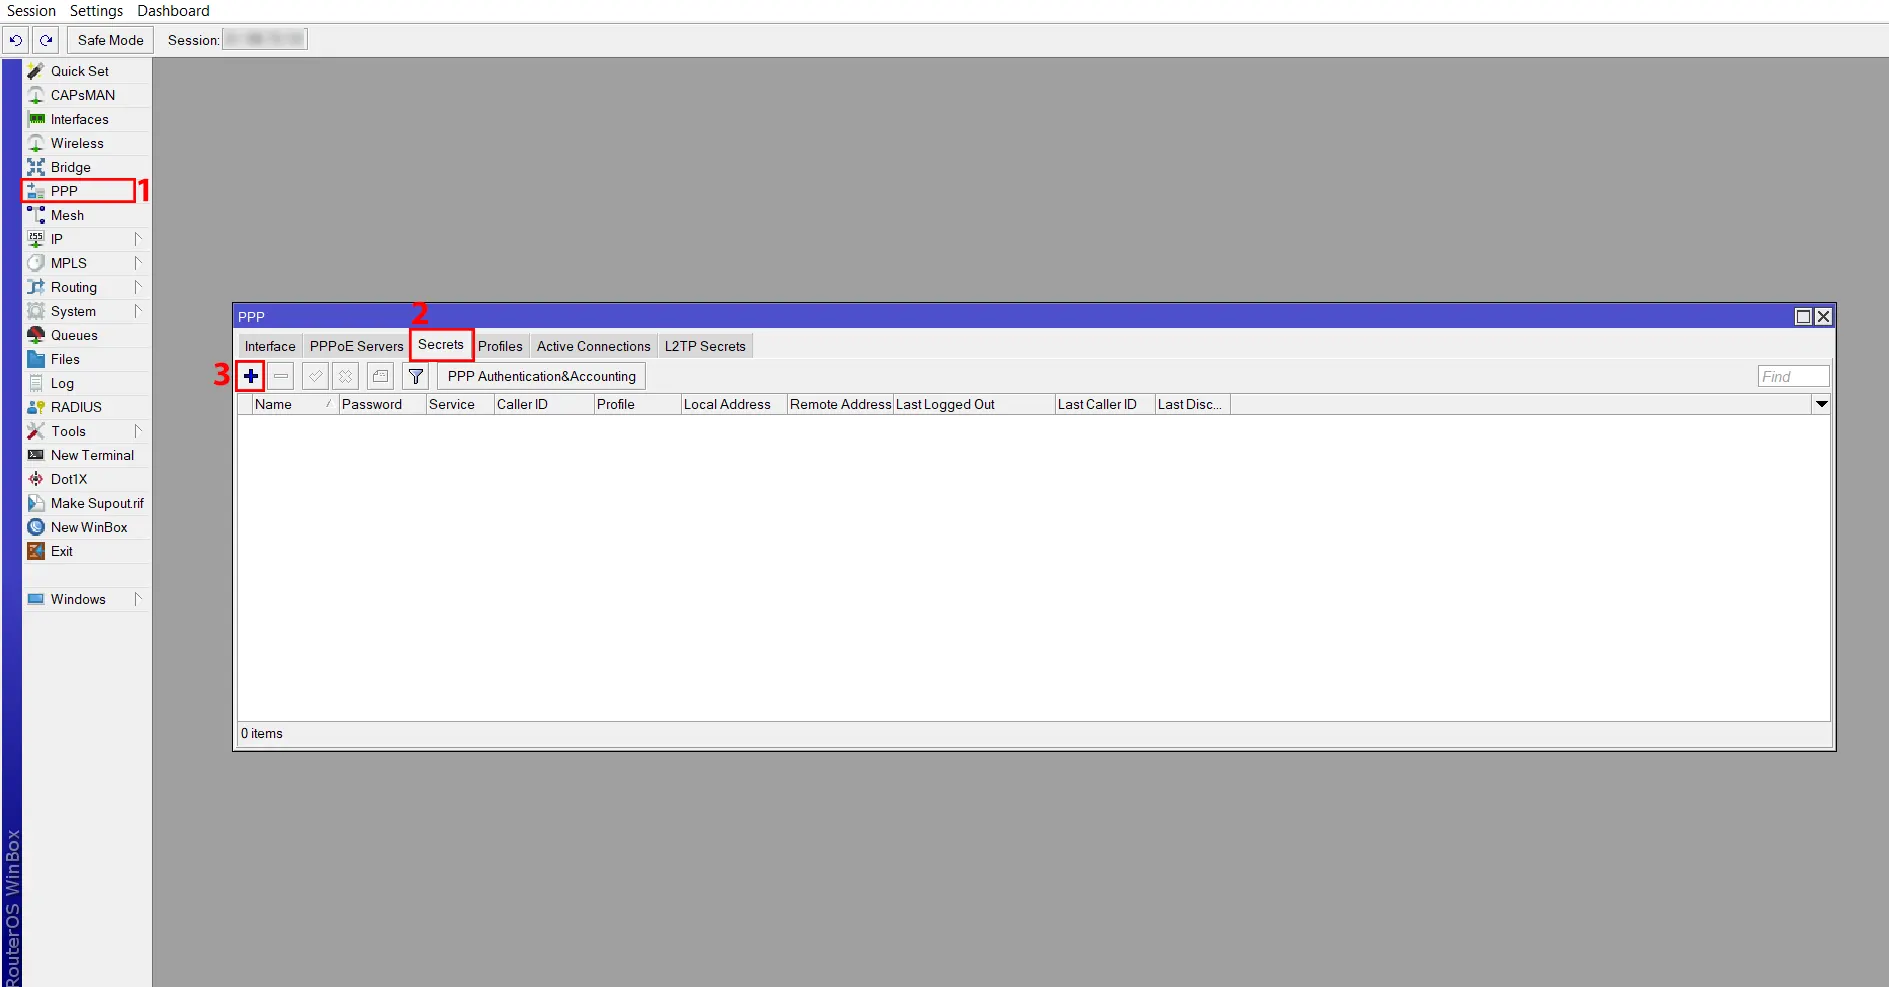
Create SSTP Users on MikroTik
In this step, you will learn how to create PPP users on MikroTik. Because MikroTik SSTP VPN is limited to using a username and password for a successful VPN connection.
First, go to PPP >> Secrets path and then click +:
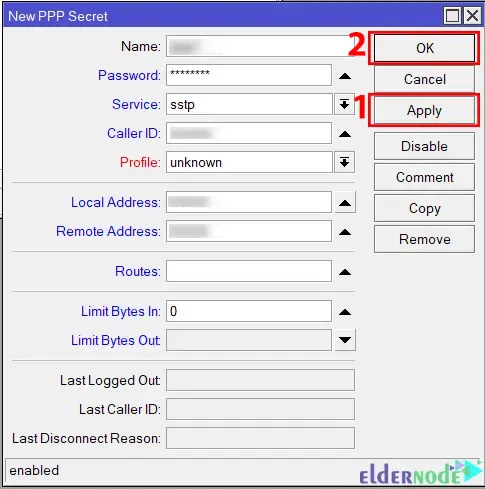
And fill in the following information:
– Enter your username and password in the username and password input fields.
– From the Service dropdown menu, choose SSTP.
– Enter VPN Gateway IP in the Local Address input field. Since the virtual interface is created where the Gateway IP is automatically assigned, you do not need to assign this Gateway IP on any interface.
– Enter the IP address that is assigned in the Home Router in the Remote Address input field. You don’t need to assign on any interface, because this address will be assigned automatically.
– In order for the Office Router to reach the Home Router network in the Routes input field, enter the static route that is assigned in the office router. If you do not assign routes here, you can statically put routes in the routing table to reach the Home Router network.
Finally, click Apply >> OK:
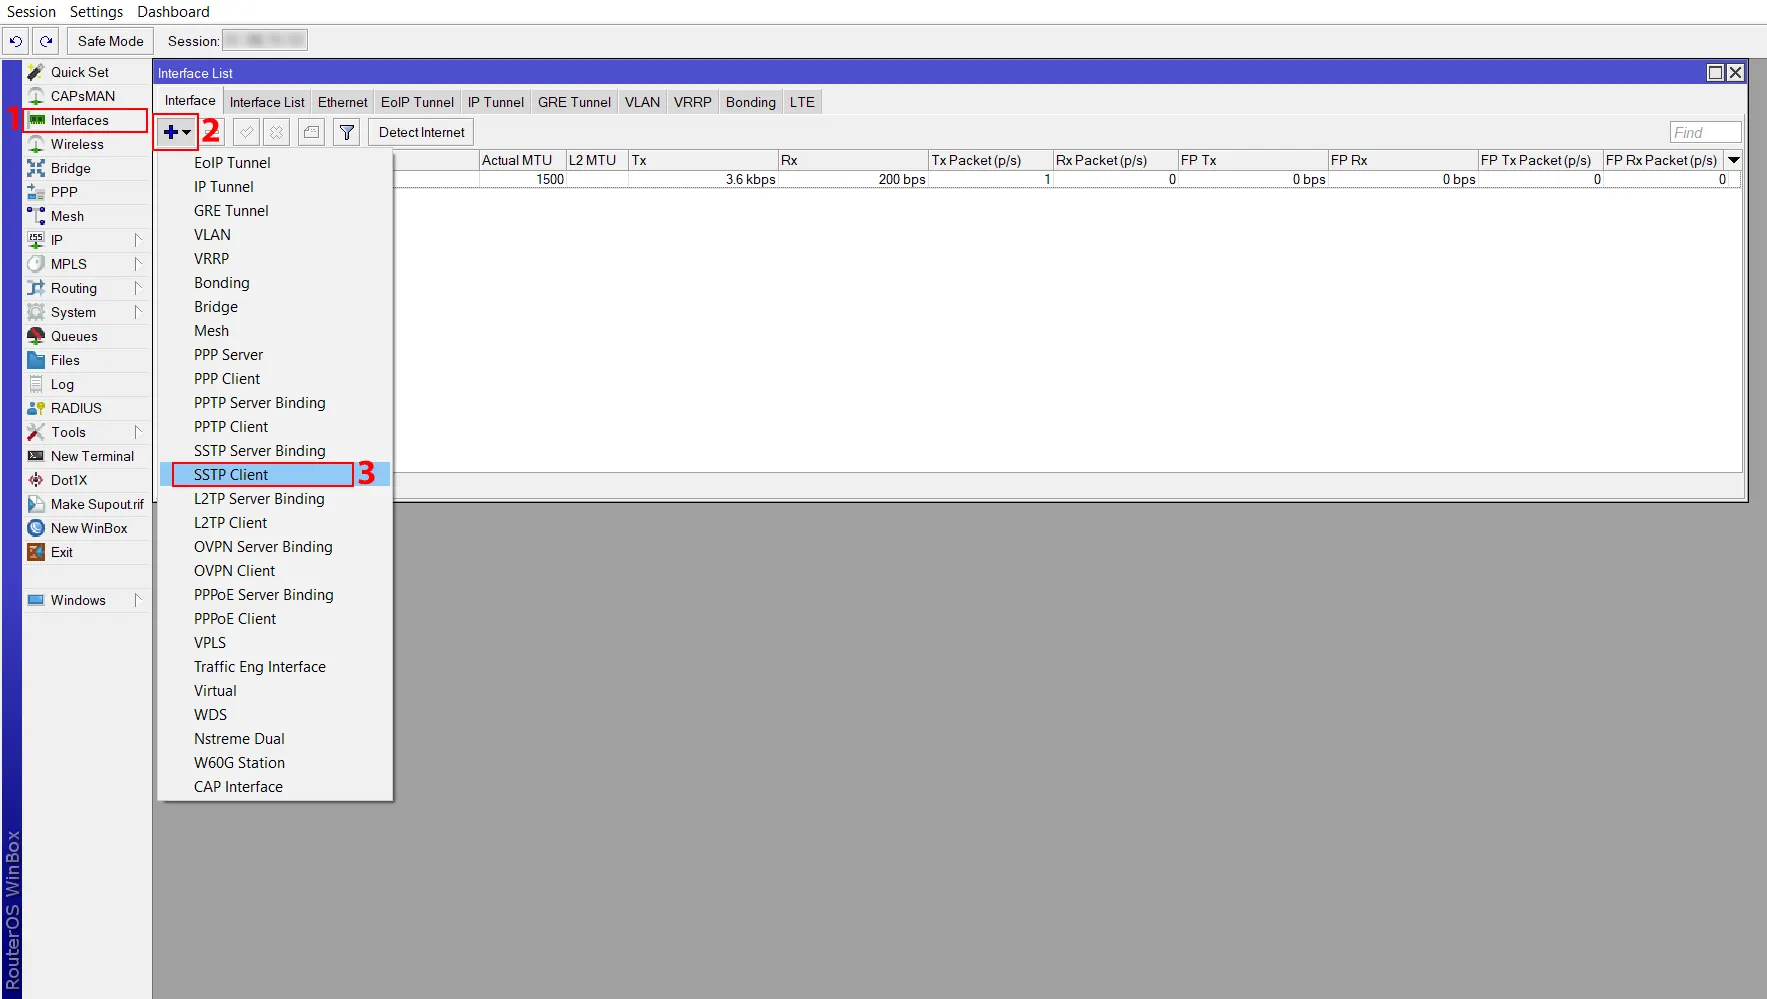
Configure SSTP VPN RouterOS Client
Firstly, go to the Interfaces menu item, click on the + drop-down menu, and choose the SSTP Client option:
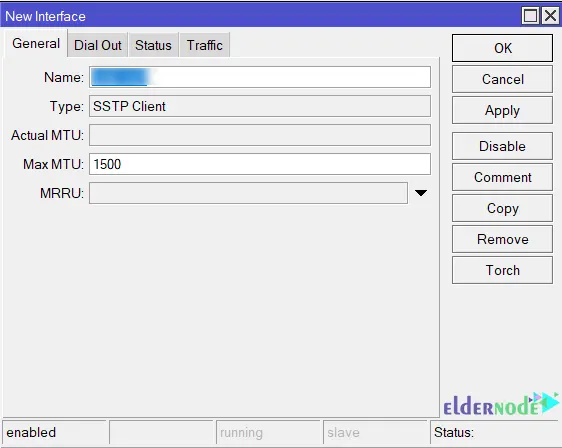
Head over to the General tab and plug in the client details. You don’t need to change much here unless you have a custom setup.
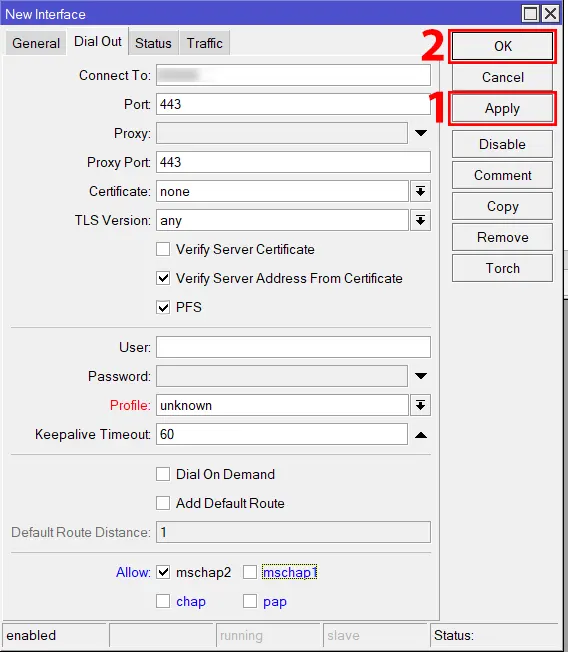
In the Dial Out tab, do the following configuration:
– Enter Office Router WAN IP in Connect To input field.
– Check the Verify Server Address from Certificate check box to verify the hostname.
– Check the PFS checkbox to ensure that a private encryption key is generated for each session.
– In the Name input field, enter the username you created in SSTP User and the password in the Password input field.
– From Allow protocol panel, uncheck all checkboxes except mschap2.
Lastly, click Apply >> OK:
That’s it! The SSTP tunnel is successfully established and Home RouterOS can now successfully access the office router network. You can find connected users from PPP >> Active Connection tab.
Common Issues When Setting Up SSTP on MikroTik
My certificate kept showing “Not Trusted”, turned out I forgot to tick the damn “Trusted” checkbox. Classic.
I couldn’t connect at first because my ISP had 443 blocked. Switched ports, still didn’t work. Ended up tethering off my phone just to test.
SSTP was technically connected, but I had no routes. Took me 10 minutes to realize I forgot to set Remote Address properly in PPP > Secrets.
Conclusion
That’s it now you know how to set up SSTP on your MikroTik router, including TLS certificates, user config, and client setup. Whether you’re running this on your own hardware or a MikroTik VPS, this setup should give you secure remote access in no time.
Got stuck somewhere? Drop a question in the comments and we’ll try to help out.
👉 Need a VPS that’s already optimized for MikroTik VPNs? Check out Eldernode’s MikroTik VPS plans.