Special Offer
 Reset Your Ubuntu Remote Desktop Password Quickly


You’re all set to start your day, you open your remote desktop… and then it hits you, you’ve forgotten your Ubuntu password. Ugh! It’s one of those forget Ubuntu Password moments that can really throw a wrench into your workflow. Whether you’re managing a cloud server miles away or a workstation across the office, being locked out is stressful, but don’t worry, you can fix it.
Linux actually gives you a few solid ways to get back in. If you’re staring at an “access denied” message from your remote desktop, take a deep breath. This guide will walk you through step by step how to regain access, secure your system, and get back to work without losing any data if you forget Ubuntu Password credentials.
Recognizing the Authentication Roadblock
Getting locked out of your remote session sucks. Usually, the system doesn’t make it easy, you might see an xrdp login failed error or get stuck in a loop where it just keeps rejecting your password. At the end of the day, it’s all about an authorization mismatch.
The good news? You can fix it without wiping out your data or messing with your configuration files. It’s easier than it sounds. We just need to fix the password safely.
How to Recover Your Ubuntu Login Remotely
So, you’re locked out of your Ubuntu machine, maybe a few miles away or even on another continent. The 1 thing everyone asks is: “How do I get back in without being there physically?” Luckily, there are a few best ways to reset your Linux password safely, depending on how your server was set up. Additionally, here’s what to do when you forget Ubuntu Password remotely.
Method 1: Reset Your Ubuntu Password via SSH
If you were smart enough to set up SSH keys beforehand, you’re in luck. SSH works independently of your remote desktop, so it’s often the fastest way back.
Open your server terminal and connect via SSH using your key:
ssh -i /path/to/private_key username@server_ip
Got sudo access? Great, become root:
sudo su
Time to change your password:
passwd your_username
Enter the new password twice, and you’re good to go.
If you don’t have sudo access either, don’t panic, you’ll need to use cloud-level tools or physical recovery methods, which we’ll cover next.
Method 2: Cloud Instance Serial Console
For VPS users on platforms like Eldernode, AWS, Google Cloud, or Azure, there’s a neat trick: you can bypass the network interfaces entirely. Most cloud providers let you open a serial console through their dashboard.
This basically gives you “physical” access to your virtual machine. From here, you can reboot, interrupt the boot sequence, and follow the GRUB recovery steps we’ll explain in the next section.
Regaining Access via Local or Console Recovery
If SSH isn’t an option and you can either touch the machine physically or access it through your hypervisor’s console, don’t worry, the GRUB bootloader is your safety net.
Boot into GRUB Recovery Mode
Here’s what to do:
Reboot your machine. As it starts up, hold down Shift (or tap Esc repeatedly on UEFI systems) to bring up the GRUB menu.
Select Advanced Options using the arrow keys and press Enter.
Pick Recovery Mode, choose the kernel that ends with (recovery mode).
Drop to Root Shell, scroll down to root – Drop to root shell prompt and hit Enter.
At this point, you’ve got root access, but the filesystem is read-only. If you try to change your password now, it won’t work. First, make the system writable:
mount -o remount,rw /
Then, reset your password:
passwd your_username
Behind the scenes, this safely updates the system’s password file. When you’re done, type:
reboot
And just like that, you’re back in your remote desktop environment. Easy, right? Therefore, as you can see, even if you forget Ubuntu Password steps, there is always a recovery method.
Post-Recovery Housekeeping
Resetting your password gets you back into Ubuntu, but if you’re using a graphical desktop like GNOME, there’s one more thing to take care of your keyring.
Fixing the GNOME Keyring
If you’re on GNOME, you’ll probably start seeing pop-ups asking for a keyring password. That’s because you changed your login password outside the desktop, so the keyring is still locked with the old one.
Here’s the easy way to fix it:
Open your Applications Menu and search for Passwords and Keys (aka Seahorse).
In the left sidebar, under Passwords, right-click Login.
Choose Change Password.
Now, since you don’t remember the old password, the simplest solution is to delete the old keyring and create a new one:
Right-click Login → Delete
Log out and back in
Boom! GNOME will automatically create a new keyring, synced with your new system password. No more annoying pop-ups.
VNC vs XRDP Passwords
Here’s the deal, knowing how your remote desktop handles passwords can save you a ton of headaches later. In short, issues can be even more daunting if you forget Ubuntu Password when running multiple remote protocols.
XRDP: Easy peasy. It talks straight to Ubuntu, so when you change your system password, XRDP just gets it. Done.
VNC: Ah, this one’s a bit sneaky. VNC often keeps its own password file at ~/.vnc/passwd. Changing your Ubuntu password alone won’t help, you’ll still be locked out until you run vncpasswd to reset it.
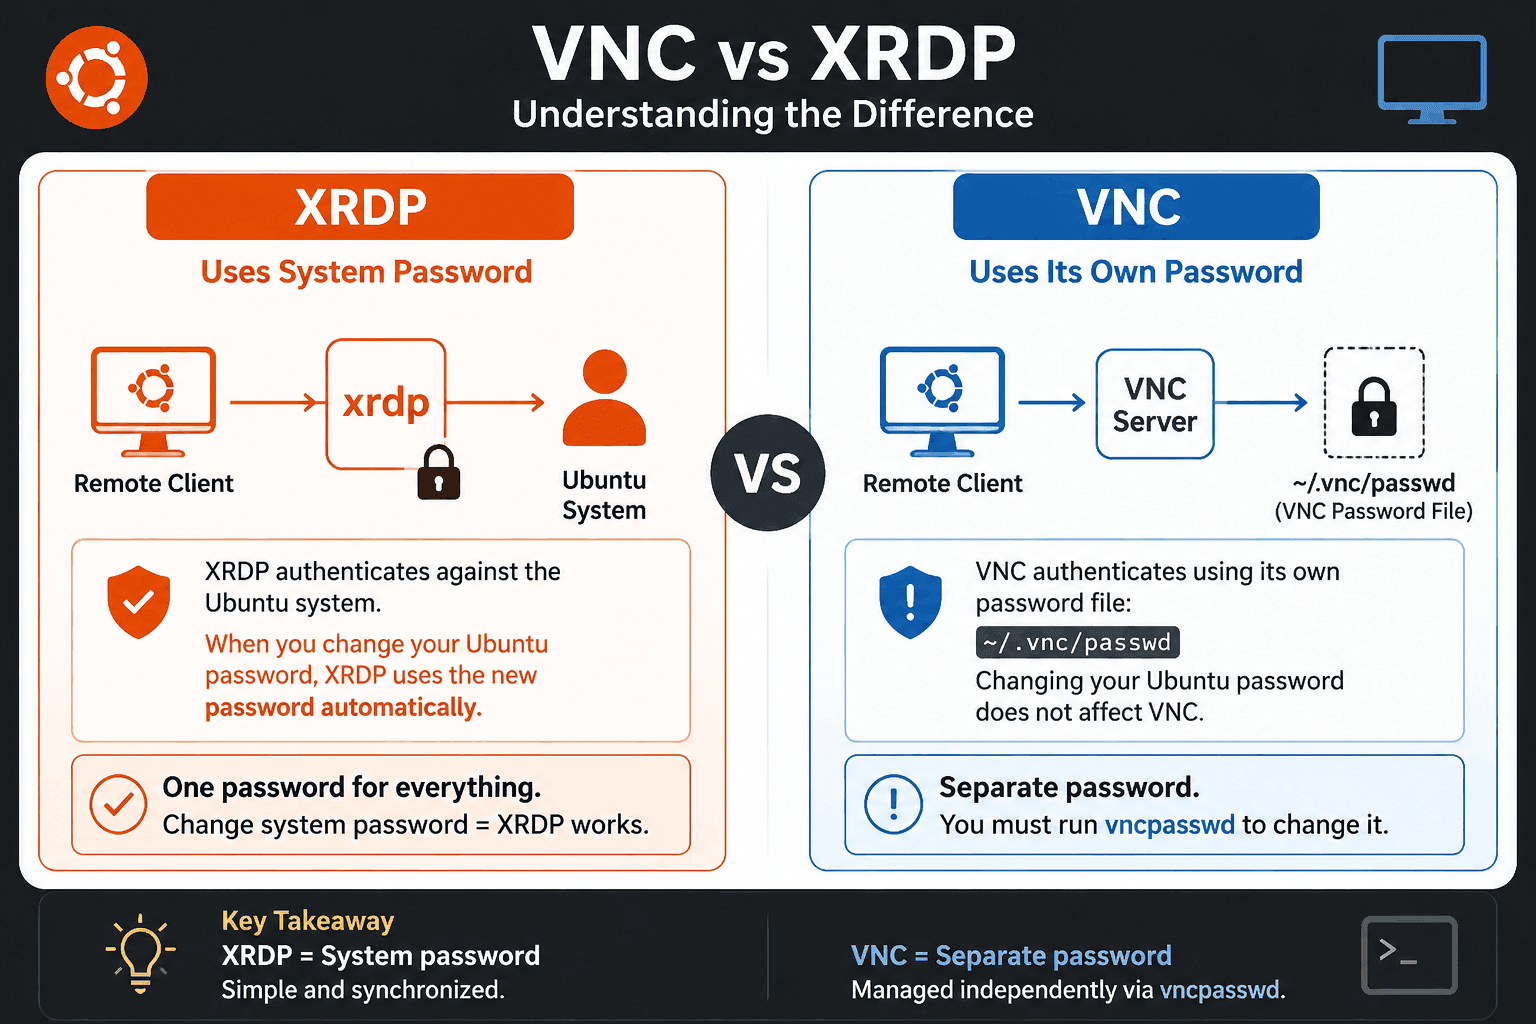
Basically: XRDP listens to the system, VNC does its own thing. Keep that in mind and you won’t get surprised later.
Preventing Future Lockouts
Okay, now that you’re back in, let’s make sure this doesn’t happen again. Nobody likes scrambling to reset a forgotten Ubuntu password in the middle of the day.
One of the easiest ways to avoid it is to use key-based authentication for all your remote admin tasks. Many sysadmins don’t even bother with the login screen anymore, they tunnel VNC or other graphical sessions through secure SSH connections using cryptographic keys. Not only does this save you from remembering tricky passwords, it also keeps hackers out.
Getting locked out is annoying and stressful, but Linux makes recovery possible. Whether you go through SSH, a cloud console, or GRUB, you now know exactly what to do to regain access and keep your system secure.