Special Offer



How to Change Mods in a Minecraft Server
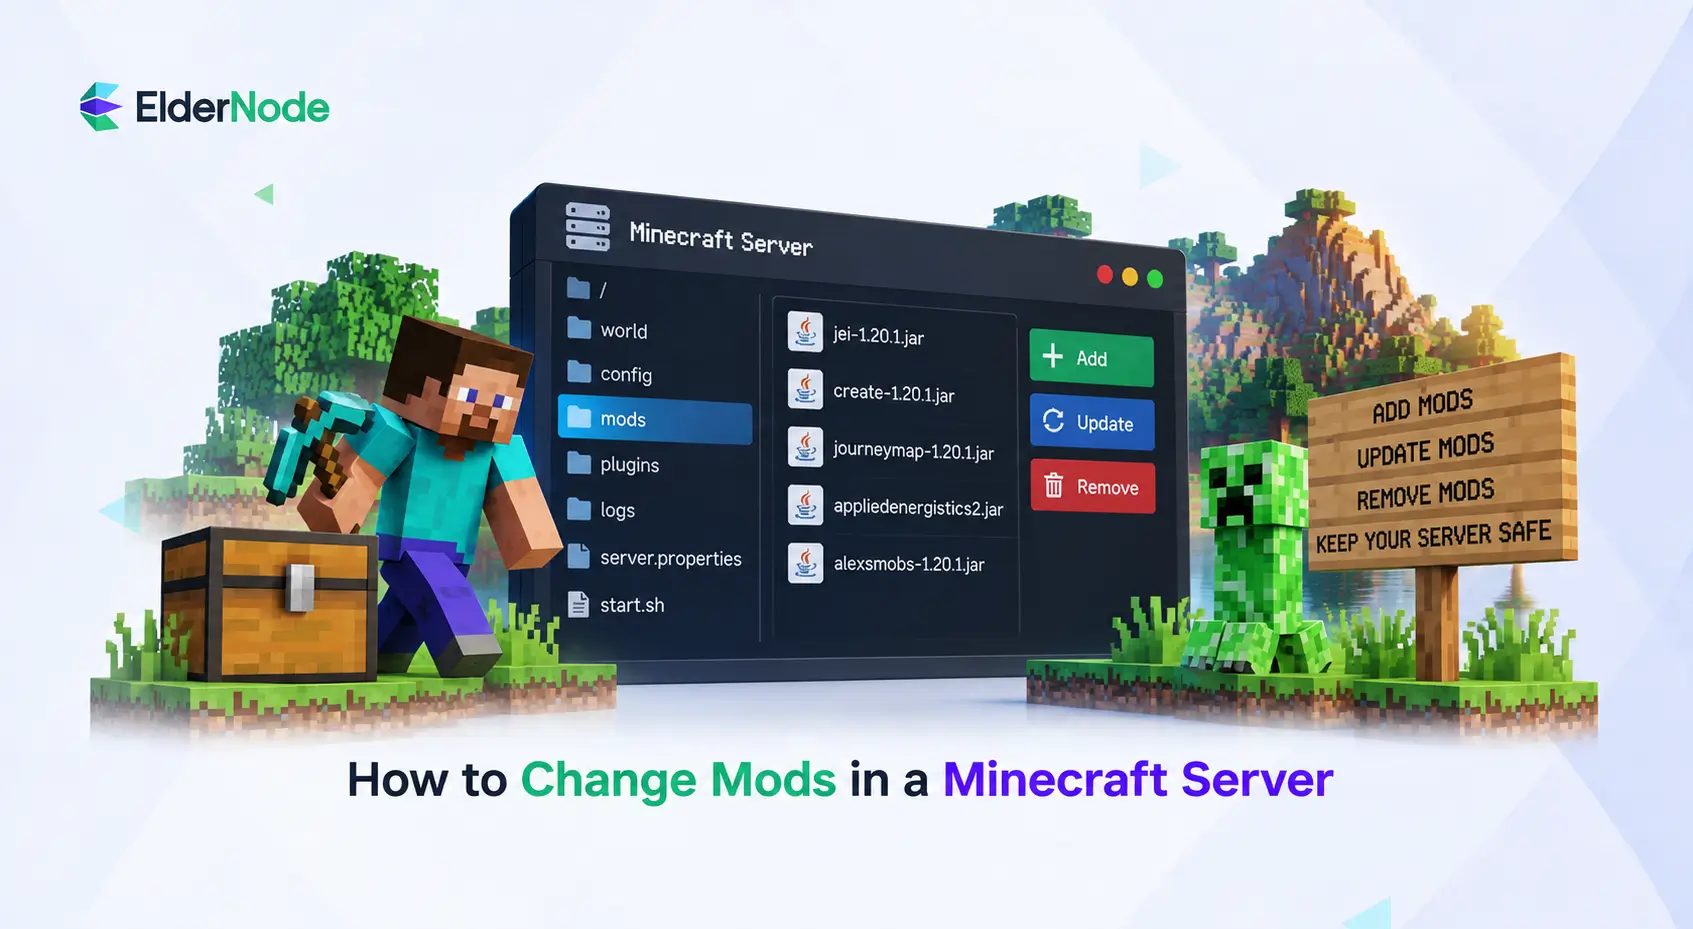



Changing mods on a Minecraft server sounds like a big job, but it really comes down to adding, removing, updating, or swapping a few files. The only catch is that you need to take it slow. A rushed change can corrupt your world or leave your players unable to join. In this guide, I’ll walk you through the steps, explain how server mods differ from plugins, and point out the mistakes that trip up most people.
What should you do before changing server mods?
Before you touch a single mod, do four things: back up your world, check your server version, make sure the mods you want actually work together, and shut the server down completely. Mods can change blocks, items, mobs, dimensions, recipes, and even player data, so skipping the prep can leave you with missing content, crashes, or corrupted chunks.
Start the server, and don’t close that console:
- Back up everything. Copy your world folder, your config files, and your current mods folder somewhere safe.
- Check your Minecraft version. Most mods are built for one specific version, so a mod that works on 1.20 won’t necessarily work on 1.21.
- Match the mod loader. Forge, Fabric, Quilt, and the rest all work differently, so every mod needs to fit the loader your server runs on.
- Look for dependencies. Plenty of mods need a library or API mod installed alongside them, and they won’t start without it.
- Warn your players. If people join regularly, tell them when the server will be down and whether they’ll need to update their own mod packs.
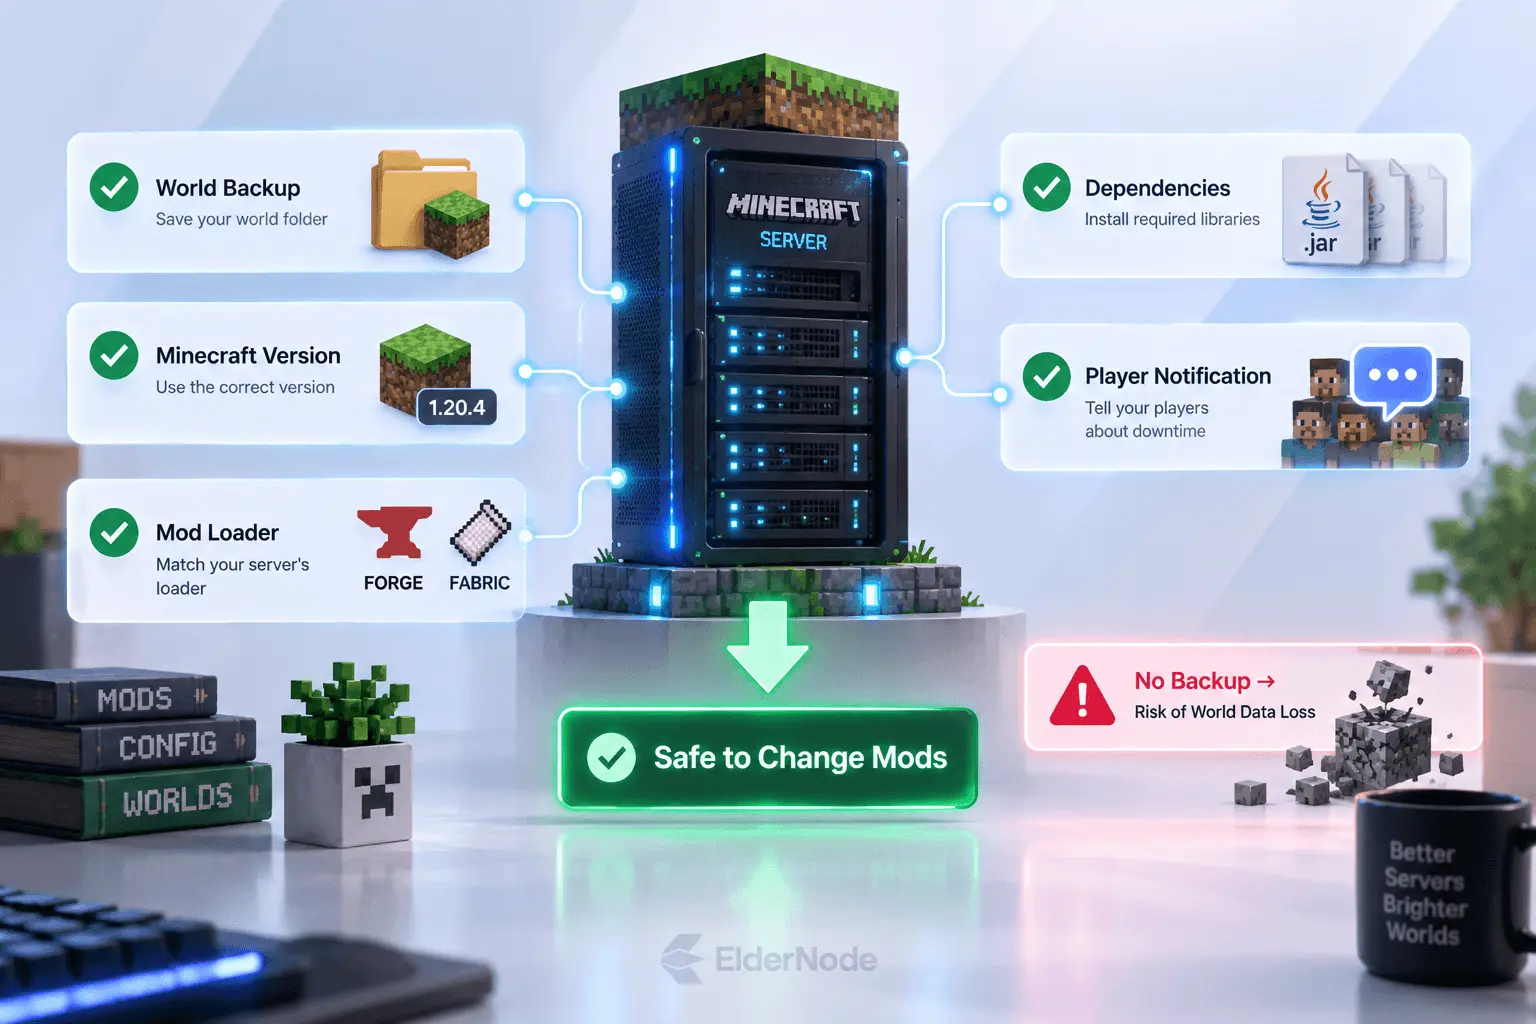
If your server runs through a hosting control panel, check for a built-in backup tool before you go digging through files. If you host it yourself, just copy the whole server directory to another location. What matters is having a clean restore point you can fall back on if something goes wrong.
Mods vs. plugins: which one are you dealing with?
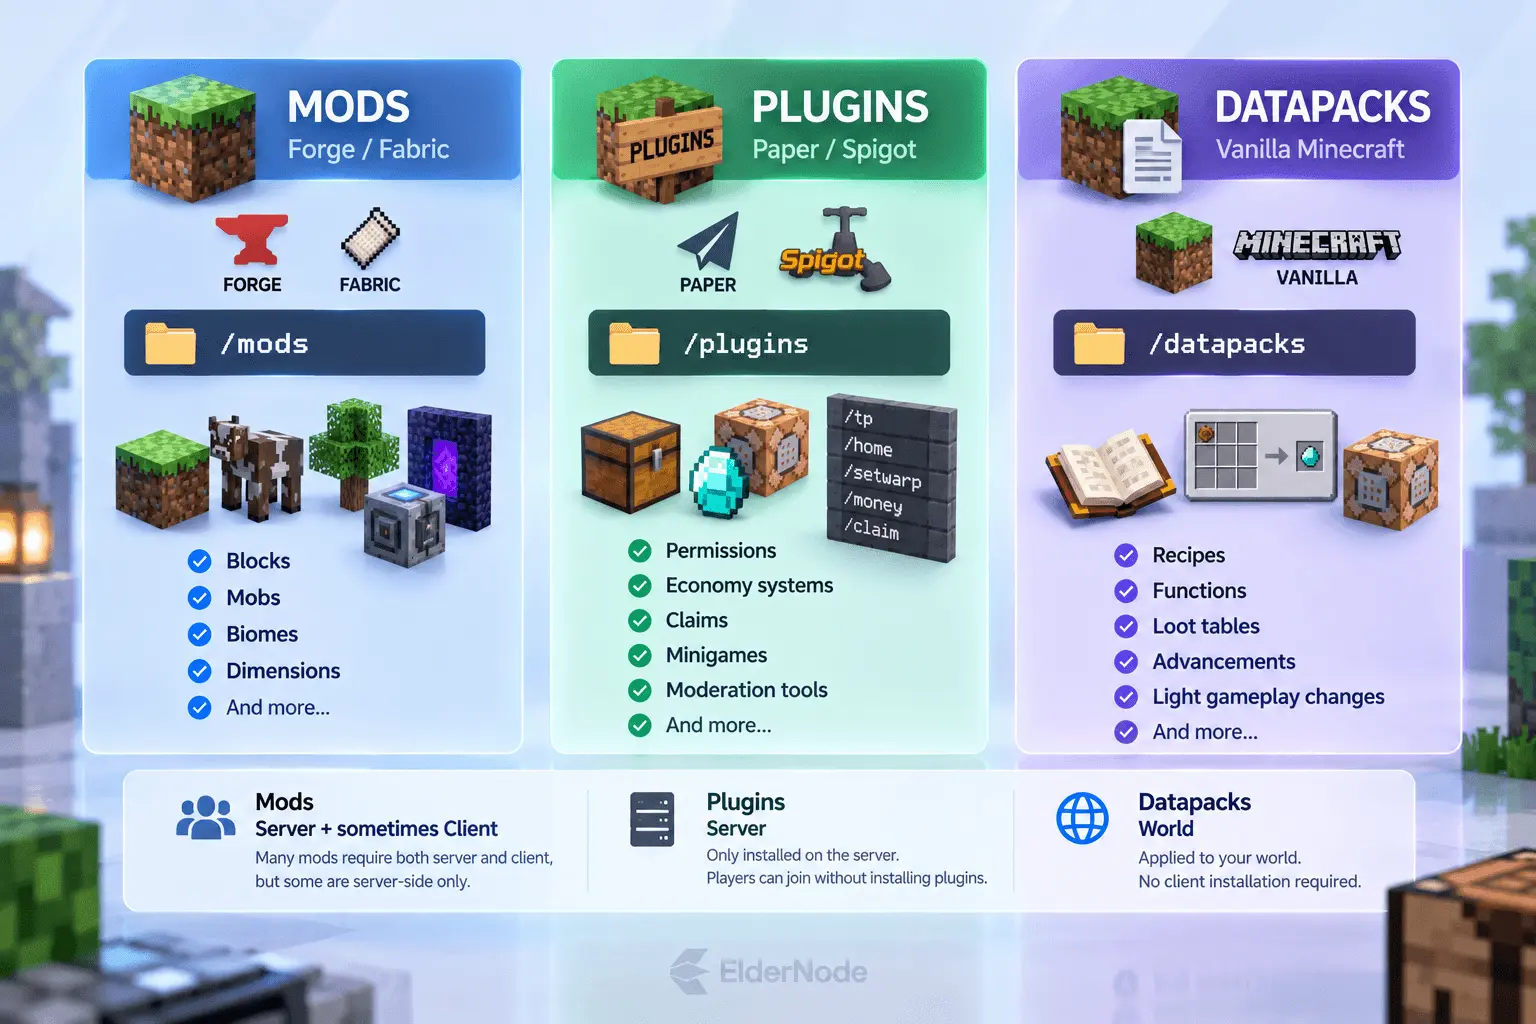
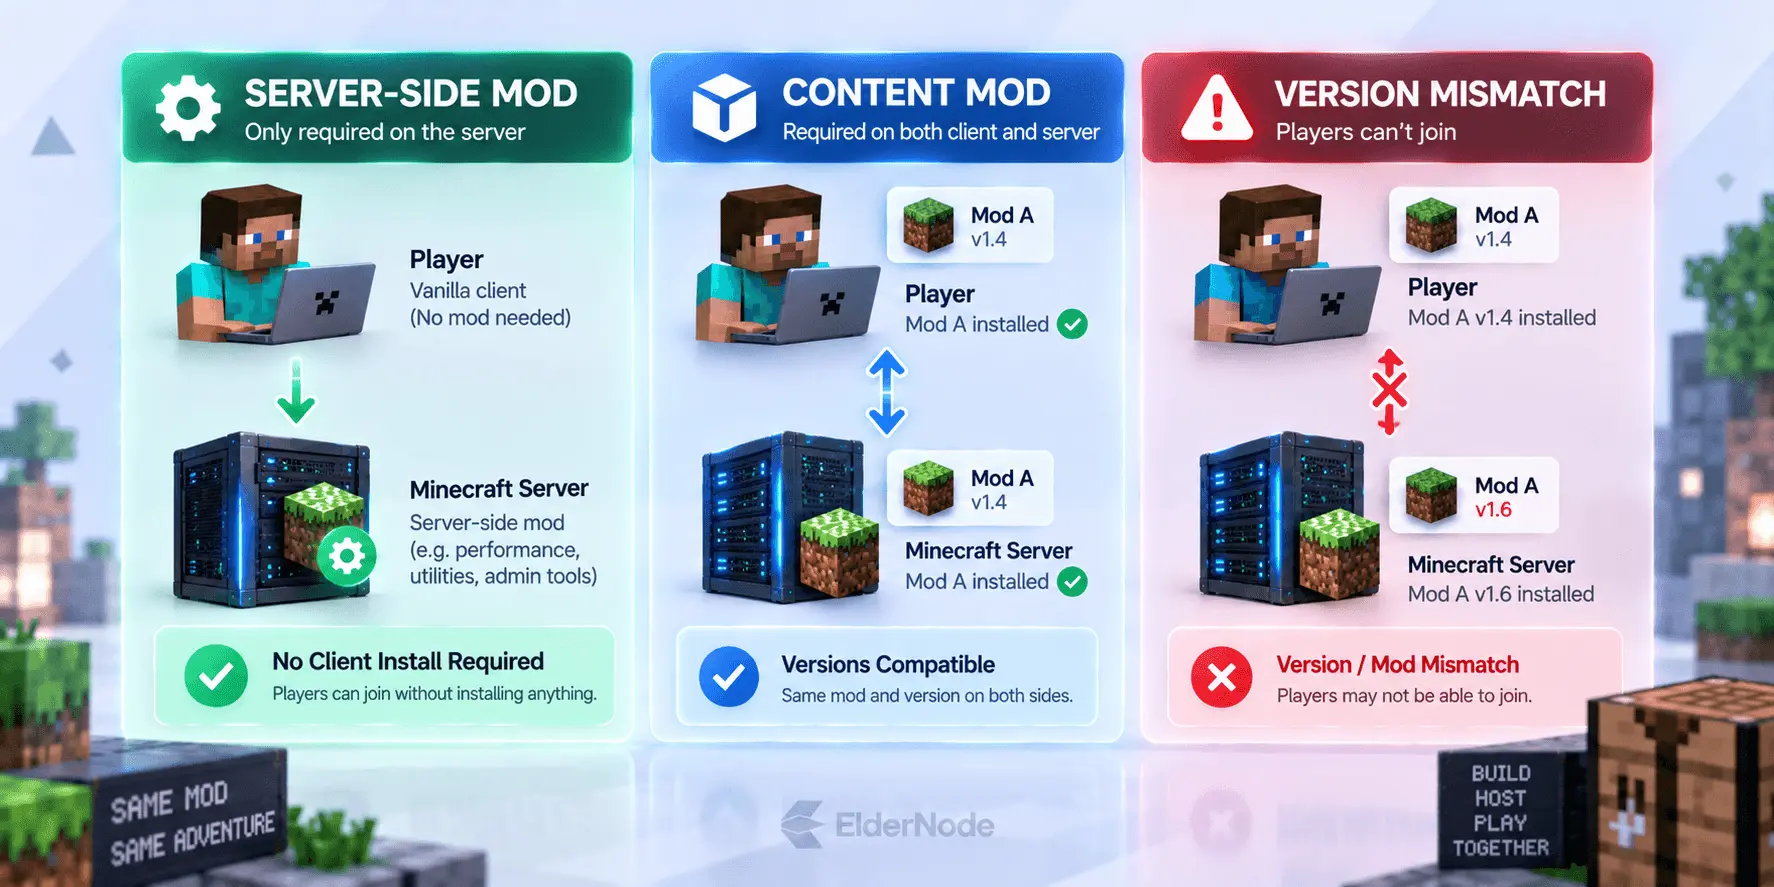
Mods and plugins get mixed up all the time, but they’re not the same thing. A mod changes the game itself, so your players need the same mods installed on their end before they can join. A plugin lives on the server (think Spigot or Paper), and players can just connect and use it without installing anything.
This distinction matters because the installation process depends on what your server is running. A Forge or Fabric server typically uses a mods folder. A plugin-based server typically uses a plugins folder. Putting the wrong file in the wrong place will not give you the result you want, and in many cases the server may fail to load it.
Think of it this way:
- Use mods when you want new blocks, biomes, mobs, machines, dimensions, or deep gameplay changes.
- Use plugins when you want permissions, economy systems, claims, minigames, moderation tools, or server management features.
- Use datapacks when you want lighter gameplay changes that fit within Minecraft’s built-in systems.
How to change mods on a Minecraft server, step by step
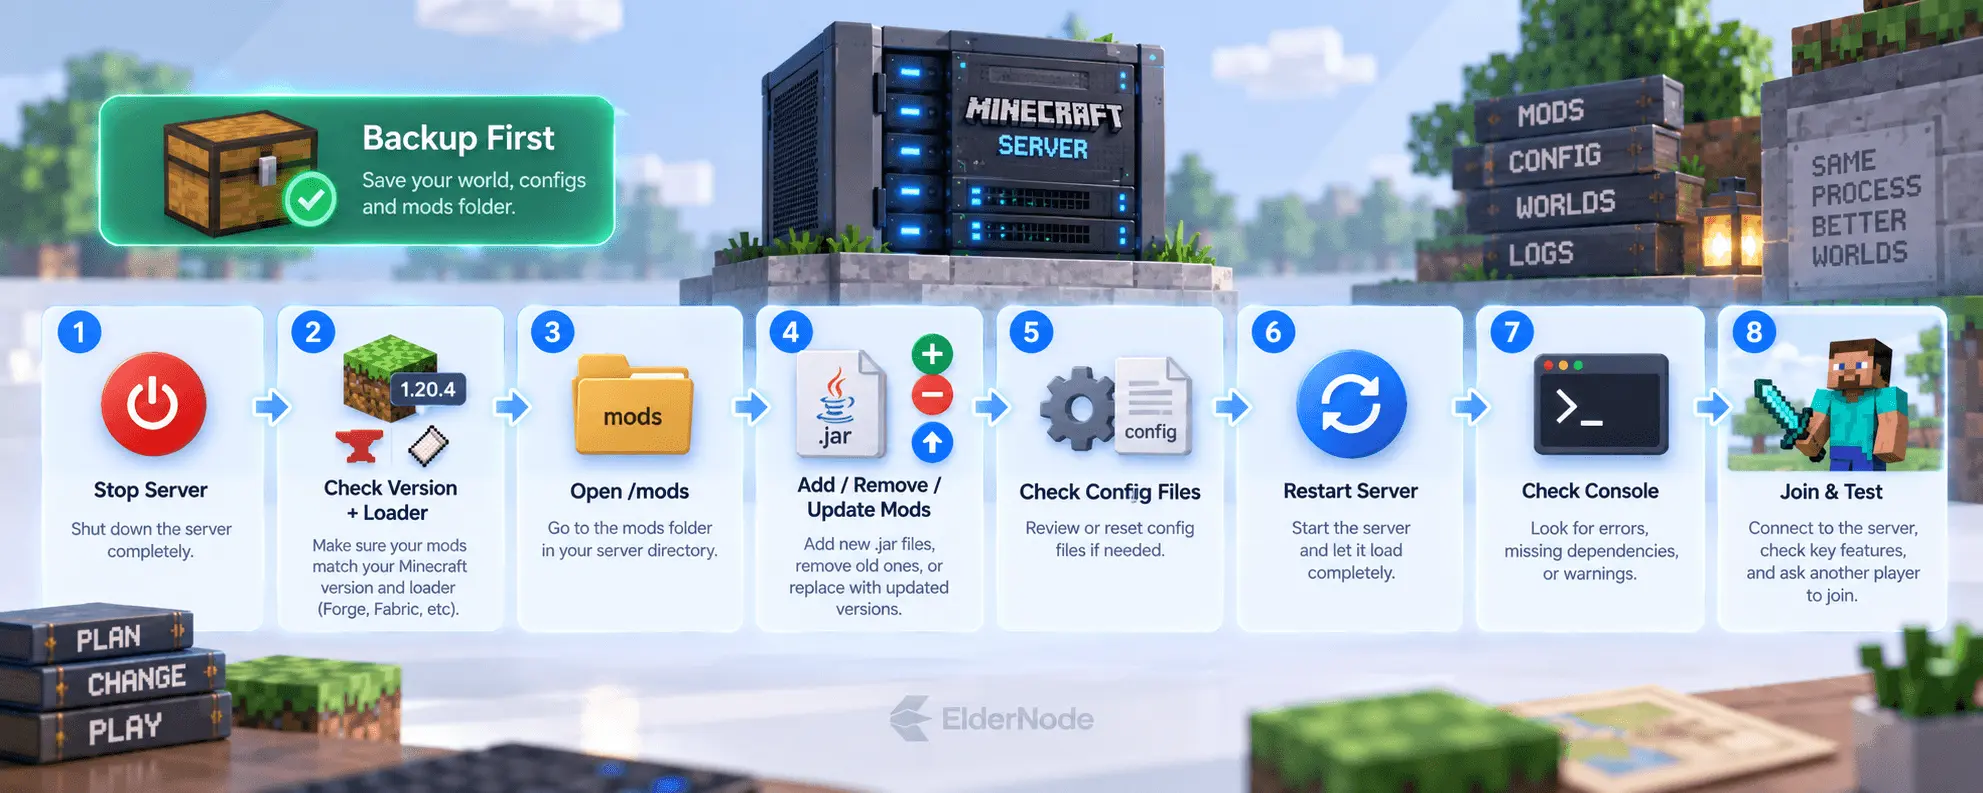
The process is simple: stop the server, swap the files in the mods folder, check your configs, then restart and test. The buttons look a little different from host to host, but the workflow is the same almost everywhere.
1. Shut the server down completely
Never change mod files while the server is running. It may be reading or writing data at that moment, and swapping files mid-process is a good way to cause errors. Hit the stop button in your hosting panel, or type the stop command if you run the server yourself. Then wait for the console to confirm it’s fully off. Killing the process should be your last resort, since it can interrupt saving.
2. Download mods that actually fit your server
Match the mod to your Minecraft version and your loader. If your server runs Fabric, grab the Fabric build. If it runs Forge, grab the Forge one. Check the mod’s page for required dependencies too.
Also watch out for client-only mods, like ones that change graphics or menus. They don’t belong on the server. Some mods only need to be on the server, but most content-heavy ones have to be installed by every player as well.
3. Open the mods folder
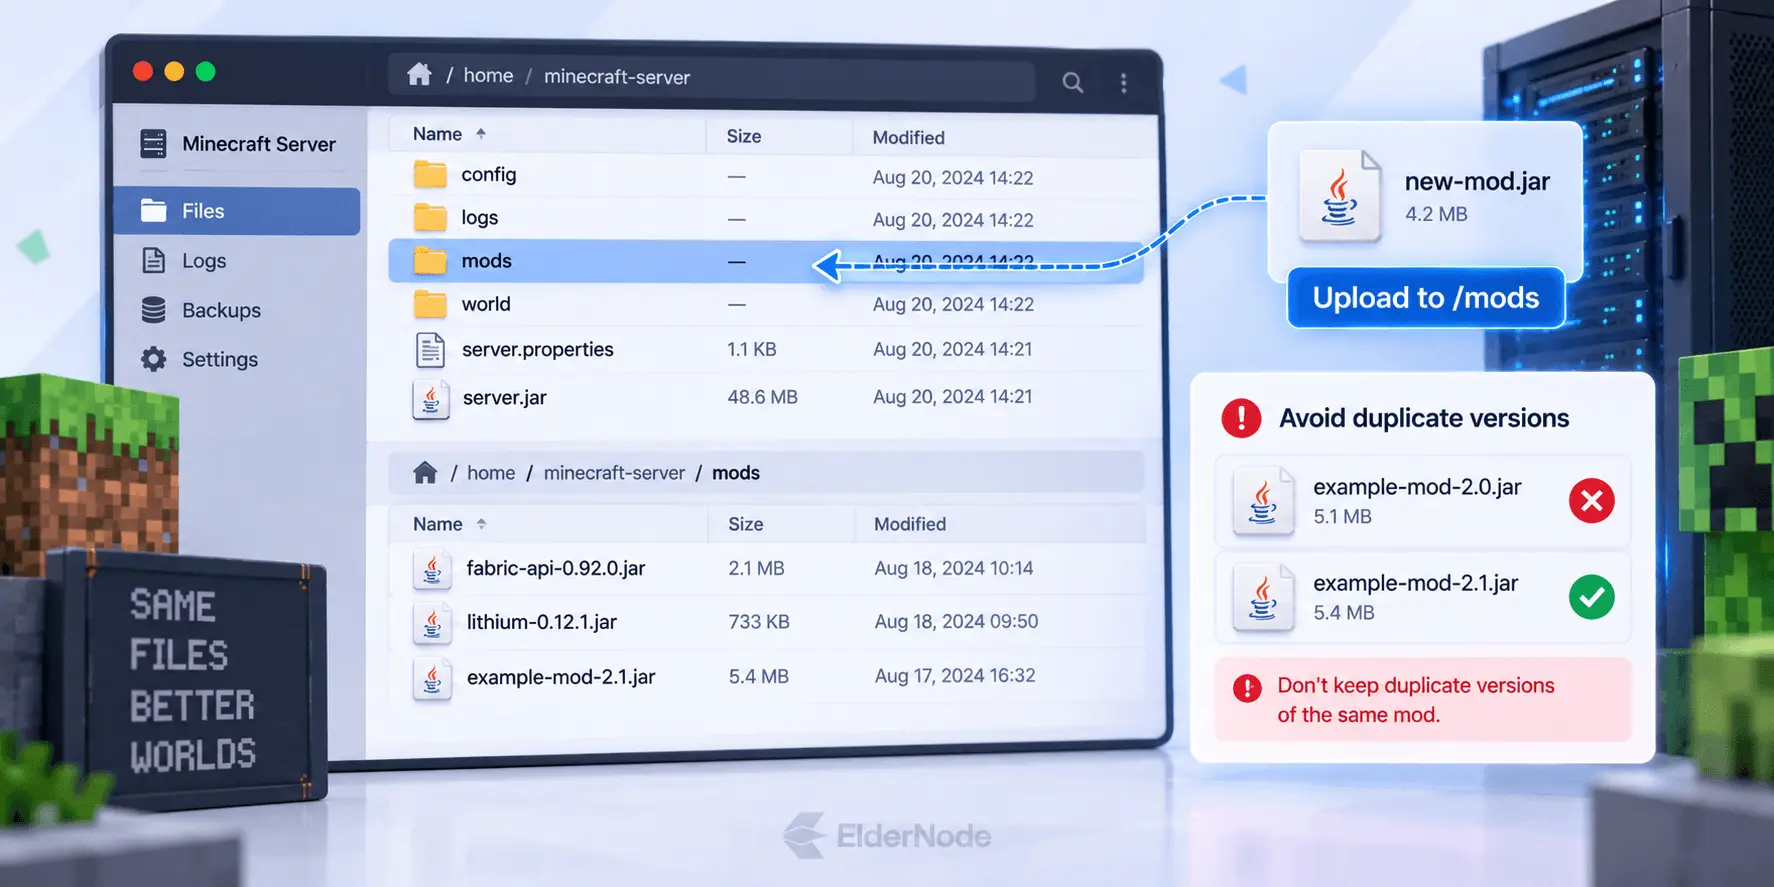
It’s called mods and sits in your main server directory. On a hosting provider, you’ll usually find it through the file manager or FTP. If you run the server locally, it’s right there in the server folder.
4. Add, remove, or replace mods
Drop new .jar files in, delete the ones you don’t want, or replace old versions with updated ones. Don’t leave two versions of the same mod in the folder, because the server might load the wrong one or crash.
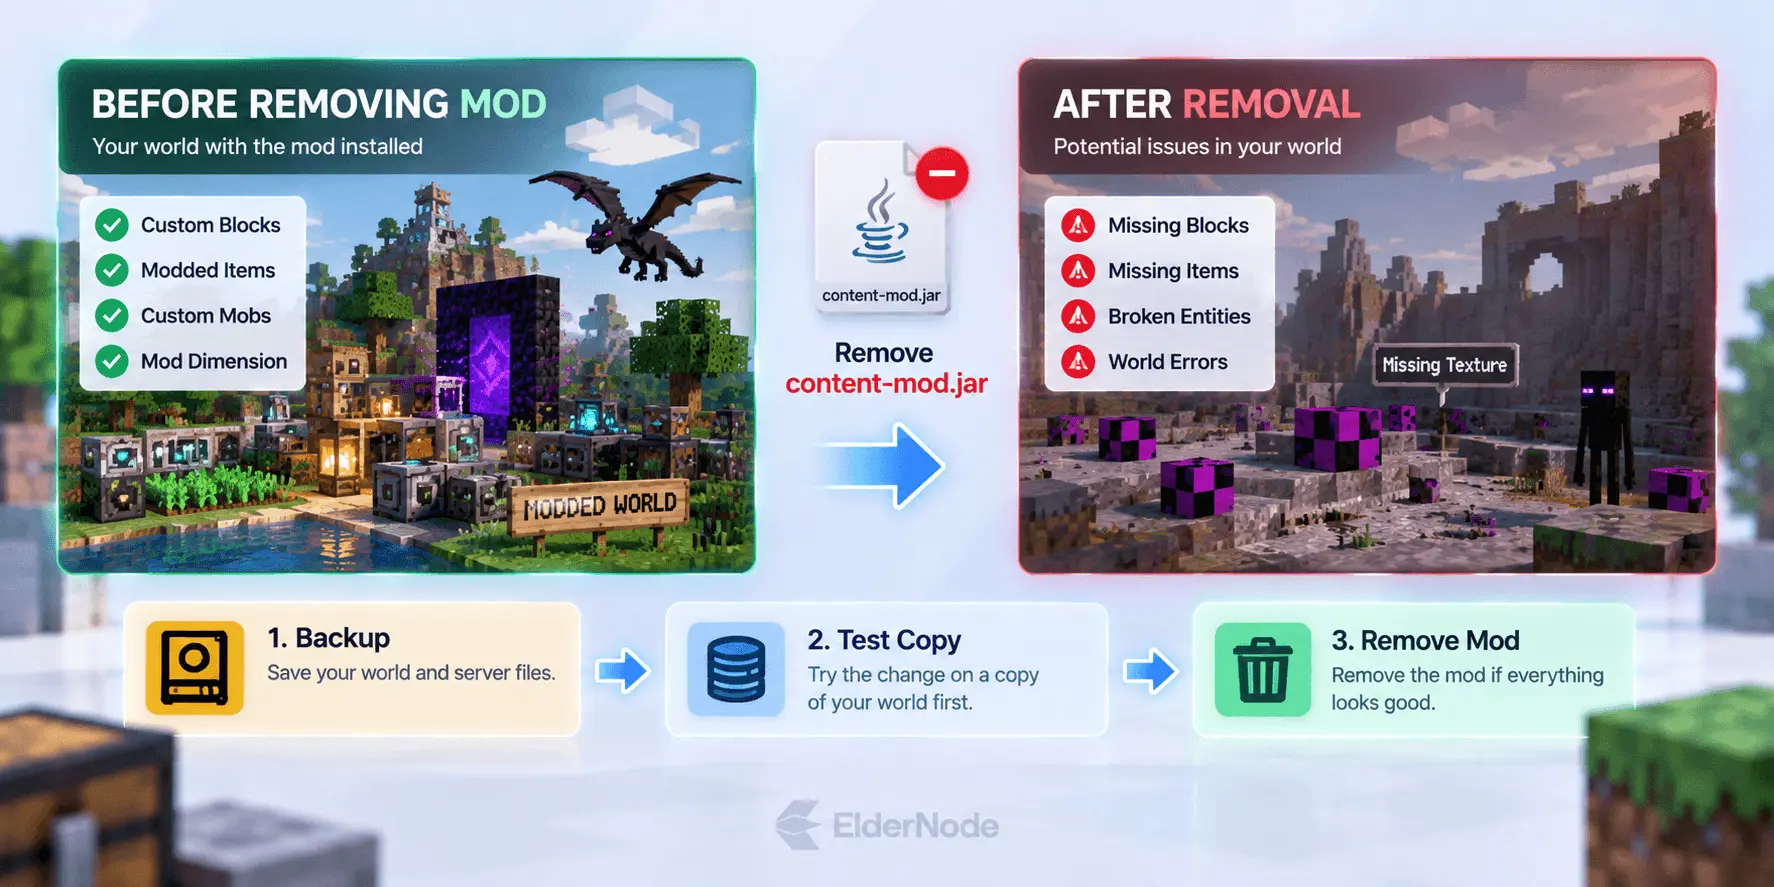
Before you remove a mod, think about what it added to your world. If it created blocks, items, dimensions, or mobs, taking it out can break or wipe anything tied to them. For big removals, try it on a copy of your world first.
5. Check your config files
Many mods generate config files after their first launch, controlling things like spawn rates, world generation, or performance. Old configs usually stick around after an update, but settings can change between versions. If the server crashes after an update, try moving that mod’s config file out of the folder and see if the problem goes away. Just keep a backup before you delete anything.
6. Restart and test
Boot the server back up and keep an eye on the console. Warnings aren’t always a problem, but repeated errors, missing dependencies, or crash reports mean you need to stop and look. Then join the server, try out the key features, and ask another player to connect if the change affects clients.
Common problems after changing mods
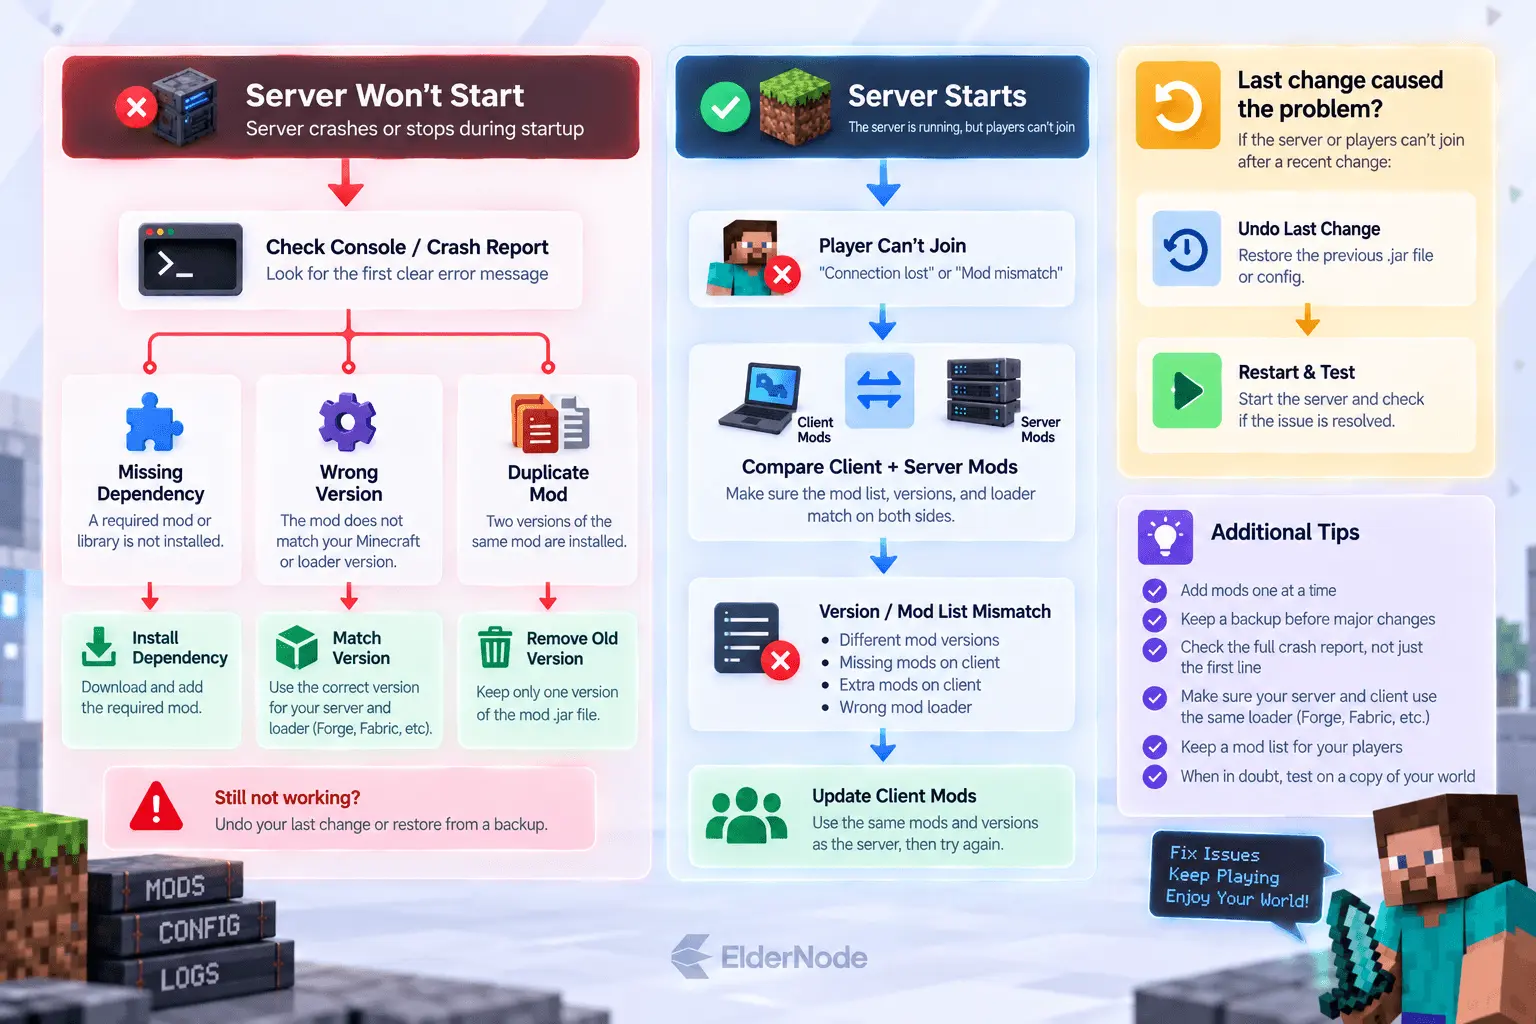
Stop mashing restart. Open the console or crash report and find the first error. Everything else is usually just background noise.
It’s usually one of these:
- You forgot a dependency. The mod needs a library or API mod, and it’s not installed.
- Wrong version. The mod was made for a different Minecraft version or loader.
- Double trouble. Two versions of the same mod are sitting in the folder.
- Players are out of sync. Their mod list doesn’t match yours.
- You deleted a mod, but the world still has its blocks and items.
- Wrong folder. A plugin in mods, or a mod in plugins. It happens to everyone.
Still stuck? Undo your last change and try again. And next time, add mods one at a time. That way, when something breaks, you already know who did it.
Oh, and keep a simple mod list for your players, with the game version, the loader, and the required files. It’ll save you from a lot of “why can’t I join?” messages.
Conclusion
Back up your world before you touch anything. Make sure every mod matches your Minecraft version and loader. Then test the server yourself before you let players back in.