Special Offer
 How to Fix VirtualBox Network Issues on Kali Linux


Having trouble getting Kali Linux to connect to the internet in VirtualBox? You’re not alone. VirtualBox offers multiple ways to set up networking for your virtual machines, but sometimes things don’t work as expected. In this guide, I’ll walk you through practical steps to troubleshoot and Fix VirtualBox Network Issues on Kali Linux, quickly and clearly.
And if you’re planning to run Linux servers with full control, you might also want to check out the Linux VPS packages available on Eldernode.
How to Troubleshoot VirtualBox Network Connection on Kali Linux
Ever set up Kali Linux in VirtualBox and found it just won’t connect to the network? Yeah, that happens a lot. I’ve been there too. Luckily, most network hiccups are easy to fix once you know where to look when trying to Fix VirtualBox Network Issues on Kali Linux.
A common problem is the Bridged Adapter mode. It’s supposed to let your virtual machine use your computer’s network, giving the VM its own IP address so it can talk to other devices. But sometimes, the adapter doesn’t play nice, or your Realtek PCIe GbE Controller isn’t recognized properly.
Don’t panic, we’ll go through the usual trouble spots and I’ll show you exactly what to check so your Kali Linux VM gets online without headaches. Furthermore, knowing how to Fix VirtualBox Network Issues on Kali Linux will save you many future frustrations.
Step 1 – Make Sure Your Network Adapter is On
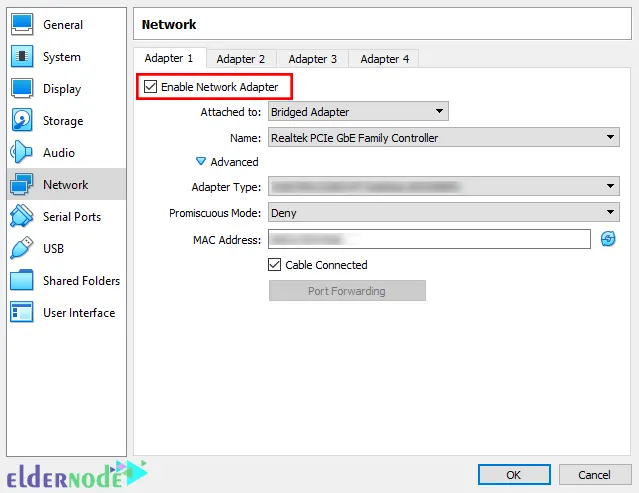
Okay, first things first—sometimes the network adapter is just… off. Happens more than you’d think. Open up VirtualBox, pick your Kali Linux VM, and go to Settings → Network. See that little box that says “Enable Network Adapter”? Yep, make sure it’s ticked.
Honestly, half the time this is all it takes. Turn it on, hit OK, and give it another shot. You’d be surprised how often the connection suddenly works.
Step 2 – Make Sure Your Realtek Network Adapter is Working
Alright, now let’s check the network card on your main computer. Sometimes VirtualBox looks fine, but the host OS itself isn’t playing along.
Open Device Manager on your PC and look for Realtek PCIe GbE Family Controller. See a little yellow warning triangle next to it? That’s your clue something’s off.
If that’s the case, just update the driver. Usually, a quick driver update fixes things and your Kali VM should be able to connect right after.
Step 3 – Tweak the Network Settings
First, see if it’s set to get an IP automatically (DHCP) or if you gave it a fixed IP (static). A tiny clash, like another device already using the same IP, can mess everything up.
If that’s all good but it’s still offline, try switching to a Host-Only Adapter for a bit. It’s a sneaky trick that usually works when NAT or Bridged are being stubborn.
And heads up: if you’re on NAT, VirtualBox often defaults to 10.0.2.0. You can swap it to something like 192.168.0.x that fits your network.
Once you master these settings, you’ll know how to Fix VirtualBox Network Issues on Kali Linux every time.
Wrapping Up
So, that’s it! You should now have your Kali Linux VM talking to the network without throwing tantrums. 🙂
If it still acts up, don’t stress, sometimes a tiny setting is all it takes. Give it a shot, tweak what we went through, and you’ll be online in no time.And hey, if something weird happens or you’ve got a tip to share, drop a comment below, I’d love to hear what worked for you.