Special Offer



How to Taking Screenshots on an HP Laptop
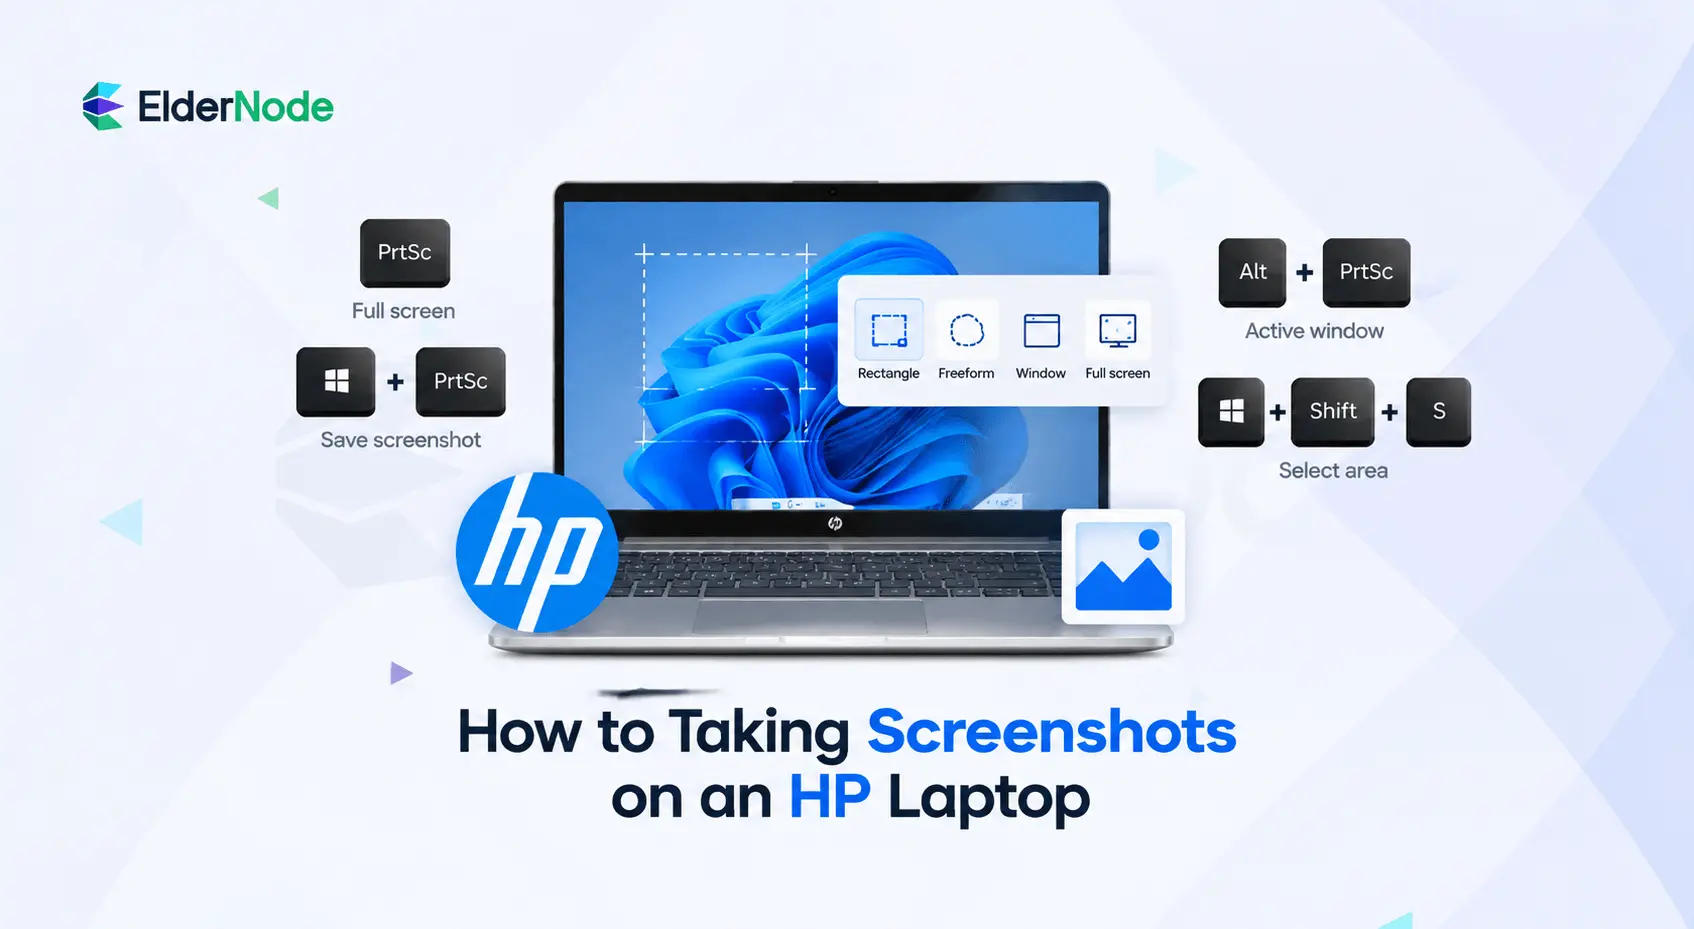



Taking a screenshot on an HP laptop really isn’t complicated, you just need to know which shortcut does what you’re after. You can grab the whole screen in one go, copy a single window, drag out a custom area yourself, or turn to the built in Windows tools when you want a bit more control over the whole thing.
How exactly do you take a screenshot on an HP laptop?
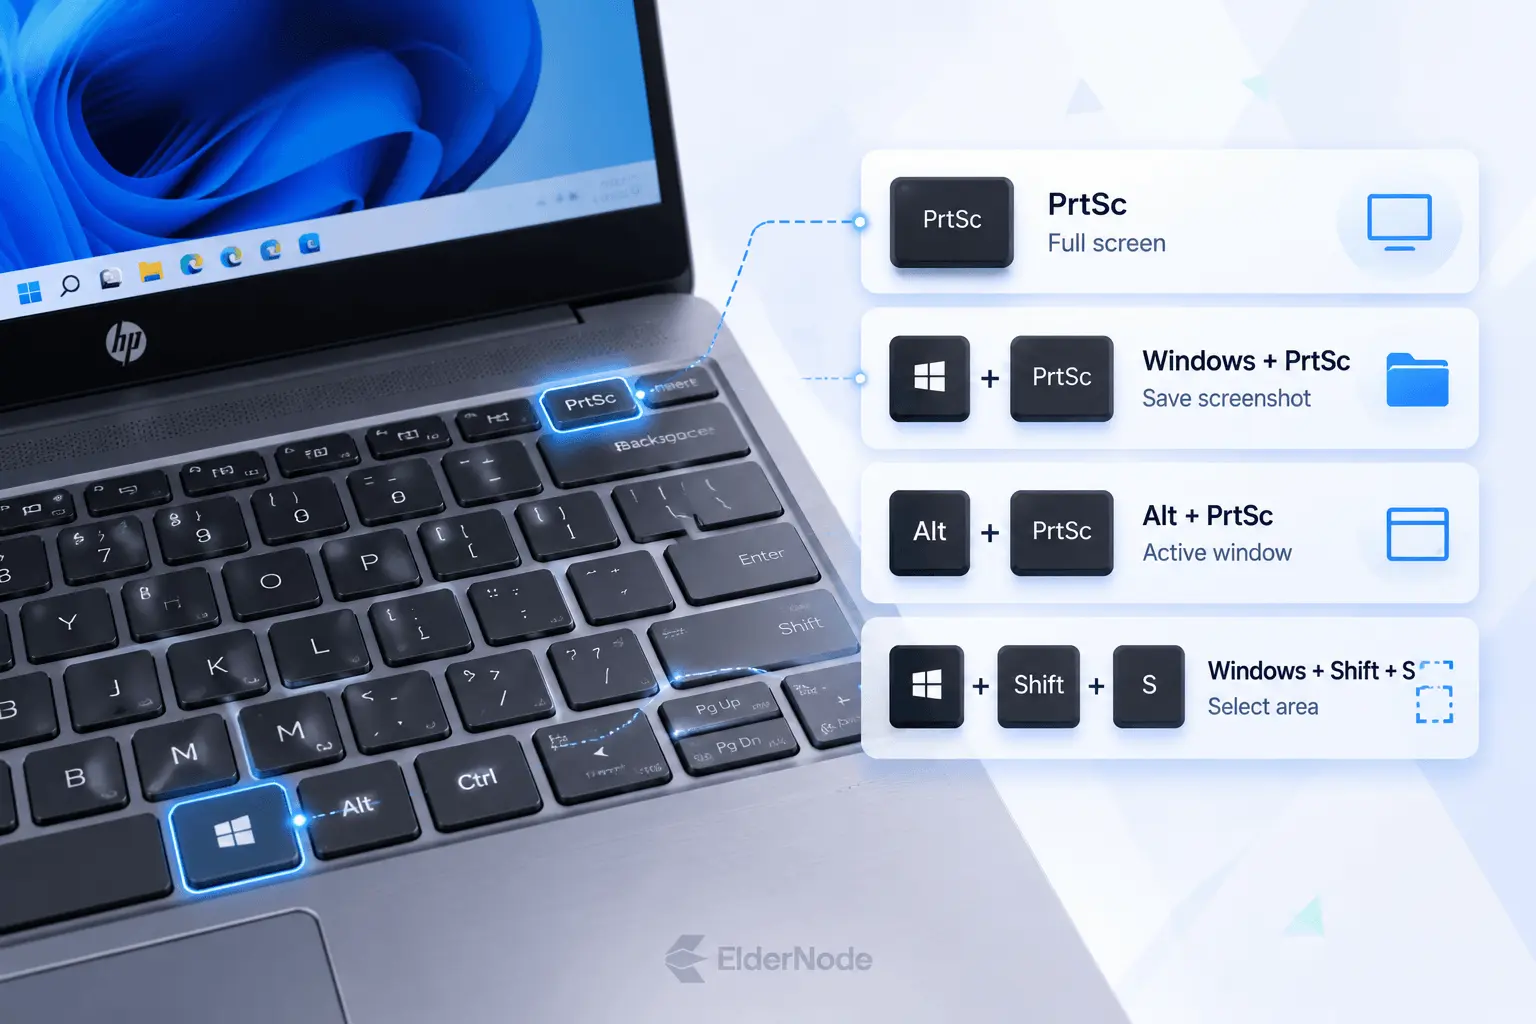
You screenshot on an HP laptop by pressing a keyboard shortcut like PrtSc, Windows + PrtSc, Alt + PrtSc, or Windows + Shift + S. Which one you should use really depends on what you’re trying to do, whether that’s copying the screen to your clipboard, saving an image file automatically, or selecting just a specific part of the display. And if your HP keyboard has combined function keys, you might need to hold down Fn along with the screenshot key too.
On most HP laptops, that screenshot key is labeled PrtSc, PrtScn, or sometimes just Print Screen. Some of the smaller, more compact models tuck it into a shared function key, so again, you may need to press Fn to actually trigger it.
1. Use Print Screen to copy the full screen
The simplest way to take a screenshot on an HP laptop is to just press PrtSc. This just grabs your whole screen and pops it right onto the clipboard, ready to paste wherever you need it.
Once you’ve pressed it, open up an app like Paint, Word, PowerPoint, an email draft, or even a messaging window, then press Ctrl + V to paste it in. From there you can crop it, save it, or send it off to whoever needs it.
If pressing PrtSc on its own doesn’t seem to do anything, try Fn + PrtSc instead. A lot of HP laptops use that function row for things like brightness, volume, or keyboard lighting, so you’ll often need to hold Fn to actually trigger Print Screen.
2. Just press Windows + PrtSc and it saves itself
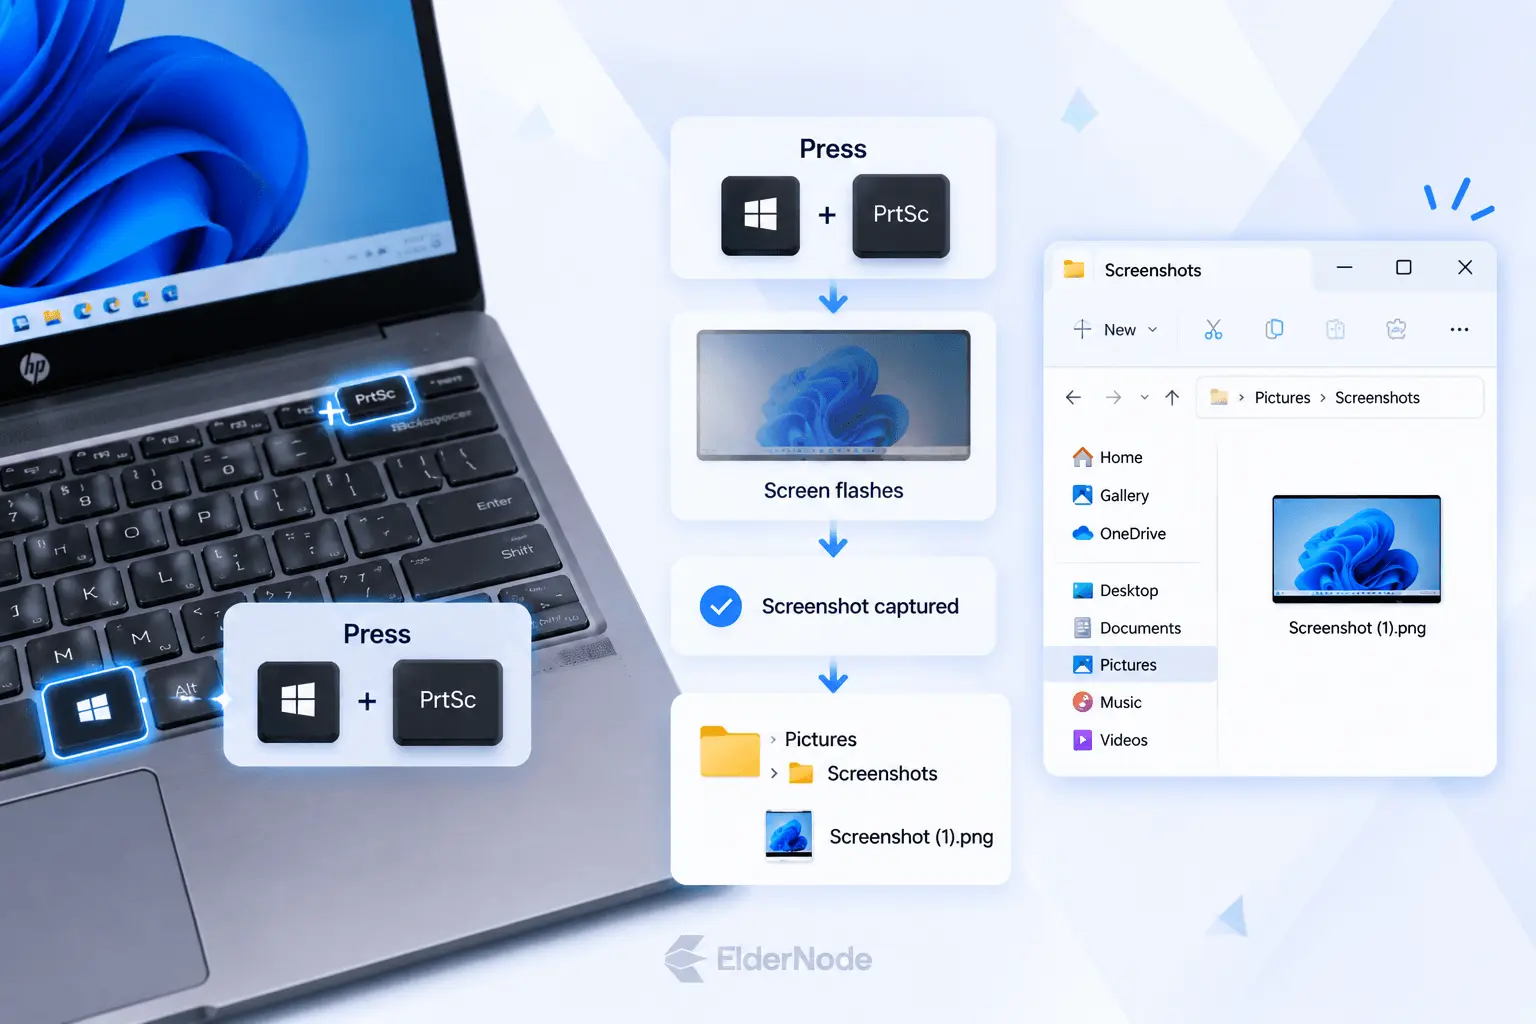
If you want the screenshot to become a file right away, press Windows + PrtSc. On many Windows HP laptops, the screen briefly dims to show that the screenshot was captured. The image is then saved automatically in the Screenshots folder inside Pictures.
Open File Explorer, select Pictures, then open Screenshots. Your image should appear there with a screenshot file name.
If there is no file, try Fn + Windows + PrtSc, especially if your HP laptop uses a shared Print Screen key.
3. Use Alt + PrtSc to capture only the active window
When you only need one particular app or window instead of your whole screen, click on that window first so it’s active, then hit Alt + PrtSc. This grabs just that window and copies it to your clipboard, leaving out the taskbar, your desktop, and whatever else you’ve got open in the background. It’s genuinely useful for things like capturing an error message, walking someone through software instructions, showing a browser window, or putting together a clean screenshot for a support ticket.
Once you’ve done that, paste the image in with Ctrl + V wherever you’re working. And if nothing shows up when you paste, it probably means the window wasn’t actually active when you pressed the shortcut, so just click its title bar first and try again.
On some HP laptops, the standard shortcut just won’t respond, and you’ll need to use Fn + Alt + PrtSc instead.
4. Press Windows + Shift + S to select part of the screen
For most people, Windows + Shift + S is the easiest way to screenshot on an HP laptop. It opens the snipping toolbar so you can drag over just the area you want, instead of capturing your whole screen.
Press the shortcut, your screen dims, and a small toolbar appears. Pick rectangular, freeform, window, or full screen snip, then select your area.
The image copies straight to your clipboard. Click the notification to edit or save it in Snipping Tool, or just paste it with Ctrl + V.
5. Open Snipping Tool for more control
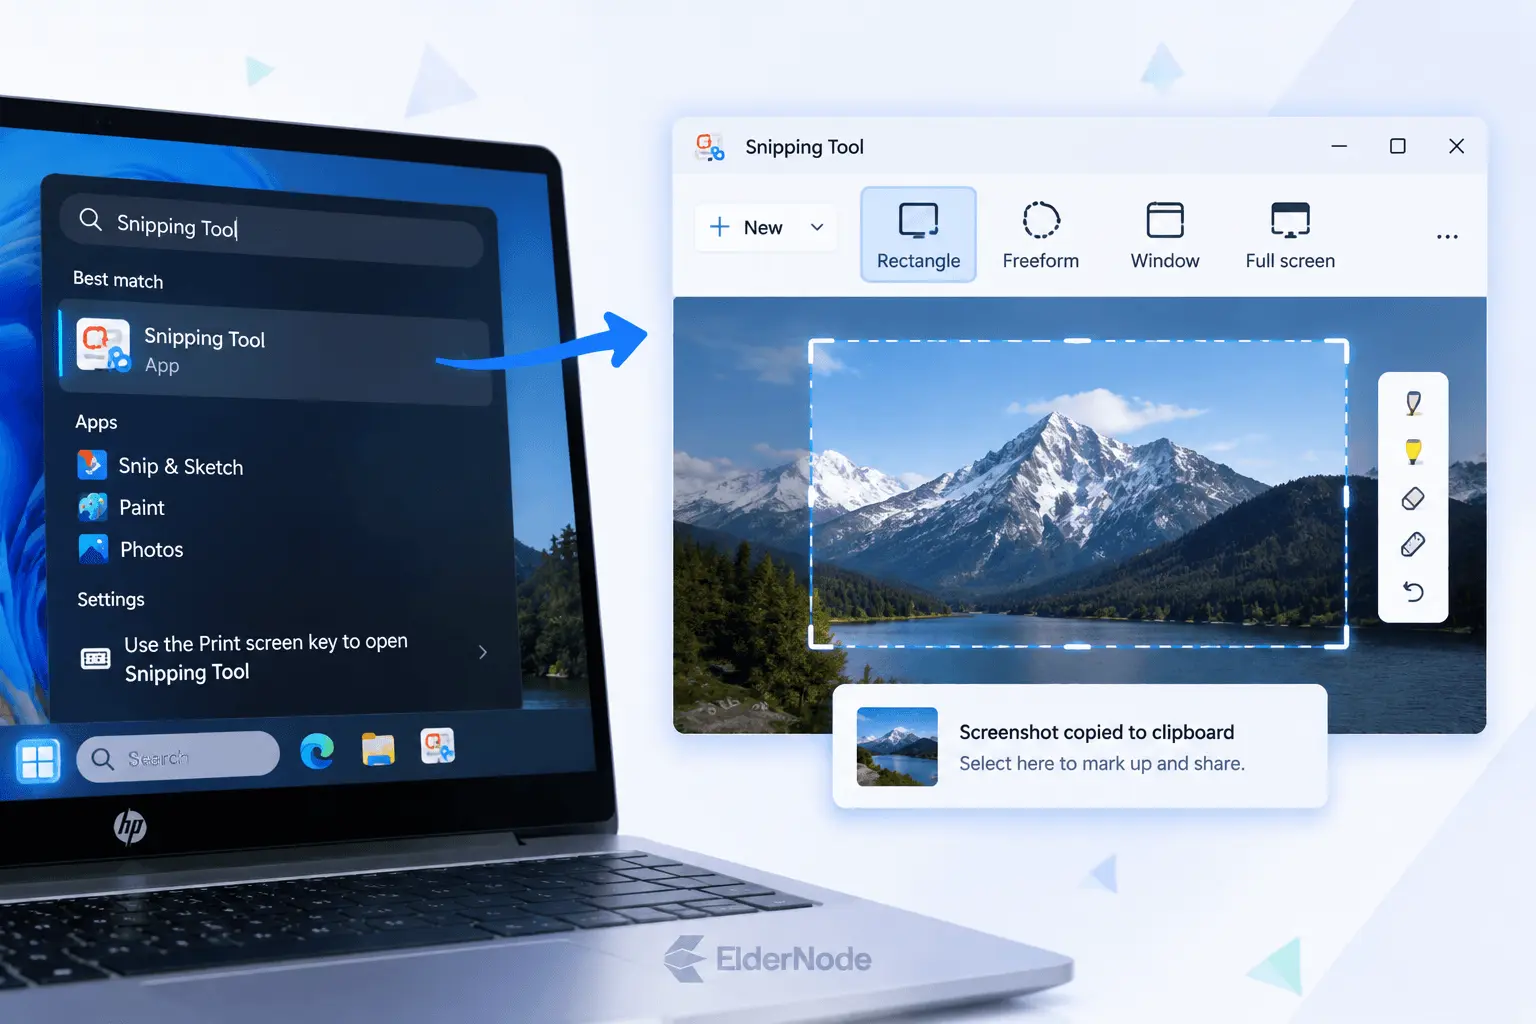
The Snipping Tool comes in handy when a quick keyboard shortcut just doesn’t cut it. Open your Start menu, type in Snipping Tool, and click on the app. From there you can choose your snip mode, hit New, and capture whatever area you need.
This method really shines when you need to mark up a screenshot. You can draw attention to a button, underline some text, or crop out anything unnecessary before you save it. It’s also a bit easier if you’re newer to this, since you can actually see all your options laid out instead of having to remember every shortcut.
Where are screenshots saved on HP laptops?
If you’re going to need the image later, save it with a clear file name and put it somewhere you’ll actually be able to find again.
If you pasted your screenshot into Paint or another editor, go to File, then Save As. PNG is usually your best bet if you want sharp text and clear interface details.
For work or school stuff, try not to save screenshots with private information in them unless you genuinely need to. Crop out passwords, personal messages, account numbers, or any browser tabs that don’t need to be there before you share it with anyone.
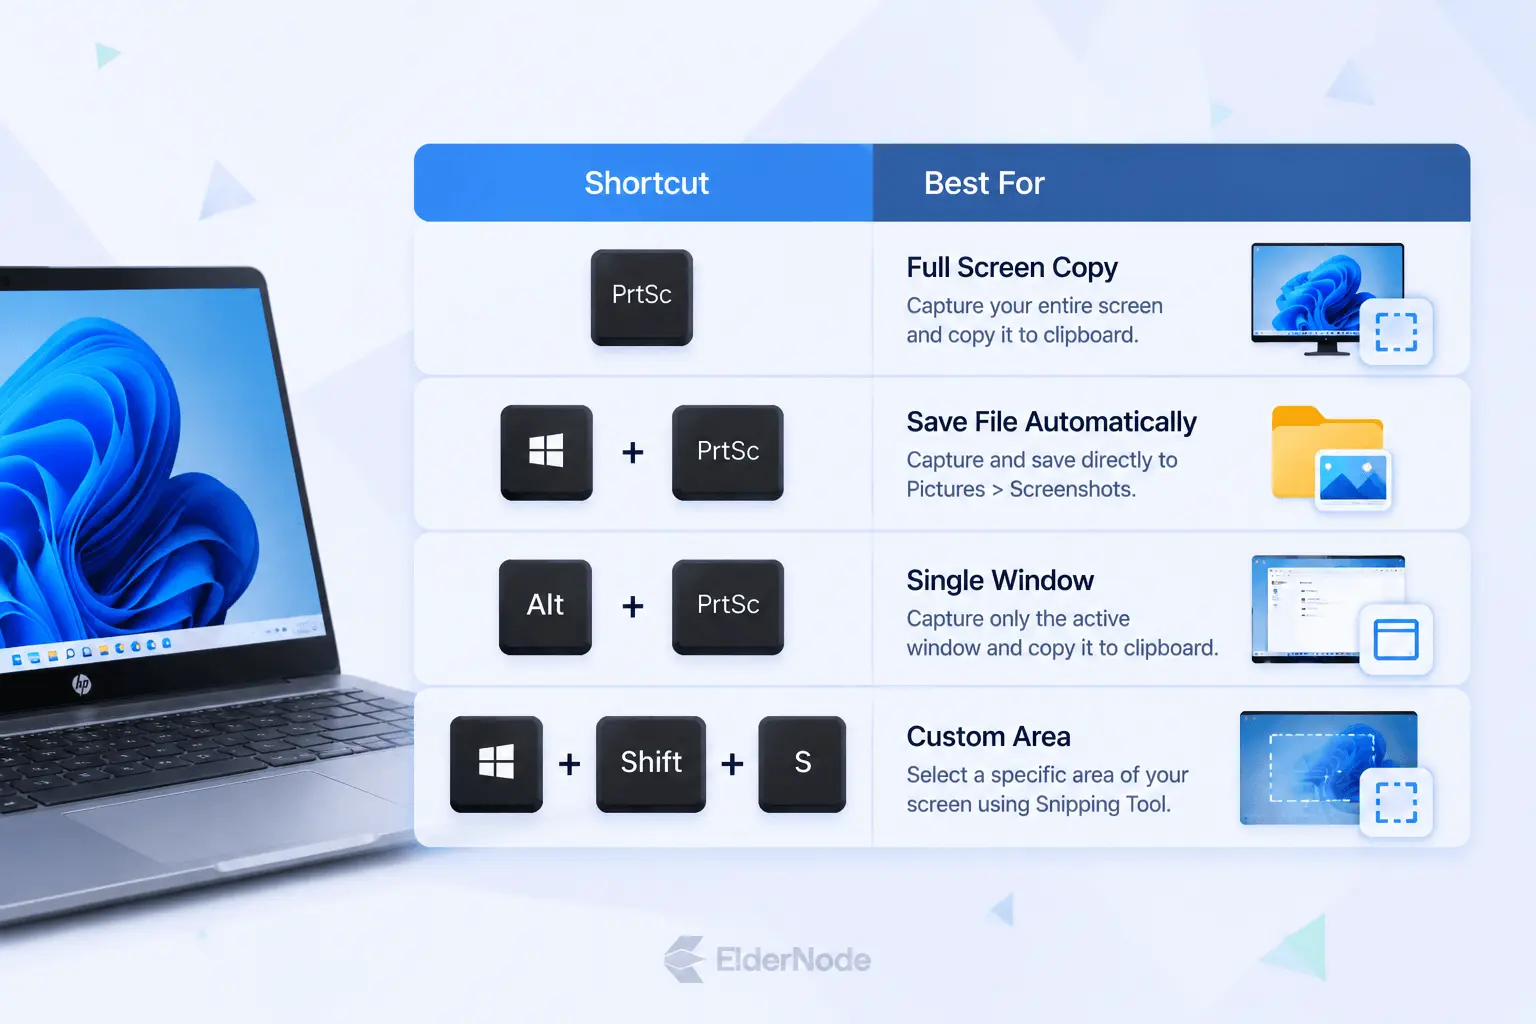
Which screenshot method is right for you?
Use Windows + Shift + S when you want the most control, Windows + PrtSc when you want an automatic file, PrtSc when you only need to paste quickly, and Alt + PrtSc when you need one active window. These shortcuts cover almost every everyday screenshot on HP laptops.
Here is a simple way to choose:
- Fast copy: Press PrtSc, then paste with Ctrl + V.
- Automatic save: Press Windows + PrtSc and check Pictures > Screenshots.
- One app window: Press Alt + PrtSc, then paste.
- Selected area: Hit Windows + Shift + S and drag over whatever area you’re trying to grab.
- Editing and delay: Pop open the Snipping Tool and play around with its capture options from there.
Fix common screenshot problems
If your screenshot shortcut isn’t working, it’s usually one of three things, the keyboard layout, your function key setting, or just not knowing where the screenshot got saved. Try adding Fn before the screenshot key first and see if that fixes it.
Can’t find a saved screenshot? Open File Explorer and check Pictures > Screenshots. And if you used PrtSc, Alt + PrtSc, or Windows + Shift + S, keep in mind the image might just be sitting on your clipboard until you paste or save it somewhere. Open Paint or a document and hit Ctrl + V to check if it’s there.
If your keyboard doesn’t have an obvious Print Screen key, look for labels like prt sc, prt scn, or a small secondary label tucked onto a shared key. Or just skip the whole hunt and use the Snipping Tool from the Start menu instead.