Special Offer



How to Install Audiobookshelf Server on Ubuntu
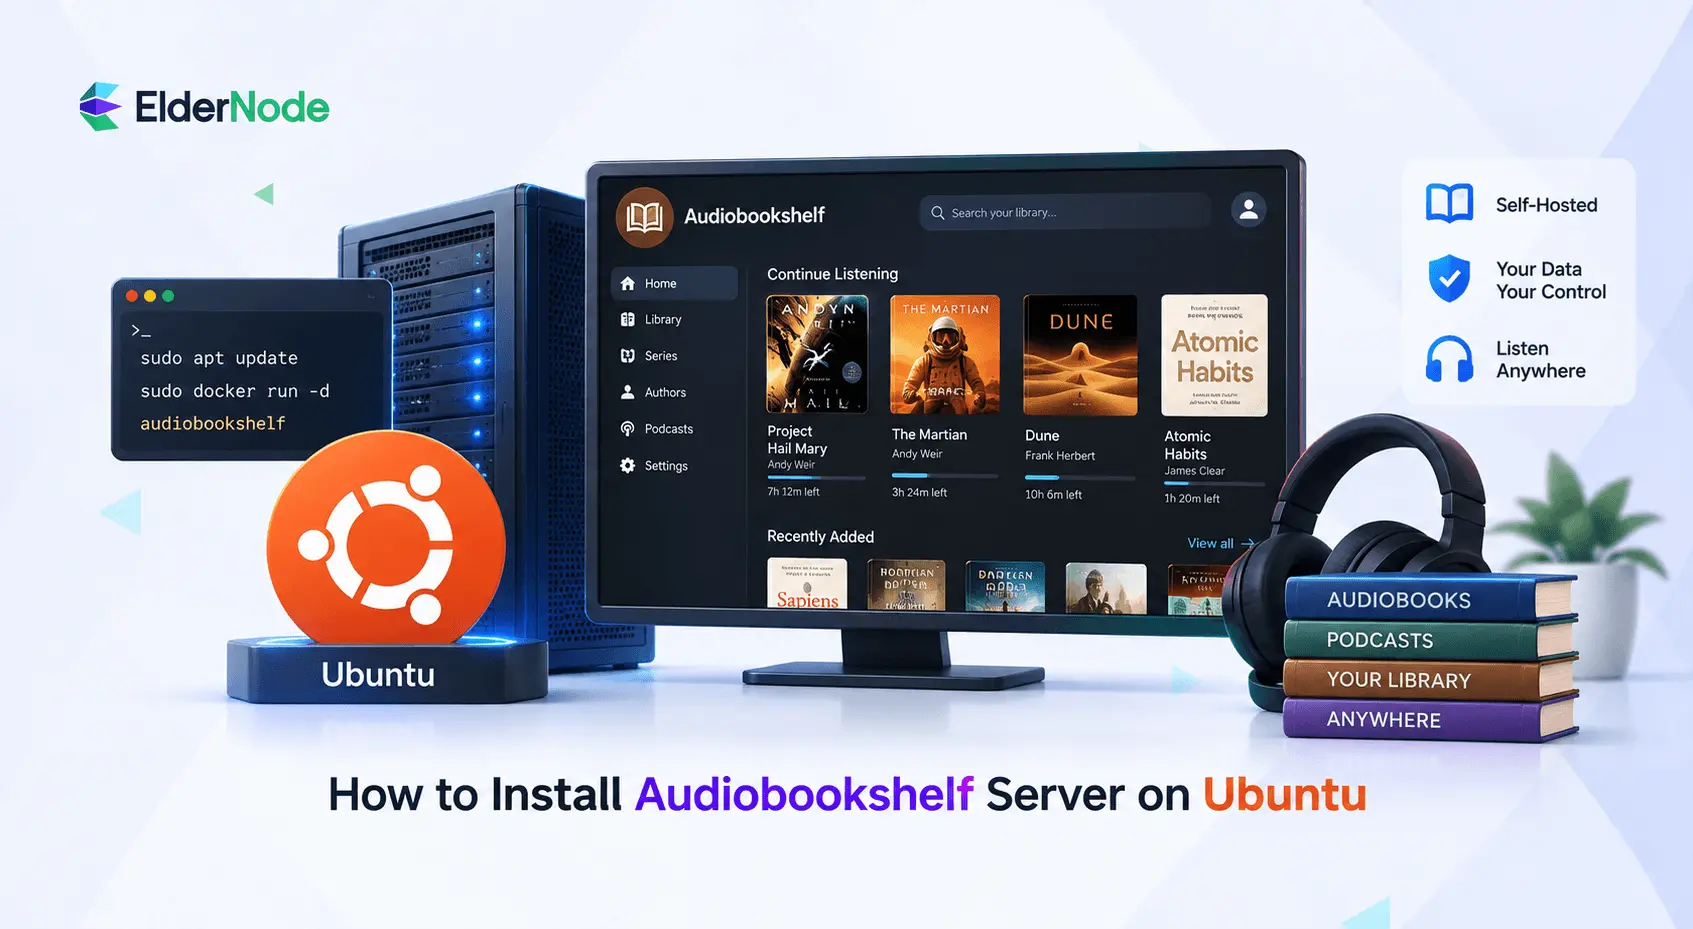



Setting up your own audiobook server sounds intimidating, but Audiobookshelf makes it pretty painless. It’s a self hosted media server that lets you organize, stream, and sync your audiobooks and podcasts straight from your own Ubuntu machine, no subscriptions, no third party servers, just your files under your control. This guide walks you through getting it installed on Ubuntu the right way, without cutting corners on security. By the time you’re done, you’ll have Audiobookshelf up and running on port 13378, ready to use from your browser, your phone, or wherever you keep your library.
Before you install Audiobookshelf on Ubuntu, what do you actually need?
You’ll need a working Ubuntu server, shell access with sudo, enough storage to hold your audiobook library, and some idea of how your devices will actually connect to the server. Ubuntu 24.04 LTS is a solid pick for a small media server since it’s familiar, well documented, and easy to keep updated with apt.
If you’re setting this up on a Linux VPS instead of a home machine, pick a provider and plan that gives you predictable storage and bandwidth. Audiobook files add up fast, and if you’re streaming from outside your home network, that outbound transfer counts against you too.
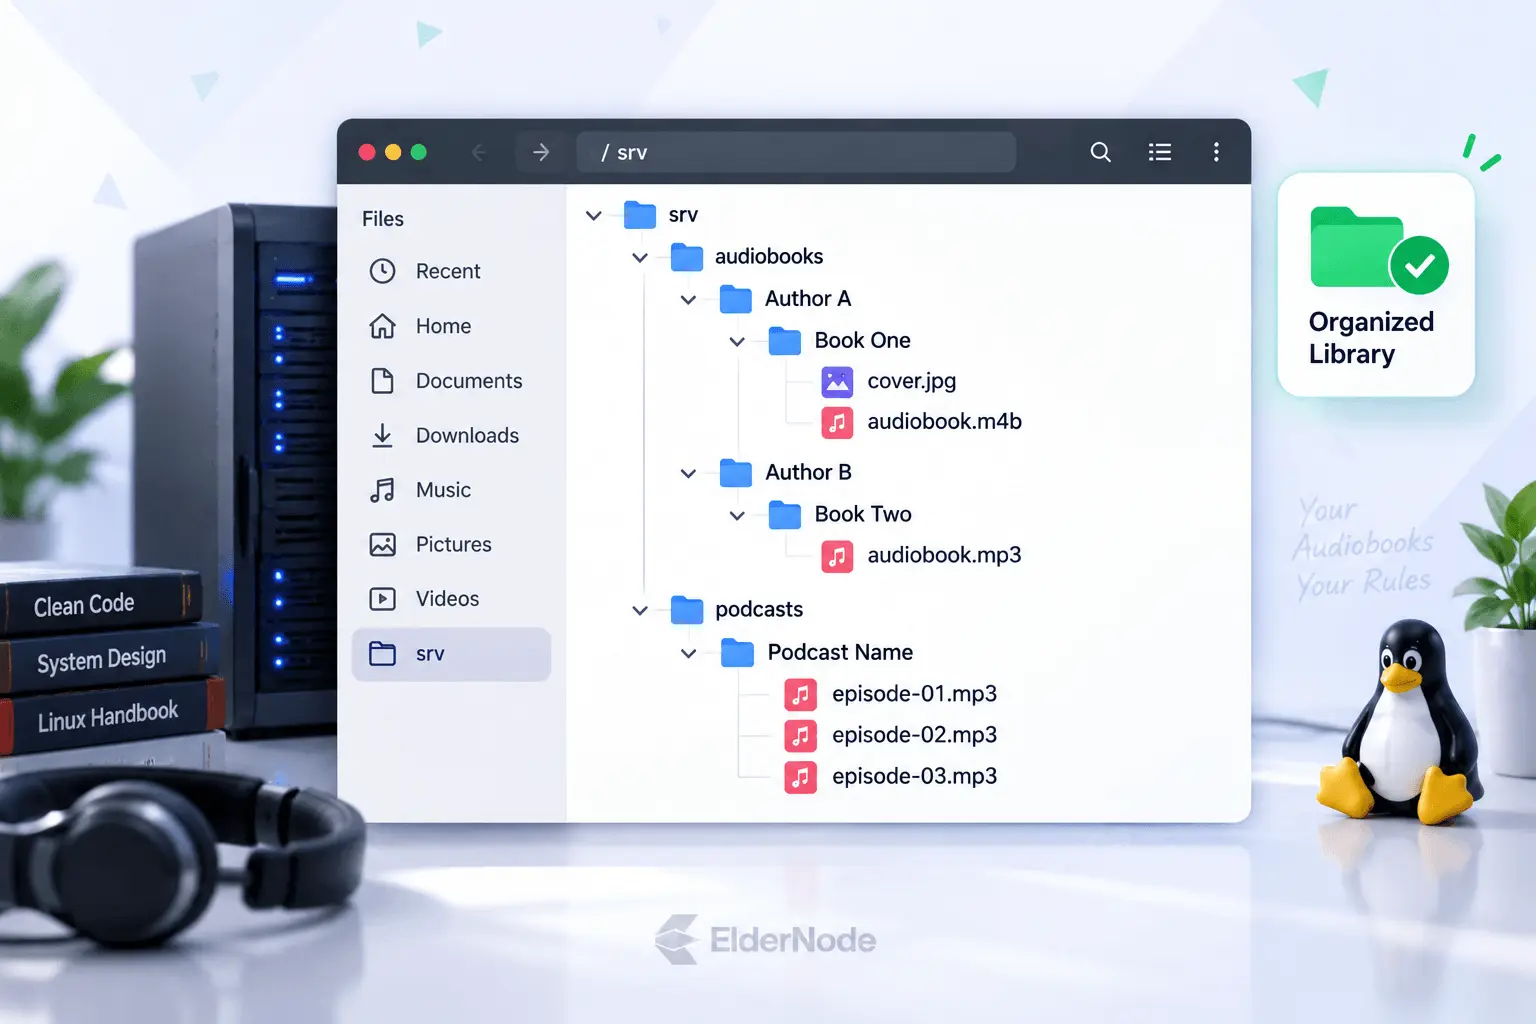
Before you even start installing anything, figure out where your files are actually going to live. Something simple works fine, like /srv/audiobooks for your books and /srv/podcasts for podcasts. Try to keep one book per folder wherever you can. Audiobookshelf’s own FAQ actually warns that a messy directory structure can cause the scanner to lump multiple books together incorrectly.
Native installation keeps Ubuntu maintenance simple
If you want Audiobookshelf managed like any other system package, a native install is the way to go. The official Linux package guide walks through a Debian and Ubuntu method that adds the Audiobookshelf signing key and repository, then installs everything through apt. It also mentions that the package drops a default config file at /etc/default/audiobookshelf.
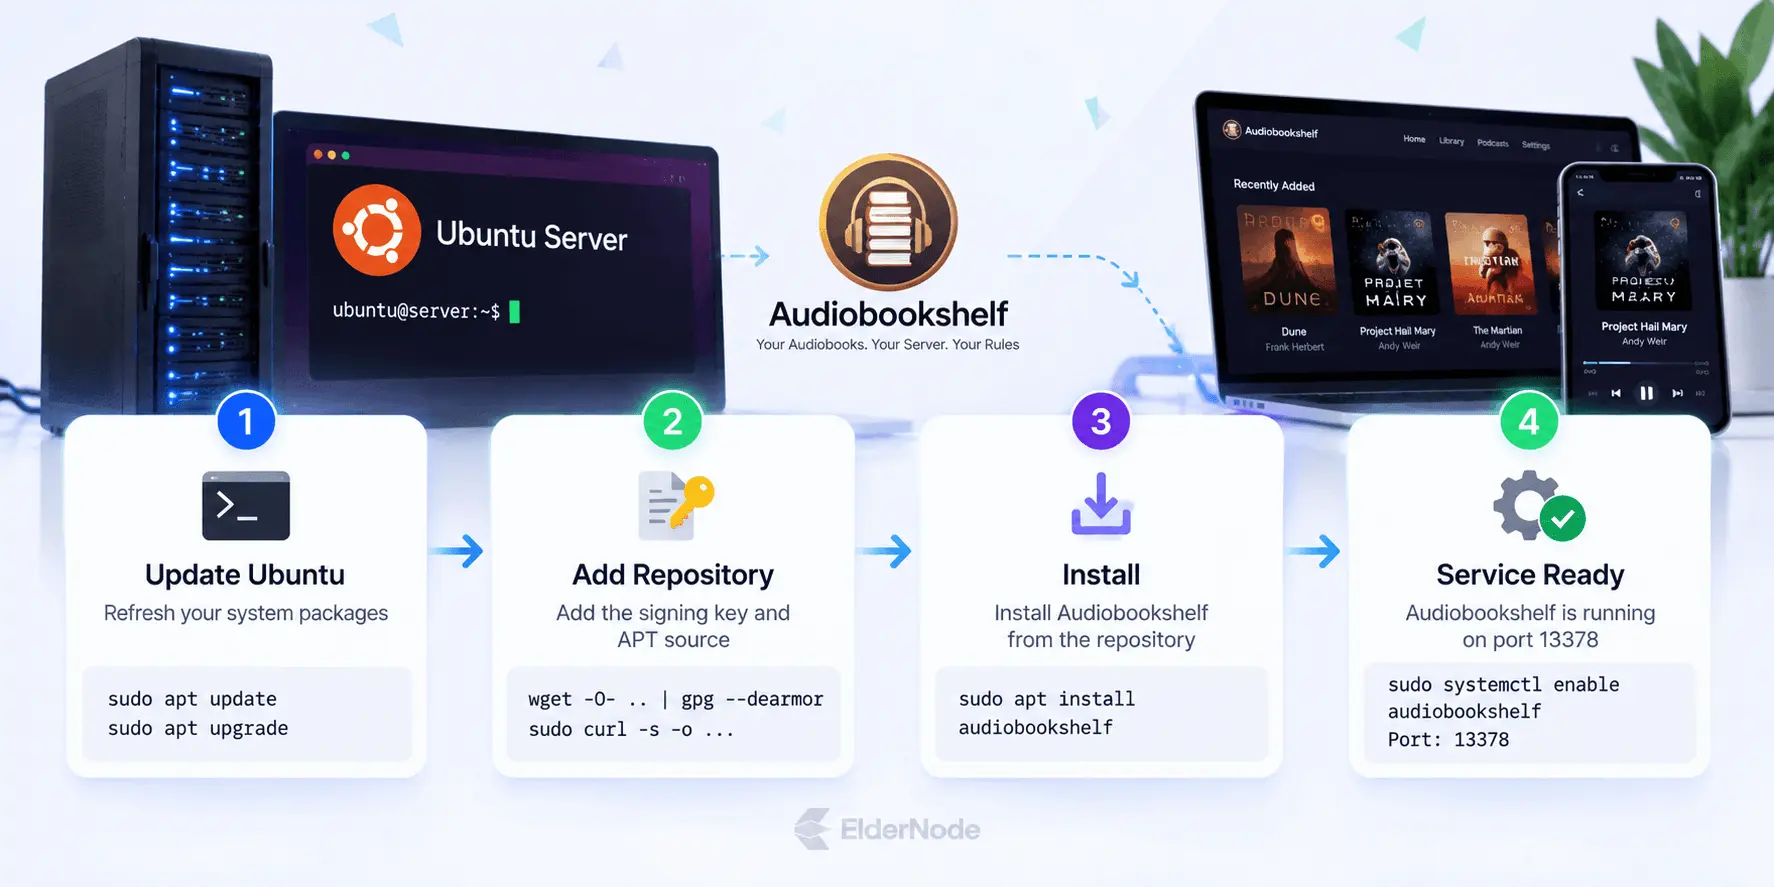
Start by updating your system:
sudo apt update
sudo apt upgrade
sudo apt install gnupg curl wget ffmpeg
Once that’s done, add the repository and install Audiobookshelf itself:
Install the signing key:
wget -O- https://advplyr.github.io/audiobookshelf-ppa/KEY.gpg | gpg --dearmor | sudo tee /etc/apt/trusted.gpg.d/adb-archive-keyring.gpg
Add the package source:
sudo curl -s -o /etc/apt/sources.list.d/audiobookshelf.list https://advplyr.github.io/audiobookshelf-ppa/audiobookshelf.list
Refresh your package list:
sudo apt update
Install the app:
sudo apt install audiobookshelf
Configuration files, ports, and service control
Once it’s installed, take a look at:
/etc/default/audiobookshelf
According to the package guide, the defaults look like this:
METADATA_PATH=/usr/share/audiobookshelf/metadata
CONFIG_PATH=/usr/share/audiobookshelf/config
PORT=13378
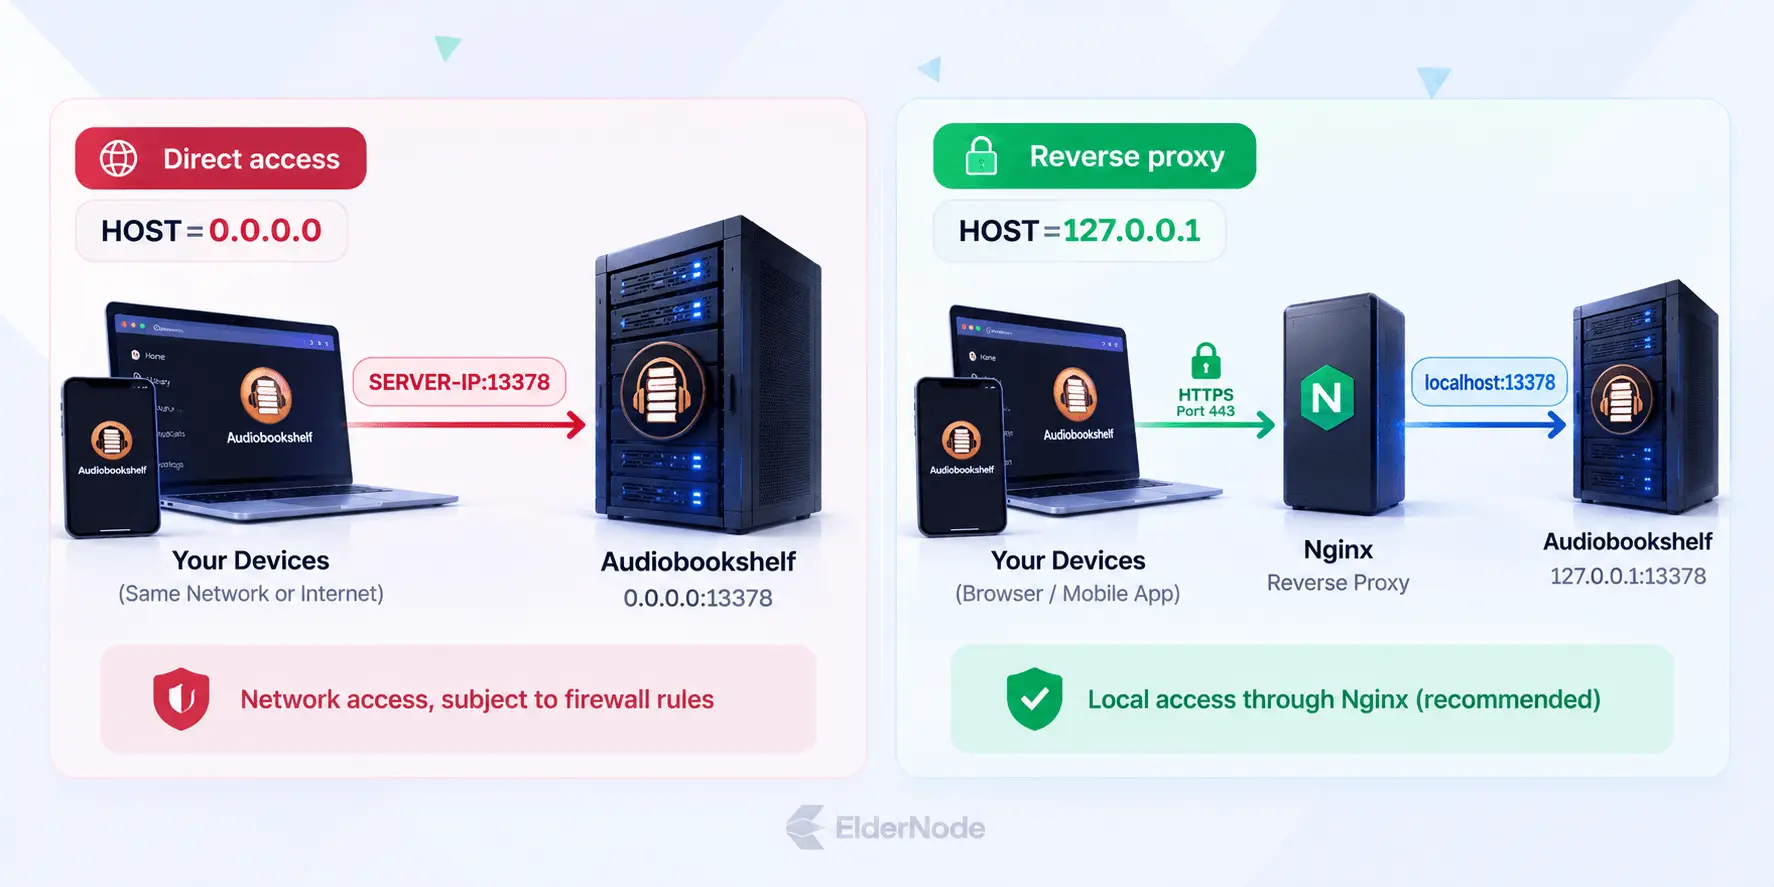
HOST=0.0.0.0
The guide also explains that HOST=0.0.0.0 lets other devices on your network reach the service, while switching it to 127.0.0.1 makes more sense if you only want a local reverse proxy talking to it.
From there, systemd handles the service for you:
- Start it now: sudo systemctl start audiobookshelf.service
- Make it survive a reboot: sudo systemctl enable audiobookshelf.service
- Check on it: sudo systemctl status audiobookshelf.service
- Look at the logs: journalctl -u audiobookshelf.service -n 100 –no-pager
Next, go ahead and create your media folders:
sudo mkdir -p /srv/audiobooks /srv/podcasts
Then move your files in however works for you, rsync, scp, SFTP, or just a mounted drive. Before you kick off a scan, just double check that the Audiobookshelf process can actually read those folders.
How do you access the Audiobookshelf web interface?
Open http://SERVER-IP:13378 in a browser, replacing SERVER-IP with your Ubuntu server’s local IP address or VPS public IP. On first visit, Audiobookshelf asks you to create the root user; there is no default admin username and password, according to the official FAQ.
If you use UFW, allow the port for local testing with:
sudo ufw allow from YOUR-IP to any port 13378 proto tcp
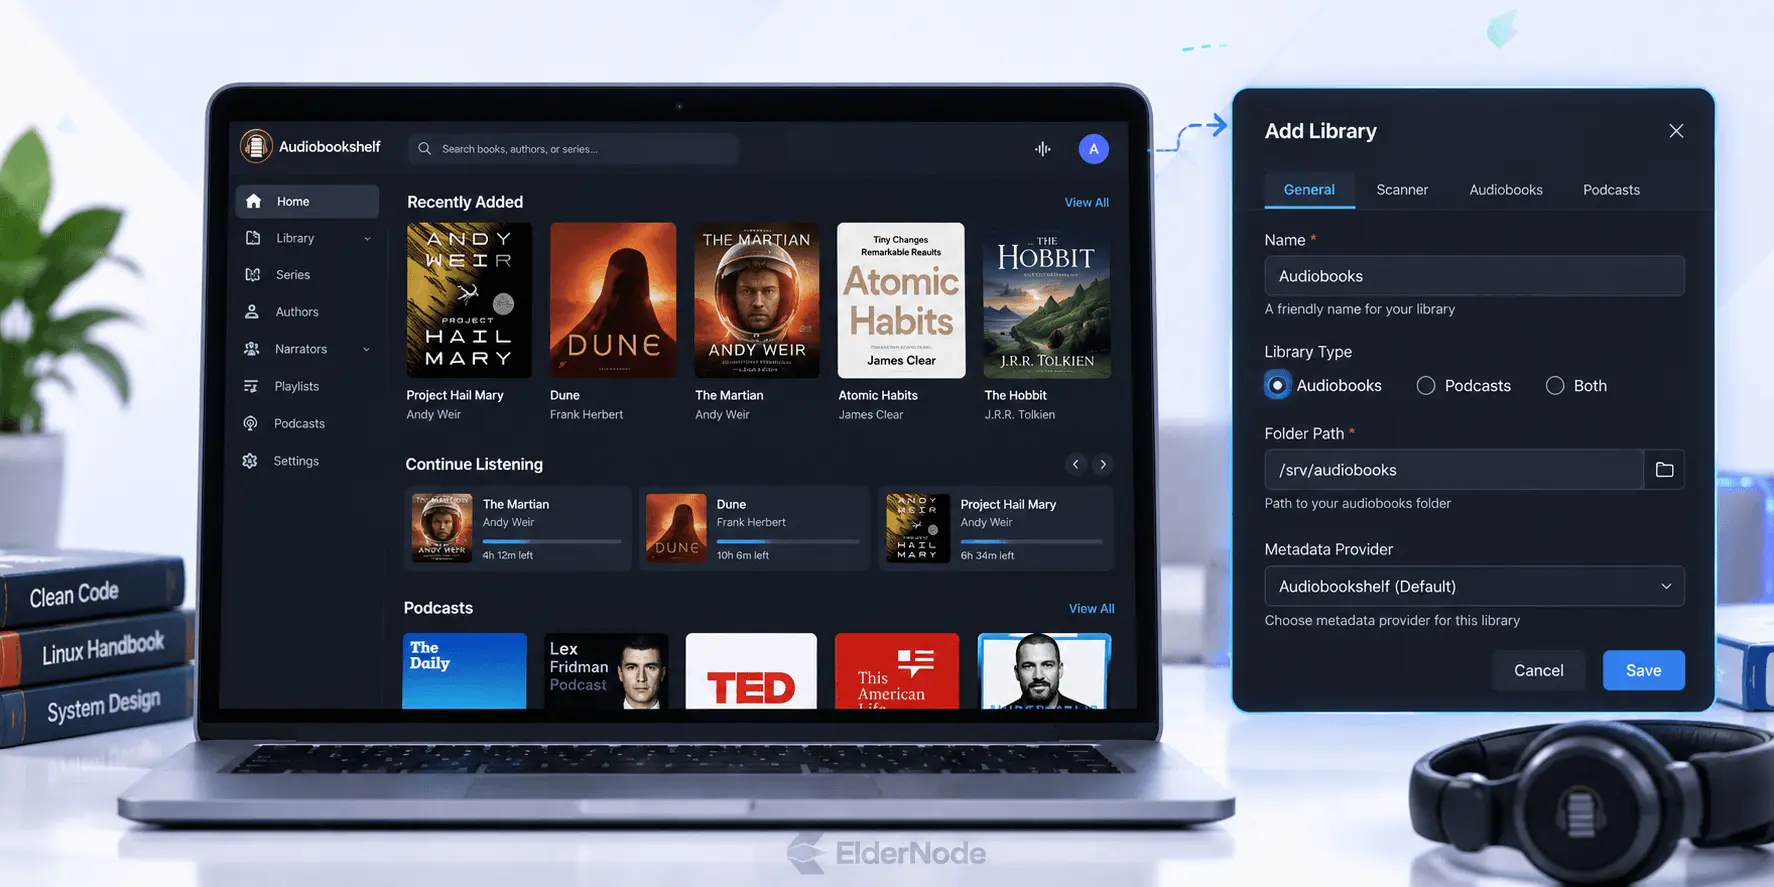
Once logged in, add a library and point it to your audiobook folder. Let the first scan complete before troubleshooting metadata. Scans read local folder names, audio tags, and metadata files; matching against online providers is a separate manual action in Audiobookshelf.
Secure remote access with a reverse proxy
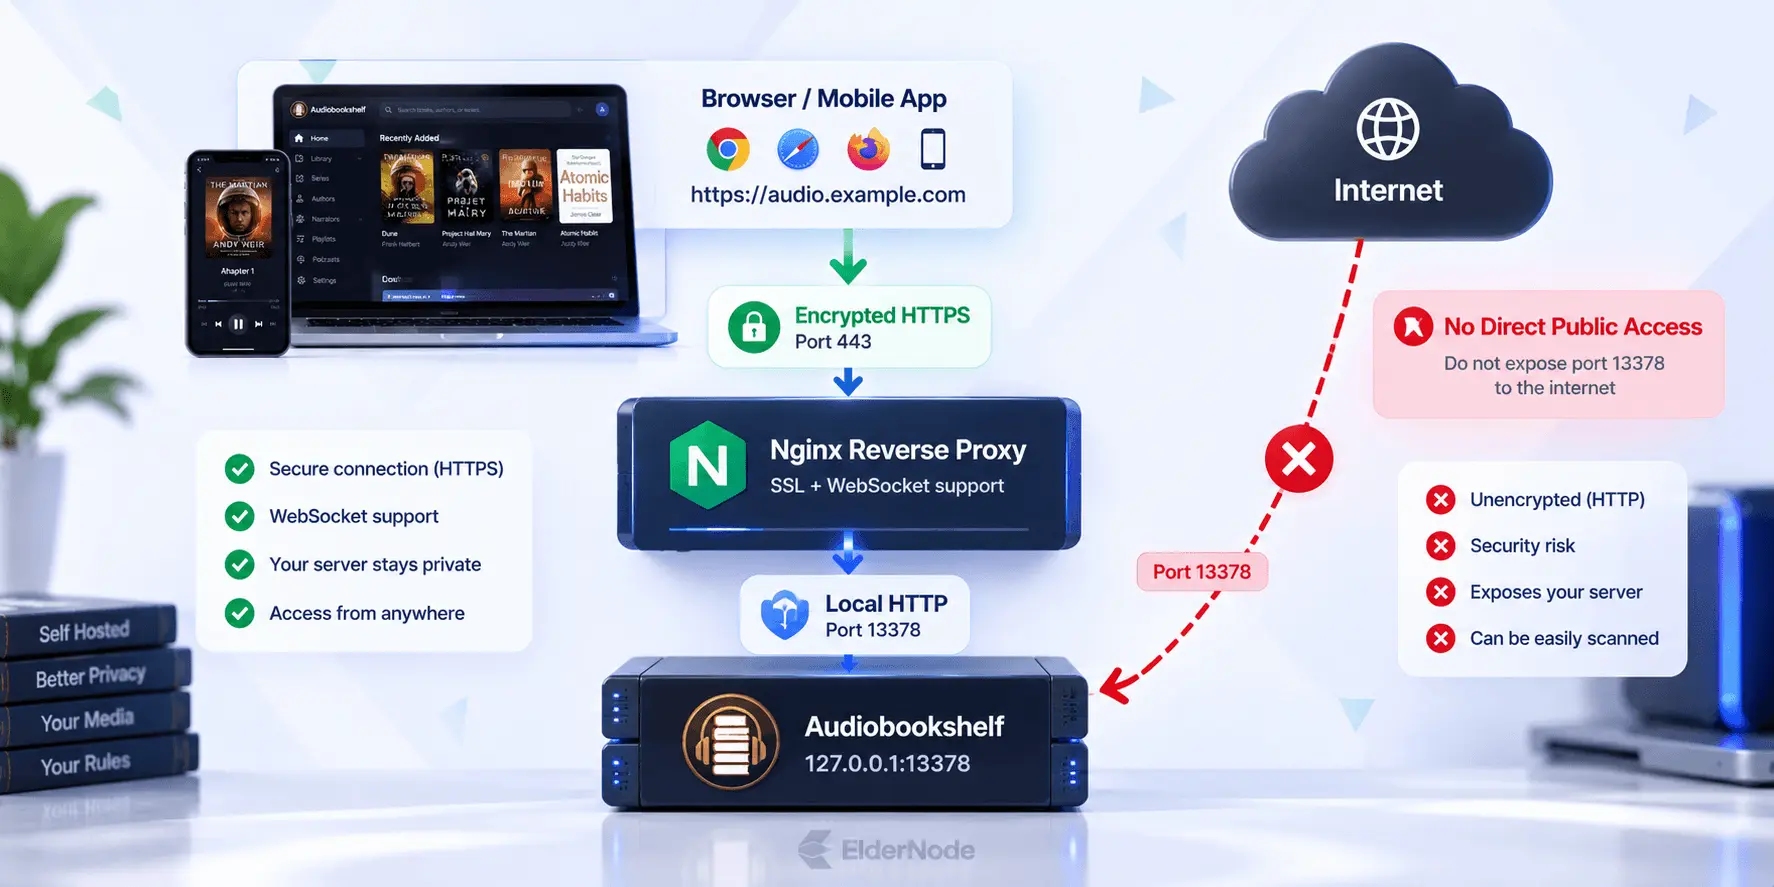
By itself, Audiobookshelf only serves plain, unencrypted HTTP, which is why the official FAQ recommends putting a VPN or reverse proxy in front of it for remote access.
If you’re using Nginx, just make sure your proxy actually passes WebSocket traffic through. The reverse proxy guide is pretty clear that WebSocket support isn’t optional here, and it lists the key headers you need: Upgrade, Connection “upgrade”, and proxy_http_version 1.1. One more thing worth noting, if you’re running Audiobookshelf in a subfolder instead of its own subdomain, that path has to be /audiobookshelf specifically.
A few practical security habits worth building in:
- Set a genuinely strong root password inside Audiobookshelf itself.
- Keep your Ubuntu system patched by running sudo apt update && sudo apt upgrade regularly.
- On a Linux VPS, use SSH keys instead of relying on password only login.
- Never expose it to the internet without HTTPS, whether that’s through Nginx, Caddy, or a VPN.
- Back up your Audiobookshelf metadata and your actual media files separately from each other.
- And unless you really know what you’re doing, don’t expose port 13378 directly to the public internet.
Troubleshooting common Ubuntu install issues
If the page just won’t load at all, start with systemctl status to make sure the service is actually running, then check whether UFW is allowing traffic on port 13378. And if it loads fine on the machine itself but not from another device on your network, check that HOST isn’t set to 127.0.0.1, unless of course you’re deliberately running it behind a reverse proxy.
If you’re running into failed scans or books that just won’t import, check whether FFmpeg is even available with ffmpeg -version. It’s also worth taking a look at your folder structure before you keep hammering the rescan button, since one book per folder is just a lot easier for Audiobookshelf to make sense of.
And if login works fine but playback or live updates break once you’re behind Nginx, WebSocket proxying is usually the culprit. Go back and double check your Upgrade and Connection headers, then test the web player again through your actual HTTPS domain to confirm it’s fixed.
Conclusion
Setting up an Audiobookshelf server on Ubuntu gets you a private, flexible library that’s entirely yours, no one else’s rules, no one else’s servers. Whether you’re running it quietly on a home media server or out on a public Linux VPS, the formula that actually works is simple: install it from the repository, let systemd manage it as a proper service, only open up access on purpose, and always put a reverse proxy or VPN between it and the outside world for secure remote listening.