How to Install an SSL Certificate on IIS Web Server (Step-by-Step)
Installing an SSL Certificate on IIS Web Server isn’t just a formality it’s the step that actually tells your visitors “this site is safe.” Once you add SSL, the connection between your server and the browser gets encrypted, so information like passwords or payments can’t be intercepted. You’ll also notice the change right away in the browser: instead of a plain http://, your site loads with https:// and the familiar lock icon.
In this tutorial, I’ll walk you through how to install an SSL Certificate on IIS Web Server step by step. We’ll start with adding the certificate to MMC, then import it, bind it inside IIS Manager, and finally restart the server to make the changes live.
If you don’t already have a Windows server, consider using a Windows VPS from Eldernode for SSL Certificate on IIS Web Server installation. It’s preconfigured for IIS and makes setting up SSL much easier.
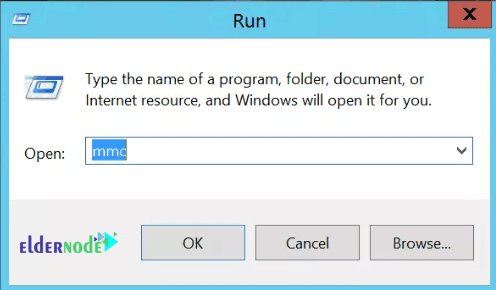
A) Add the Certificate to MMC
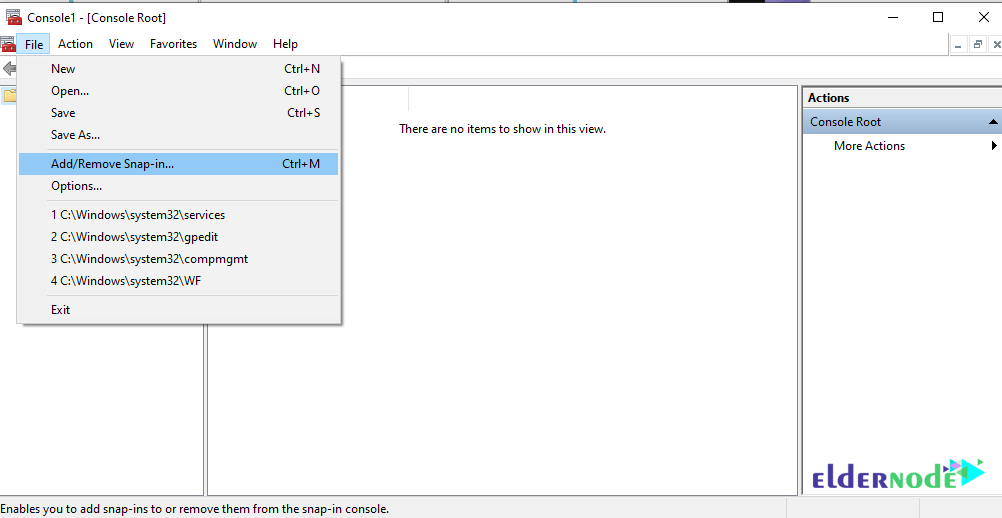
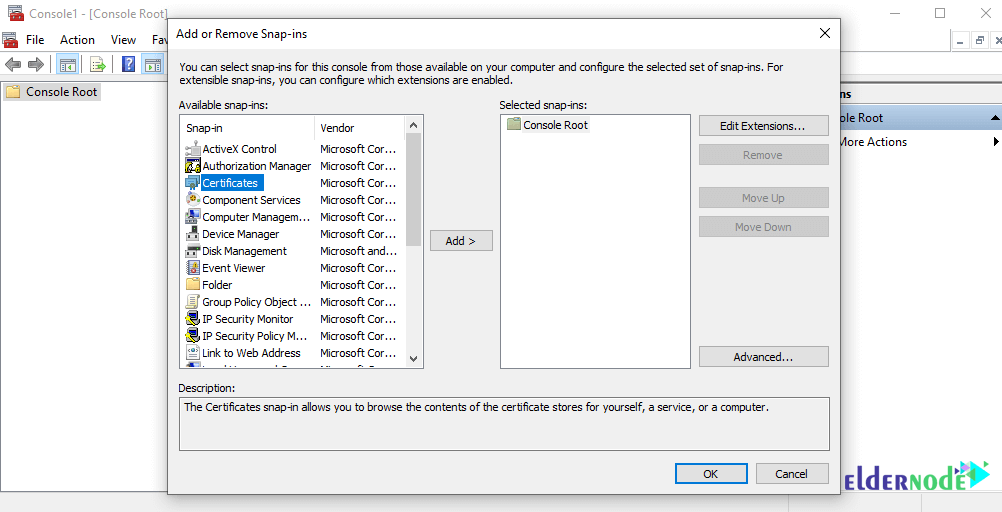
2. On the new MMC Console window Click on File then Add/Remove Snap-In.
3. In the Add / Remove Snap-ins window, first click Certificates and then Add.
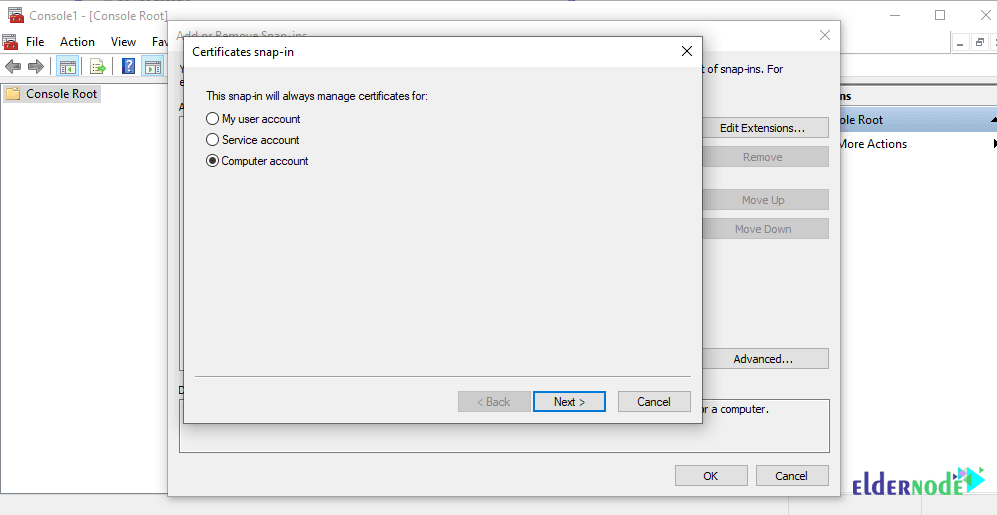
A new window like the one below will open called Certificates Snap-In .
4. Click on the Computer Account button and click on Next.
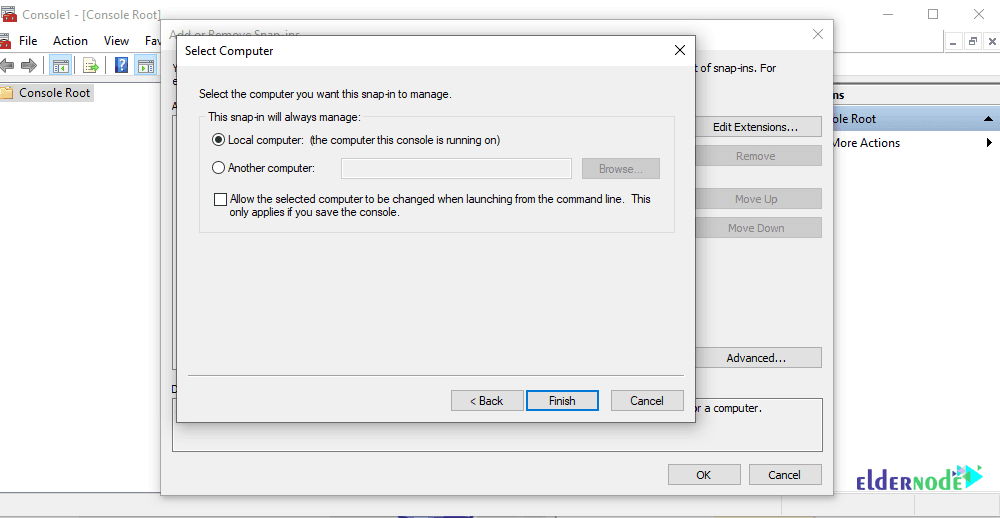
5. Choose Local Computer and hit Finish.
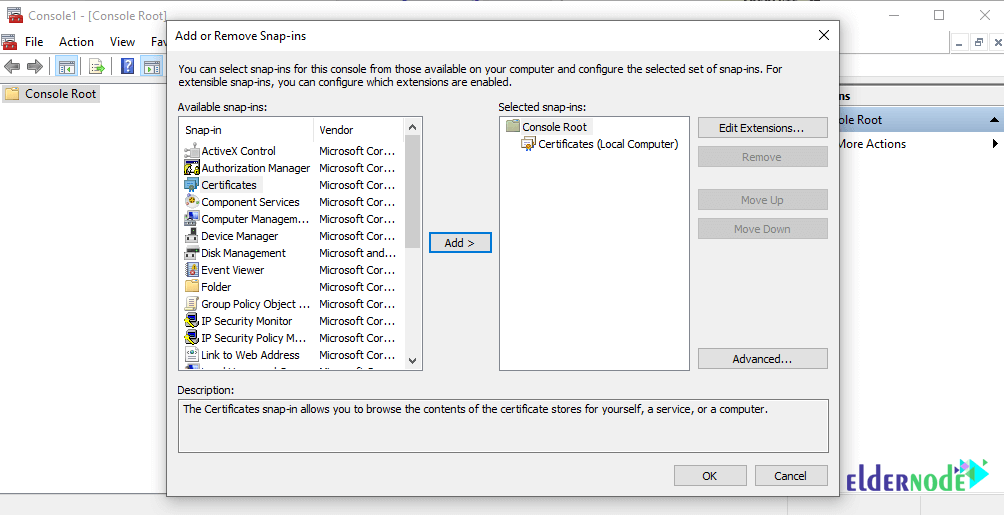
6. Click on OK to close the Add or Remove Snap-Ins Window.
B) Import the Certificates
Next step is to get your SSL Certificate on IIS Web Server into Windows so IIS can use it.
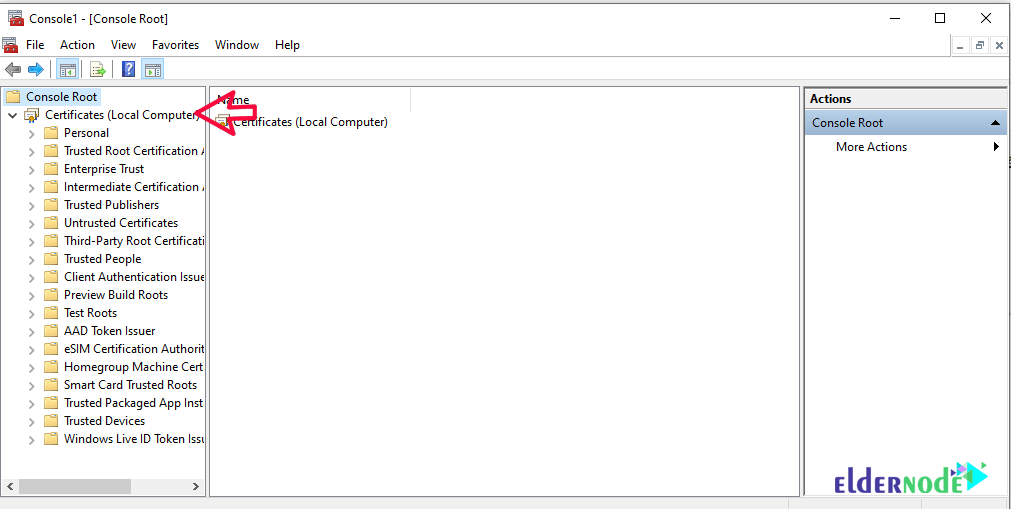
7. In the MMC window, open up the Certificates drop-down on the left. You should see a list of folders under it.
👉 If you don’t see “Certificates” at all, it usually means the snap-in wasn’t added to the Local Computer earlier just go back and add it, then it’ll show up.
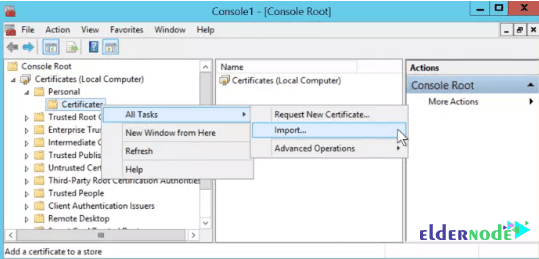
8. Click on the Personal drop-down and then Right-click on Certificates > All Tasks > Import.
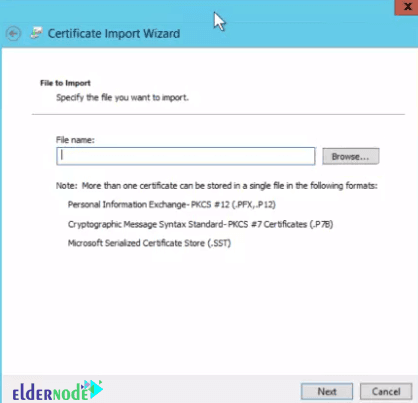
9. In the image below, click Browse and browse your SSL files.
*
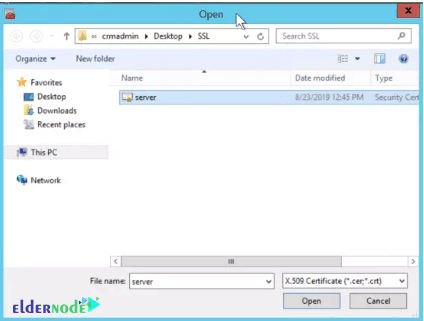
After finding the file you want, open it to see the SSL Certificate on IIS Web Server as shown below.

C) Add the Certificate to IIS
At this point you’ve got the certificate ready, now you need to hook it up inside IIS so the site actually uses it.
Press the Windows key, start typing IIS Manager, and hit Enter when it pops up.
Once IIS Manager is open, look on the left tree, expand your server name, then go to Sites and pick the site you want (most people just use Default Website). On the right-hand side, click Bindings.
👉 Quick note: if your site doesn’t show up under “Sites,” it means you haven’t created it yet you’ll need to set it up first before adding SSL.
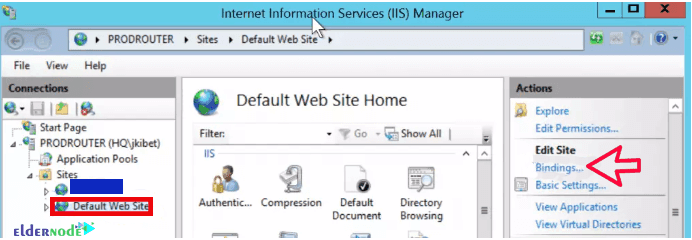
12. In the Site Bindings window, click Edit.
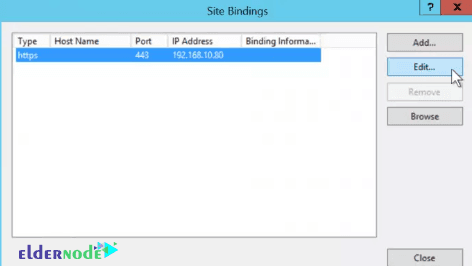
If the SSL certificate doesn’t appear in the dropdown list, double-check that you imported it under the Personal → Certificates store. If it was placed in another store (like Trusted Root or Intermediate), IIS won’t detect it.
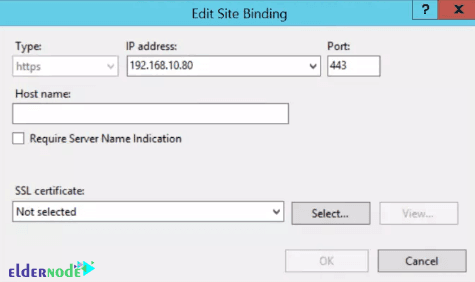
Make sure your IP and Port are correct. You can as well place a Hostname.
On the SSL Certificate area, click on the drop-down arrow and check whether the friendly name of your SSL Certificate you noted is available. After selecting it, click OK.
D) Restart IIS Server
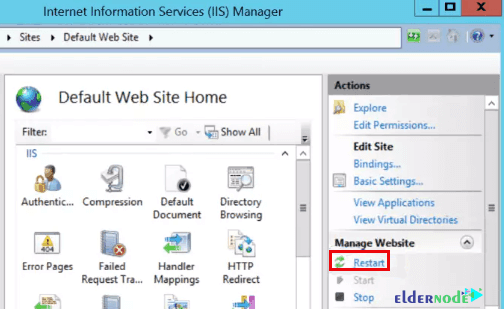
Alright, last step. For the new SSL to actually kick in, IIS needs a quick restart.
Just go back to IIS Manager, look at the right-hand side where the Actions are, and hit Restart. It only takes a second.
👉 If after restarting you don’t see the padlock in the browser, don’t panic clear the browser cache or double-check that you picked the right certificate in the bindings.
Conclusion
So yep, that’s pretty much it. After you add the SSL on IIS, your site should start loading with https and show that little lock icon in the browser. Doesn’t look like a big deal, but honestly it makes visitors feel way safer.
If you hit a snag or something doesn’t show up right, just drop a comment I’ll try to check in, and maybe someone else has already been through the same thing. And if it’s a totally different issue, the Ask page on Eldernode is probably the fastest way to get help.


