How to Scan a Website with Vega on Kali Linux (Step-by-Step)


Vega vulnerability scanner isn’t your average security tool. Think of it as a digital bloodhound, sniffing out the weak spots in your network, operating system, or website before an attacker gets the chance. Instead of poking around blindly, it compares your setup against a massive library of known vulnerabilities and flags anything that looks suspicious.
It’s one of those tools that keeps showing up in security discussions, mostly because it strikes a nice balance between raw power and straightforward usability. In this guide, I’m going to walk you through, step-by-step, how to scan a website with Vega on Kali Linux. And if you plan on running your scans on a VPS, the Linux VPS packages from Eldernode are a solid place to start.
Why Choose Vega for Website Scanning?
One of the nice things about Vega vulnerability scanner is that it doesn’t lock you into one operating system it runs just as well on Windows, Linux, or macOS. It’s open-source, free to use, and written in Java, so setting it up isn’t complicated. In real tests, Vega has been able to spot common issues like SQL Injection, XSS, and even small leaks of sensitive data that are easy to miss. It also gives you a quick look at your TLS/SSL setup, pointing out what’s strong and where you could tighten things up all from a simple, point-and-click interface.
Installing Vega on Kali Linux
Before you start, make sure your system is up to date. Open a terminal and run:
sudo apt update
sudo apt upgrade
You can install the Vega scanner by running the following command:
sudo apt install vega
Now enter the following commands to install some dependencies and tools:
sudo dpkg --configure -a
sudo apt install libwebkitgtk-1.0-0 default-jdk unzip
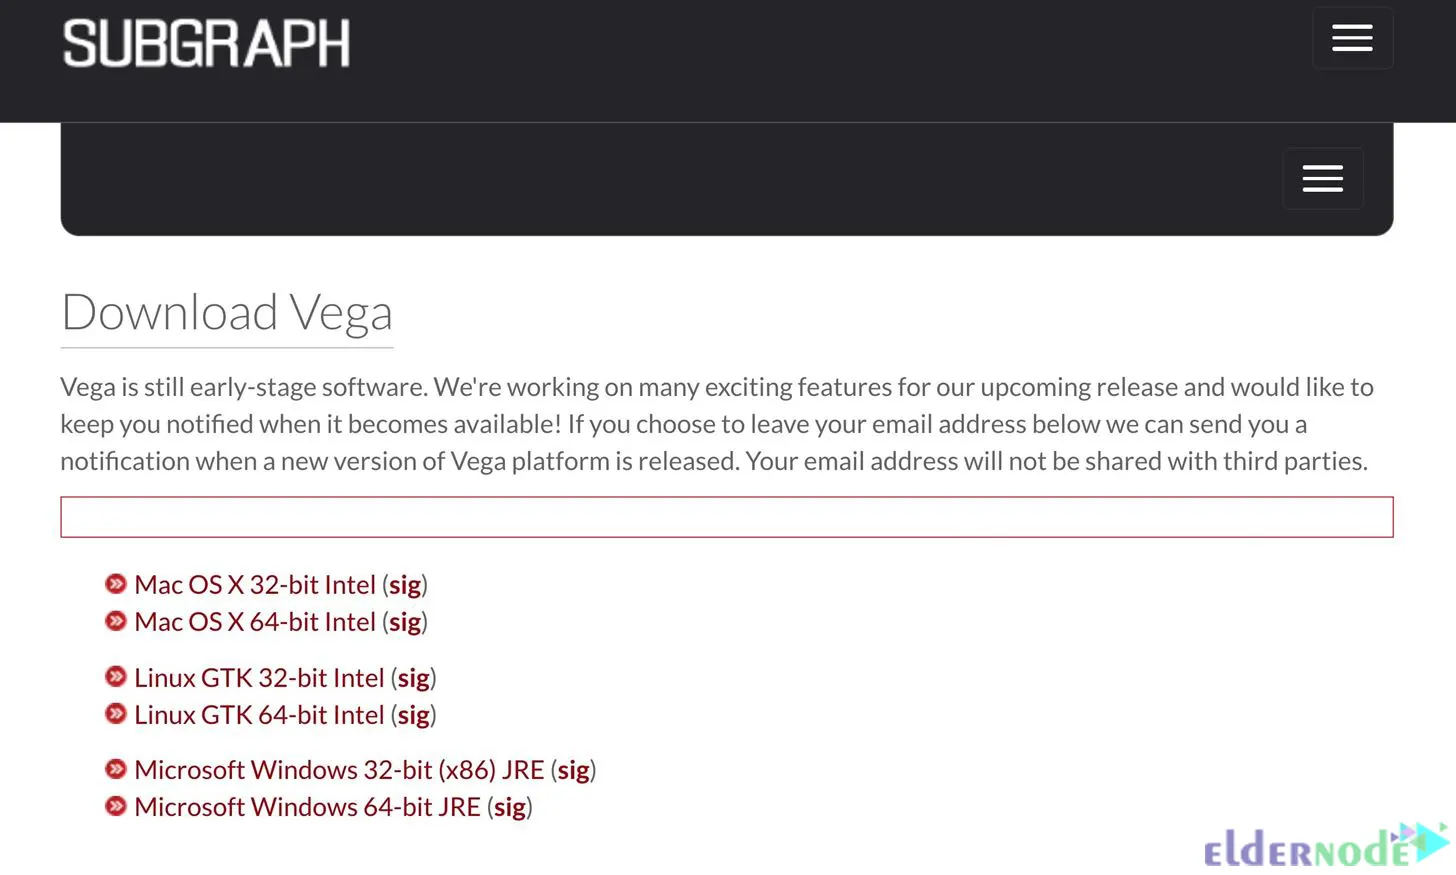
Then navigate to Subgraph’s website and download your desired Vega version:
Now install the zip file with the command below:
wget https://support.subgraph.com/downloads/VegaBuild-linux.gtk.x86_64.zip
You can unarchive the downloaded file using the following command:
unzip VegaBuild-linux.gtk.x86_64.zip
Note: Newer versions of Java will not work with Vega and you may need to change the Java version you are using. To switch to Java 8, just run the following command:
sudo update-alternatives --config java
Starting Vega on Kali Linux
Navigate to Applications >> Web Application Analysis >> Vega path. Then cd into the Vega folder and enter the ls command:
cd vega
ls
You can start Vega using the command below:
sudo ./Vega
Now you will see Vega’s start screen:

Scanning a Website with Vega on Kali Linux
All you have to do to start scanning the website is hit the Ctrl-N shortcut, click Scan in the menu bar and choose Start New Scan.
You will see the Select a Scan Target window. Enter the target URL into the Scan Target box and press Next:
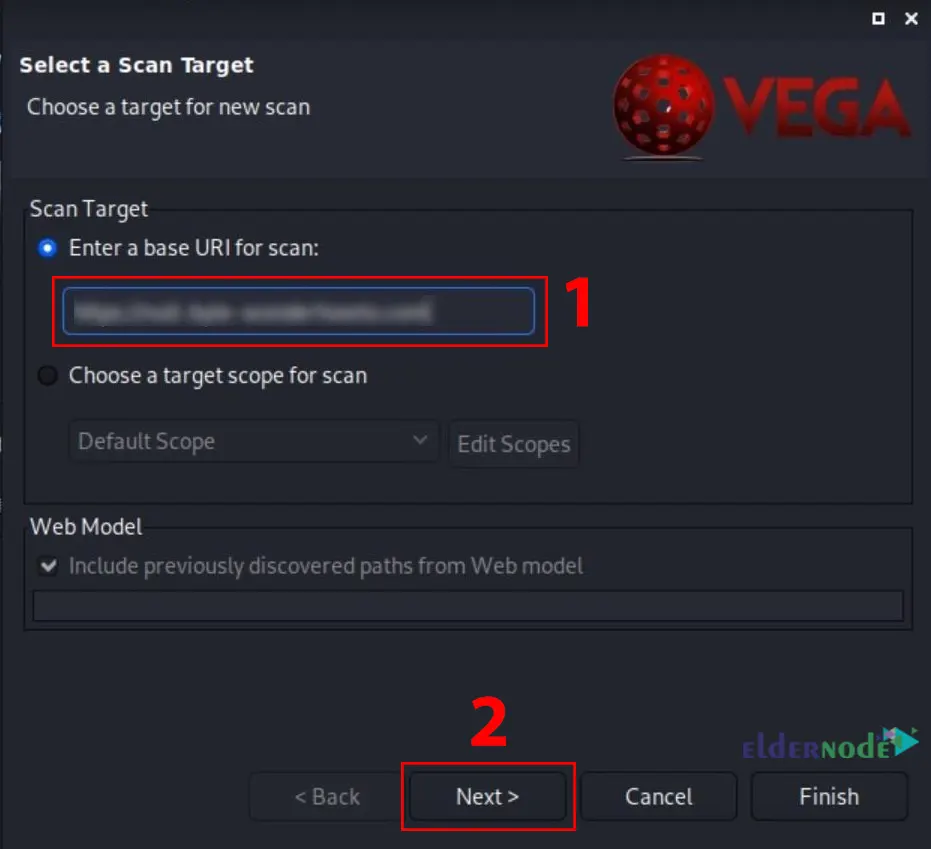
You can set authentication options or parameters by clicking Next a few times.
Click Finish to start scanning the website:

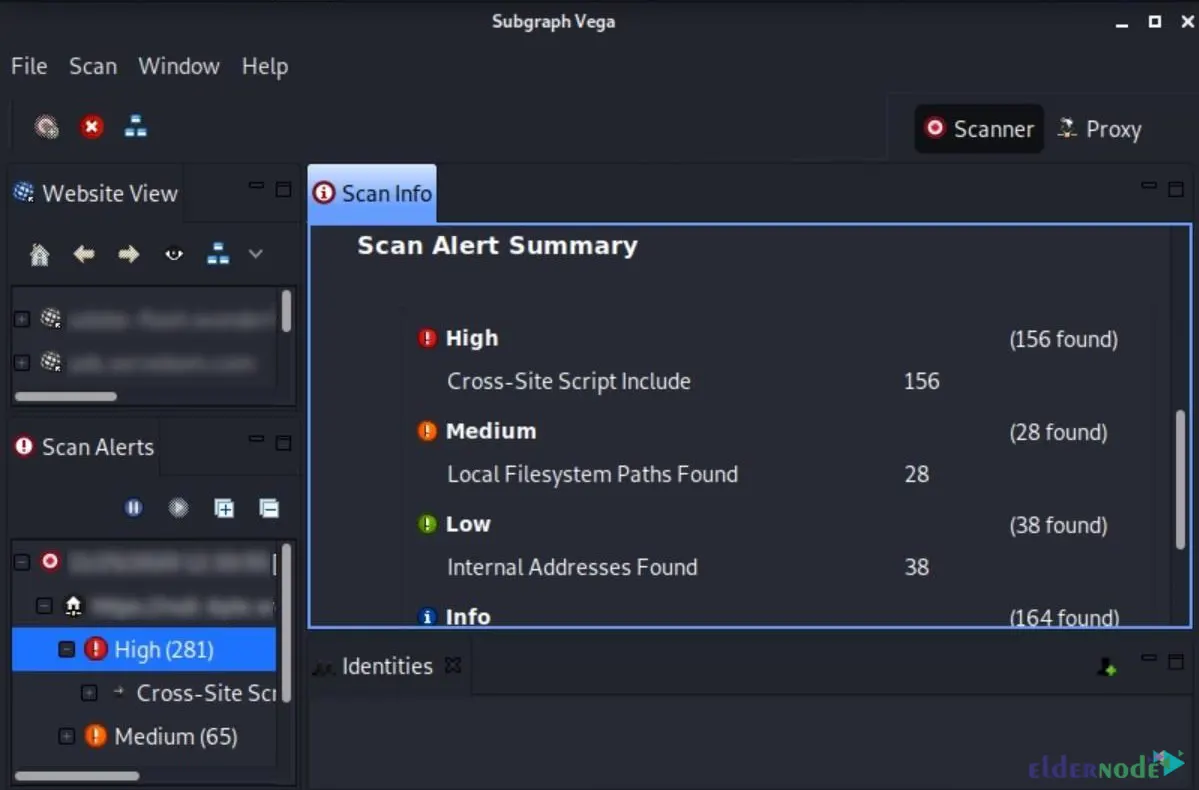
You have to wait a while for the scan to finish. The appearance of the website in the Scan Alerts tab and the release of alerts indicate that the scan has started. Once the scan is finished, you will receive a report detailing the vulnerabilities found.
Interpreting Alerts in Vega
When the scan wraps up, Vega throws a list of alerts at you basically, its way of saying “here’s what I found.” You’ll usually see the type of issue, how bad it might be, and where exactly it popped up.
Here’s the thing: Vega can be a little jumpy. It sometimes flags problems that aren’t actually there. That’s not a bug it’s just how sensitive its detection is. Think of the results as a checklist to investigate, not a final judgment.
What I usually do:
Open each alert and poke around to see if it’s real.
If something feels off, I’ll double-check with another scanner like OWASP ZAP or Nikto.
Anything confirmed goes into my notes along with how I proved it’s legit.
Even if an alert turns out to be harmless, it’s still a good excuse to review that part of your site. Sometimes “false” alerts lead you to tighten things you didn’t know were loose.
When Vega shows an alert, it’s not just a label it tells you what’s going on, why it matters, and gives you ideas on how to fix it. Click on any alert and you’ll get a breakdown of the vulnerability, sometimes with examples that make it easier to understand what’s actually happening.
I’ve found that it’s worth skimming through every detail. More than once, I’ve spotted something in Vega’s description that hinted at a bigger issue like a misconfigured header or an outdated library that I wouldn’t have caught otherwise.
Once the scan’s done, the next move is yours: fix what you can, run the scan again, and see how much cleaner your report looks the second time around.
Conclusion
If you’ve never given Vega vulnerability scanner a try, it’s worth running it at least once on a site you actually manage you might be surprised by what it digs up. The best part is, Vega doesn’t just throw a wall of cryptic data at you; it highlights the problems in plain language and gives you a nudge in the right direction to fix them.
In this guide, we went from installing Vega on Kali Linux all the way to scanning a live site and looking over the results together. If you do decide to run it yourself, I’d love to hear what it finds for you drop a note or question in the comments and let’s see how your results compare.