How to Install OpenVAS on CentOS 7 [Step-by-Step Guide]
![[Step-by-Step Guide]](https://eldernode.com/wp-content/uploads/2021/02/Install-OpenVAS-on-CentOS-7-Linux.webp)


If you’re looking to install OpenVAS on CentOS 7, you might be surprised at how simple it really is. OpenVAS is a free vulnerability scanner that spun off from the old Nessus project back in 2005, when Nessus stopped being open source. Greenbone picked it up, first calling it GNessUs, and later shaping it into what we now know as OpenVAS.
With OpenVAS you can scan your entire network for security holes without needing an expensive commercial license. And the best part? Getting OpenVAS to run on CentOS 7 isn’t complicated just a handful of Linux commands and you’re good to go.
10 Steps to Install and Configure OpenVAS on CentOS 7
Step 1 – Connect to Your CentOS 7 Server
Start by connecting to your CentOS 7 server through the terminal. Make sure you’re logged in as root or using a user with sudo rights to prepare the environment for this installation.
Step 2 – Add the OpenVAS Repository
Next, pull down the OpenVAS repository with this command:
wget -q -O - http://www.atomicorp.com/installers/atomic | sh
After it runs, you’ll be shown the license agreement just review it and continue. Make sure to carry out every part of the installation carefully.
Step 3 – Install OpenVAS Packages
Go ahead and execute the command line to install OpenVAS:
yum -y install openvas
That command will grab all the packages you need. Let it run, it usually takes a minute or two to fully install OpenVAS on CentOS 7.
Step 4 – Run the Initial Setup
After the installation wraps up, go ahead and launch the setup using:
openvas-setup
Here you’ll create the login username and password for the web interface. At the end you should see something like the setup completed for the installation process.
Setup complete, you can now access GSAD at:
https://<IP>:939
Step 5 – Disable Firewall Temporarily
To keep the install from tripping over your firewall, just turn it off for now during this OpenVAS setup.
If you’re using iptables:
systemctl stop iptables.service
If you’re on firewalld:
systemctl stop firewalld
Don’t worry, you can turn it back on later once OpenVAS is up and running on CentOS.
Step 6 – Generate SSL Certificate for OpenVAS
With the firewall turned off, the next thing you’ll do is set up a certificate for the OpenVAS web interface. Just run:
openvas-mkcert-client -n om -i
It doesn’t ask you for anything here, so just let it run until it’s done.
Step 7 – Rebuild the OpenVAS Database
When that’s finished, rebuild the OpenVAS database so everything is fresh:
openvasmd --rebuild
This step can take a little while, so don’t worry if it sits there for a bit. It is vital for building a fresh OpenVAS environment.
Step 8 – Start the OpenVAS Service
When the recovery finishes, go ahead and start the OpenVAS service with:
openvasmd
Don’t be surprised if it feels a little slow the first time that’s normal.
Step 9 – Access the Web Interface
After it’s up, just open your browser and head to your server’s IP on port 9392.
Let’s say your server’s IP is 192.168.1.10. To reach it, put this into your browser’s address bar:
https://192.168.1.10:9392
If everything went right, you’ll see the OpenVAS login screen waiting for you.

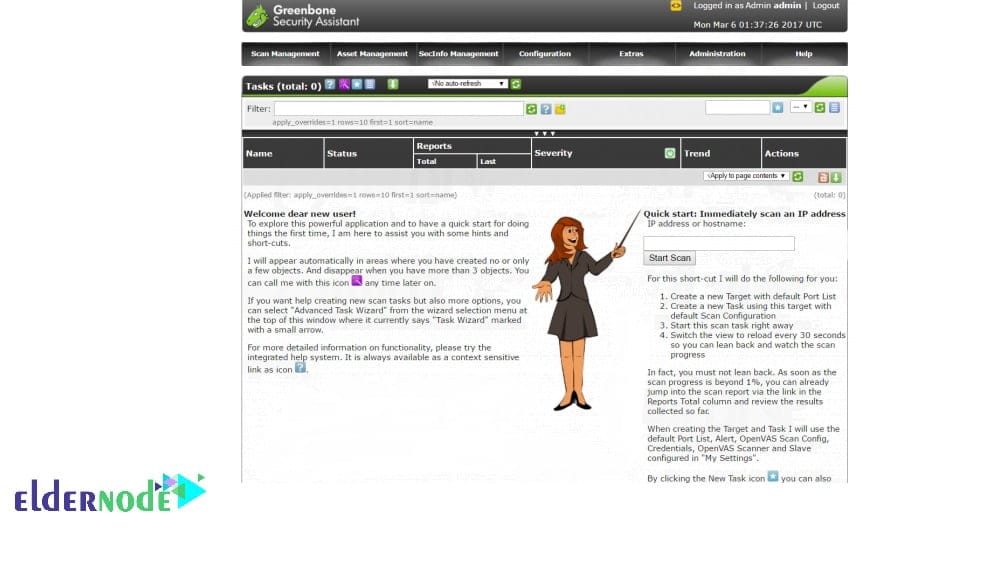
Step 10 – Log in and Explore the Dashboard
Once you’re in, the main dashboard loads. From here you can run your first scan, browse the reports, and see how the system feels in action.
Conclusion
That’s it OpenVAS is up and running on your CentOS VPS server.
The steps you followed got everything in place without too much hassle.
Not everything works perfectly on the first try, so don’t stress you’re not alone. Head over to our Ask page and you’ll probably find others who’ve hit the same snag (and the fix).
And if you want to keep learning, check out our other Linux and security tutorials. We’ve got plenty of guides to help you get the most out of your CentOS setup and keep things running smoothly.