How to Install Zenmap on Ubuntu 22.04 [Step-by-Step Guide]
![How to Install Zenmap on Ubuntu 22.04 [Step-by-Step Guide]](https://eldernode.com/wp-content/uploads/2021/02/How-to-Install-Zenmap-on-Ubuntu-22.04.webp)


Install Zenmap on Ubuntu 22.04 might sound like a small task, but if you’re into network scanning or just curious about what’s happening on your local network it’s a good tool to have.
Zenmap is basically Nmap with a face. Instead of typing long terminal commands, you get buttons, drop-downs, and a clean GUI. That’s great if you’re new to Nmap or just don’t feel like memorizing flags.
In this post, I’ll show you exactly how to get Zenmap running on Ubuntu 22.04. And yeah, if you’re running this on a remote machine, a decent Ubuntu VPS from Eldernode won’t hurt either.
Zenmap Setup Tutorial on Ubuntu 22.04
Meet Zenmap – Nmap Powerful and User-Friendly GUI
Zenmap is a free, open-source, and multi-platform application that is the official Nmap Security Scanner GUI and is designed to be used with Nmap. It supports Windows, Linux, Ubuntu, Fedora, Kali, Mint, MacOS, BSD, CentOS and etc. Zenmap makes Nmap easier for beginners and offers advanced features for experienced Nmap users. Also, it can be used by beginners to scan the network and discover vulnerabilities. Zenmap scans the network of a particular IP address or domain and displays the domain details.
Zenmap Features
1) Scan multi ports
2) Scan basic Nmap IP or host
3) Scan TCP or UDP ports
4) Scan for MAC address spoofing
5) Scan IPv6 Addresses
6) Detect malware infections on remote hosts
7) Detect service/daemon versions
8) Launch DOS
9) Launch brute force attacks
10) Disable DNS name resolution
11) Find the open port
12) Check the number of packets send or receive
Difference between Zenmap and Nmap
Zenmap has advanced features that make Nmap easy for novice developers. Zenmap is also using to display Nmap output, which can show the difference between two scans where these scans run more than once. It means Zenmap provides an interface for comparing scan results and can detect the changes even when the same scan is run on different days.
Nmap is a network scanner and is known for port mapping used to identify hosts and services. Nmap scans the computer network and provides a network for hosting exploration and services. It can detect the hosts and services of the network which is used for scanning. It should be noted that Nmap is written in C, C++, Python, and Lua but Zenmap is the GUI of Nmap and it is not possible to say in which programming language it is written.
In the continuation of this article, join us to show you how to install Zenmap on Ubuntu 22.04.
Installing Zenmap on Ubuntu 22.04
Zenmap isn’t available on the official Ubuntu repository and you have to install it manually. Before doing anything, update your system packages by entering the following command:
sudo apt update
Now you should install Nmap using the following command:
sudo apt install nmap
In this step, you need to install Python GTK on your Ubuntu 22.04 system by running the following command. Zenmap is built with Python GTK, which handles the graphical part of the app let’s get that installed before moving on.
wget http://archive.ubuntu.com/ubuntu/pool/universe/p/pygtk/python-gtk2_2.24.0-5.1ubuntu2_amd64.deb
sudo apt install ./python-gtk2_2.24.0-5.1ubuntu2_amd64.deb
Since Zenmap isn’t available in the Ubuntu repositories anymore, you’ll have to download the .deb package manually. To do this, run the following command:
wget http://archive.ubuntu.com/ubuntu/pool/universe/n/nmap/zenmap_7.60-1ubuntu5_all.deb
Also, you can download it by visiting the following address:
http://archive.ubuntu.com/ubuntu/pool/universe/n/nmap/
To install Zenmap just enter the following command:
sudo apt install ./zenmap_7.60-1ubuntu5_all.deb
How to Use Zenmap on Ubuntu 22.04
If you want to access Zenmap features and use it on your Ubuntu 22.04 system, you should run Zenmap as a root user. To do this, use the following command:
sudo zenmap
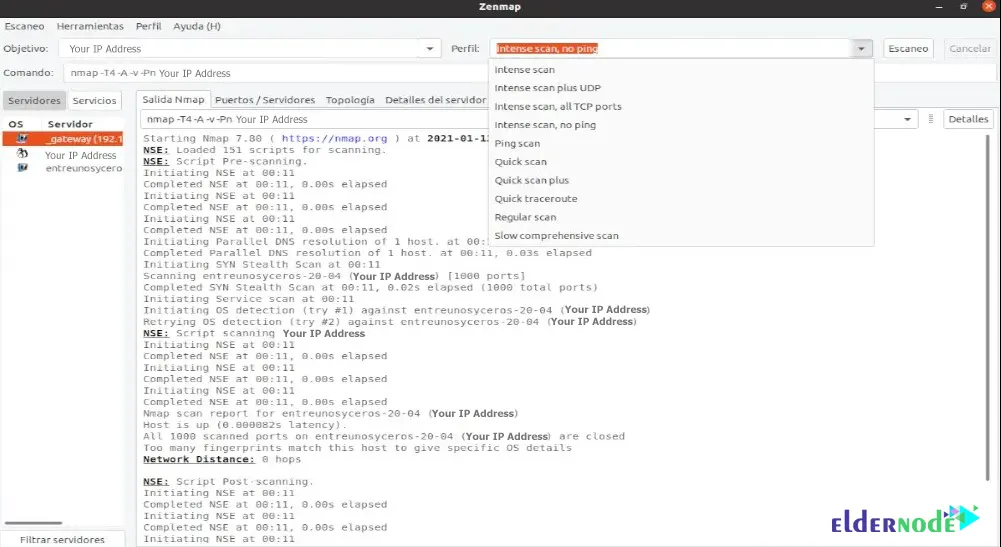
You can scan the network by typing the IP address or hostname.
In order for users to confirm the availability of the computer, they have to choose from the drop-down box from a variety of analyzes such as full scan, simple scan, or ping scan. You can see the separate steps in Nmap in the Nmap output window on the right:
Conclusion
So there you have it Zenmap up and running on Ubuntu 22.04.
Whether you’re scanning a local network out of curiosity or running security audits on a remote VPS, Zenmap makes things way easier with its visual approach.
We walked through what Zenmap actually is, how it compares to regular Nmap, and how to install it step by step even with the GTK quirks.
Hopefully, this guide helped you get started without the guesswork. If it did, feel free to bookmark it or share it with someone getting into network tools. Happy scanning!